-1.png?width=150&height=31&name=logotipo_centro_de_ayuda%20(1)-1.png)
Available for these licences:
 Access Starter, Pro, Enterprise *
Event App Starter, Pro, Enterprise *
Virtual Venue Starter, Pro, Enterprise *
Suite Starter, Pro, Enterprise *
* Within the registration form settings, there are settings included in Starter, Pro or Enterprise licenses
Meetmaps allows creating a customizable registration form that you can use for event attendees to register and thus configure the database of attendees of the event. Here's how to set it up.
NOTE 🗒️: If your event has ticket sales, remember to activate ticket sales +info👉What is the Tickets section?
IMPORTANT❗Remember that you can also have the registration form within the Landing or linked to it.
+ info 👉 How do you configure a landing page?
Configuration
1. Go to Registration > Registration Form > Form
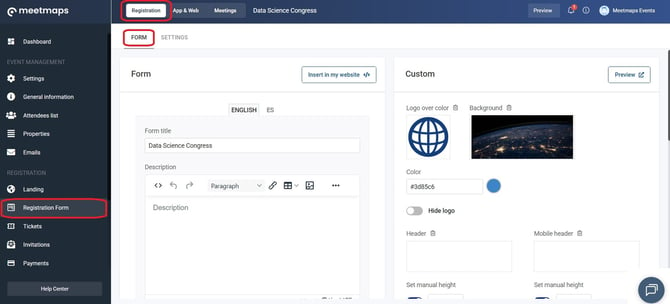
- Title of the form
- Add a description of the form
- Design: You can customize the background image, add a specific logo and header, and adjust its height in both the PC and mobile versions. + info 👉 Branding of the Registration Form
NOTE 🗒️: You can insert the registration form on your website.
In this case you will only have to define the color of your form.
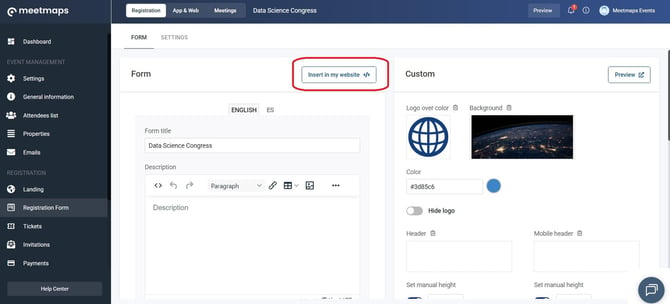
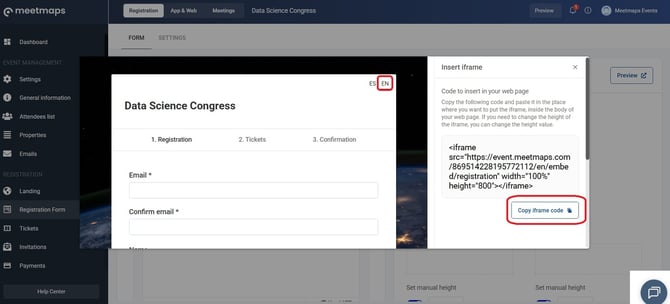
2. To configure the fields (properties), scroll to “Form fields”. Here you can edit, rearrange, delete or add new fields.
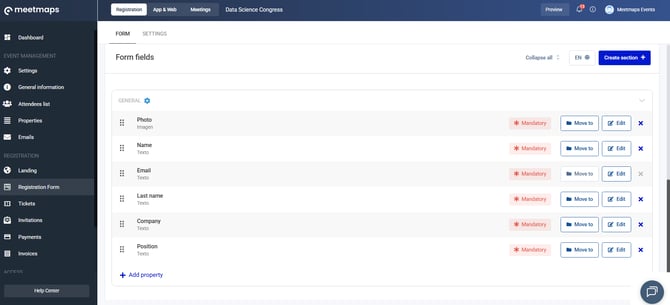
NOTE📃: It is absolutely necessary that the email field is always visible in the form, as it is essential to be able to identify the attendee on our platform. In fact, it is the only field that cannot be deleted.
Configuration of the Form Fields (properties)
1. Click on “+Add Property” to create a field, a new pop-up window will open with two options:
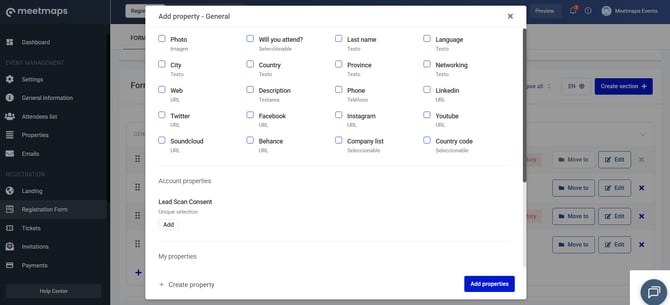
Option A: Add predefined properties.
Option B: Create new property. When creating the property, you must choose the type:
- Text: the attendee will have to respond with a text. For example: Name.
- Long description:it is a field where the attendee will have the opportunity to write a long text. For example: Answer to a question.
- Single selection: the attendee will get a drop-down menu with a series of options from which he can only choose one. For example: Are you going to dinner? Options: YES / NO.
- Multiple selection: you offer different options and the attendee can choose more than one. For example: Select availability hours.
- Checkbox: If you are interested in setting up a field with a checkbox. For example: I am interested in receiving…
- Date: Whether attendees have to enter a date. For example: Date of birth.
- File: The attendee will need to upload a file. Acceptable formats are pdf, jpg and png. For example: Summary, Document or CV.
👉 You can decide if you want the fields to be required or optional.
2. Once you've created this property, it will appear along with the rest in the "Form Fields" section.
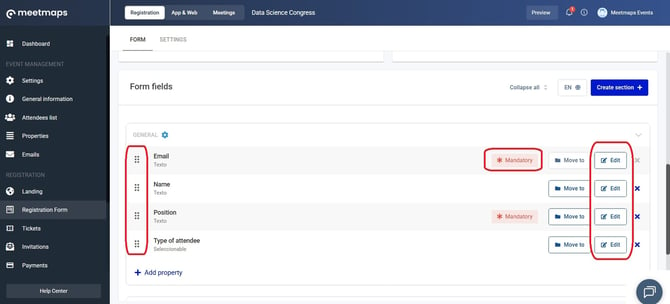
- Field Order: From the "Form Fields" section, click on the small squares on the left and arrange them as you see fit.
- Editing the fields:If you click on the edit option, you will be able to modify the properties of the field that has already been created as you deem appropriate, as well as make it mandatory or not.
Section management
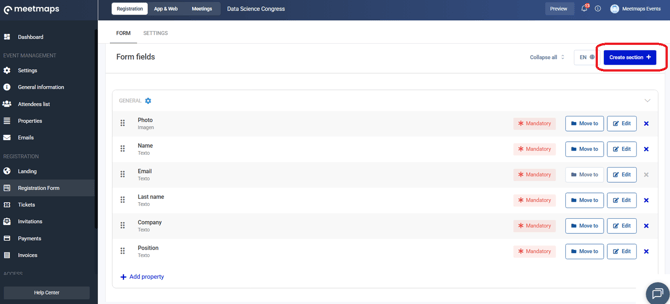
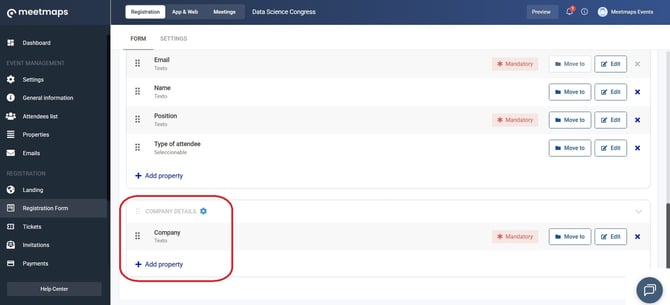
1. Click “Create section +” to create a new section: you can make the section title visible or not, as well as add explanatory text. You can also activate the Group inside another form section. This enable this to convert each form section into an independent registration step (page-by-page).
NOTE 🗒️: If you want to know how to create conditional fields in your form 👉 What are conditional fields and how are they used in a registration form
NOTE 🗒️: As you edit, keep a second window open with a preview of the registration form. This way, as you make changes and hit the refresh button (F5 in the keyboard) you can see what it will look like.
Settings section
In this section you can activate:
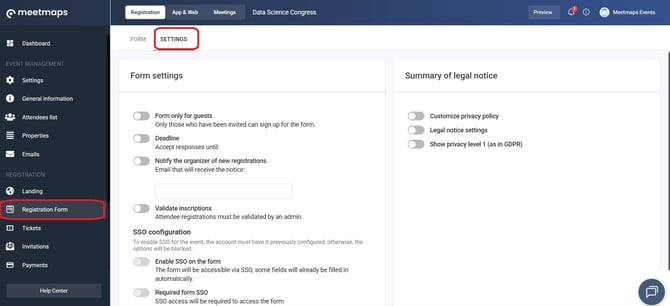
1. Form only for guests: Activate this if only those who have been invited can sign up for the form. +info 👉 What status can an attendee have?
2. Deadline: Put a deadline, date and time, and even a message.
3. Notify the organizer of new registrations: enter an email to notify them of each new registration.
4. Validate registrations: +info 👉What is the inscription validation?
5. SSO Configuration: Since each SSO system has its own specific requirements for integrating this function, you must contact the Meetmaps team. *Available for Enterprise licenses and depending on the SSO type
NOTE 🗒️: Single Sign-On (SSO) is an authentication system that allows an attendee to access multiple applications or services by logging in only once with a single set of credentials. This allows you to enable attendees to access the Meetmaps event quickly and securely using your company's SSO. With just one click and their usual corporate credentials, they'll be in without needing to create new passwords.
6. Convert sections into steps: This feature allows you to divide the form into parts using each created section. Interested in enabling it? Contact us!
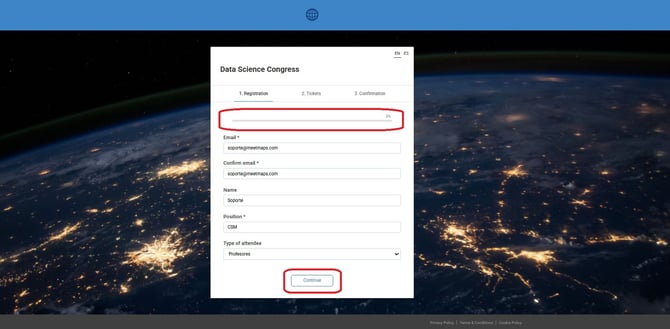
NOTE 🗒️: There are 3 automatic emails linked to the registration form:
- By registering through the form.
- When validating an attendee (only if there is attendee validation on your form)
- When rejecting an attendee (only if there is attendee validation on your form)
IMPORTANT❗In case you want to limit the number of registrations, contact Meetmaps with:
- maximum number of registrations
- message of maximum 250 characters in each language of your registration form that will appear when the limit has been reached
Summary of legal notice
NOTE🗒️: The privacy policy must be provided via a URL. Make sure it has public access permissions so that anyone can view it.
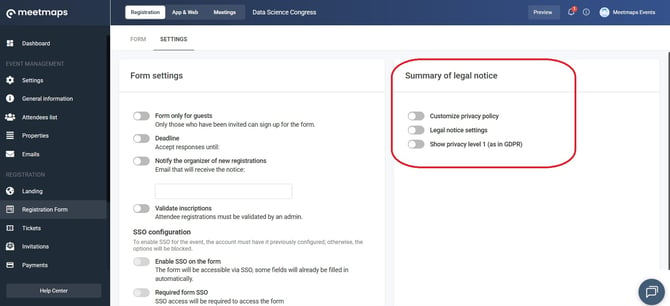
+info 👉What options are available to customize the legal notices and privacy policy?
NOTE 🗒️: you may be interested in these other articles:
👉 How to set up the landing page?