Available for these licenses:
![]() Access Enterprise
Access Enterprise
![]() Suite Enterprise
Suite Enterprise
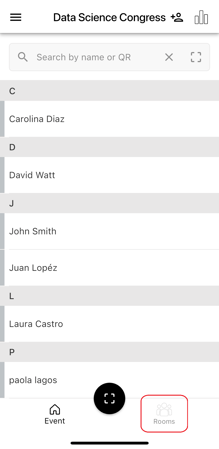
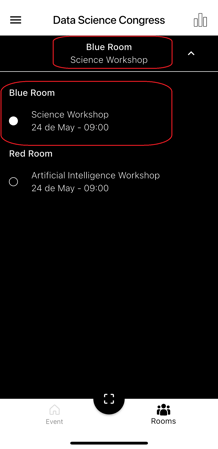
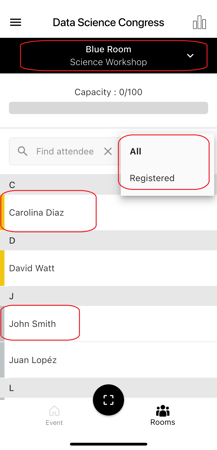
The Check-in Meetmaps App not only manages overall event access and capacity but also tracks access and capacity for individual rooms, providing specific metrics and real-time lists of attendees who enter each room.
Configuration
⚠️ Keep in mind that the Enable room check-in switch must be turned on.

Step-by Step

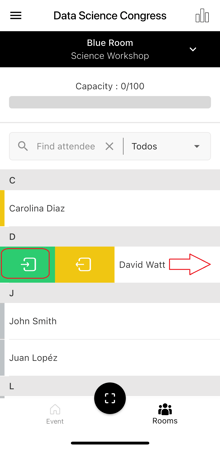
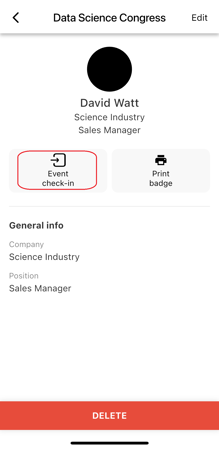
IMPORTANT❗ If instead of swiping right, you click on the attendee, this other screen will appear, and you would be doing the general check-in to the event NOT into the room.
NOTE 🗒️: To register an attendee who wasn't registered for the room but is in the attendee list, swipe their row to the left and click the blue 👤+ icon. Their status will change from gray to yellow.


To register an attendee who wasn't registered for the room or the attendee list, first add them manually by clicking in the upper 👤+ icon in the general list section. Then follow the steps above to register them in the room.


IMPORTANT ❗If the agenda session has an itinerary, to do the registration process mentioned above, activate the "Ignore itinerary for check-in to the session" in the 3. Session configuration tab.


IMPORTANT ❗
What happens if you have room check-in and assign rooms to workshop-type agenda sessions, with a limit on registered attendees?
Let's give an example so that it is better understood.
- We created a workshop session of 30 attendees maximum: "AI manipulation workshop".
+ info 👉 What are Workshop agenda sessions?
- We created Room A with a capacity of 20 attendees.
- I assign the agenda session "AI manipulation workshop" to Room A.
In this case:
- 30 attendees can register for the "AI Manipulation Workshop".
- When checking in Room A, only the first 20 attendees or with a capacity of 20 (if there is check-out) will be able to enter. The check-in App will give an error since the maximum capacity of Room A is 20.
EXPORTS 🔢 : You can export the Presented list and the History of Access to the Event for each session with: reader, date, time, whether it is In or Out, Room, session, name, and email of the attendee.
