-1.png?height=120&name=BLAU__EMBLEMA%20PRINCIPAL%20SENSE%20ESLOGAN%20(1)-1.png)
Find out how to create rooms and assign sessions to them in the event agenda
1. Go to the Virtual Event Panel or App, and access the Agenda section. Once there, in the Rooms tab 📌, click on the "Create room" button.
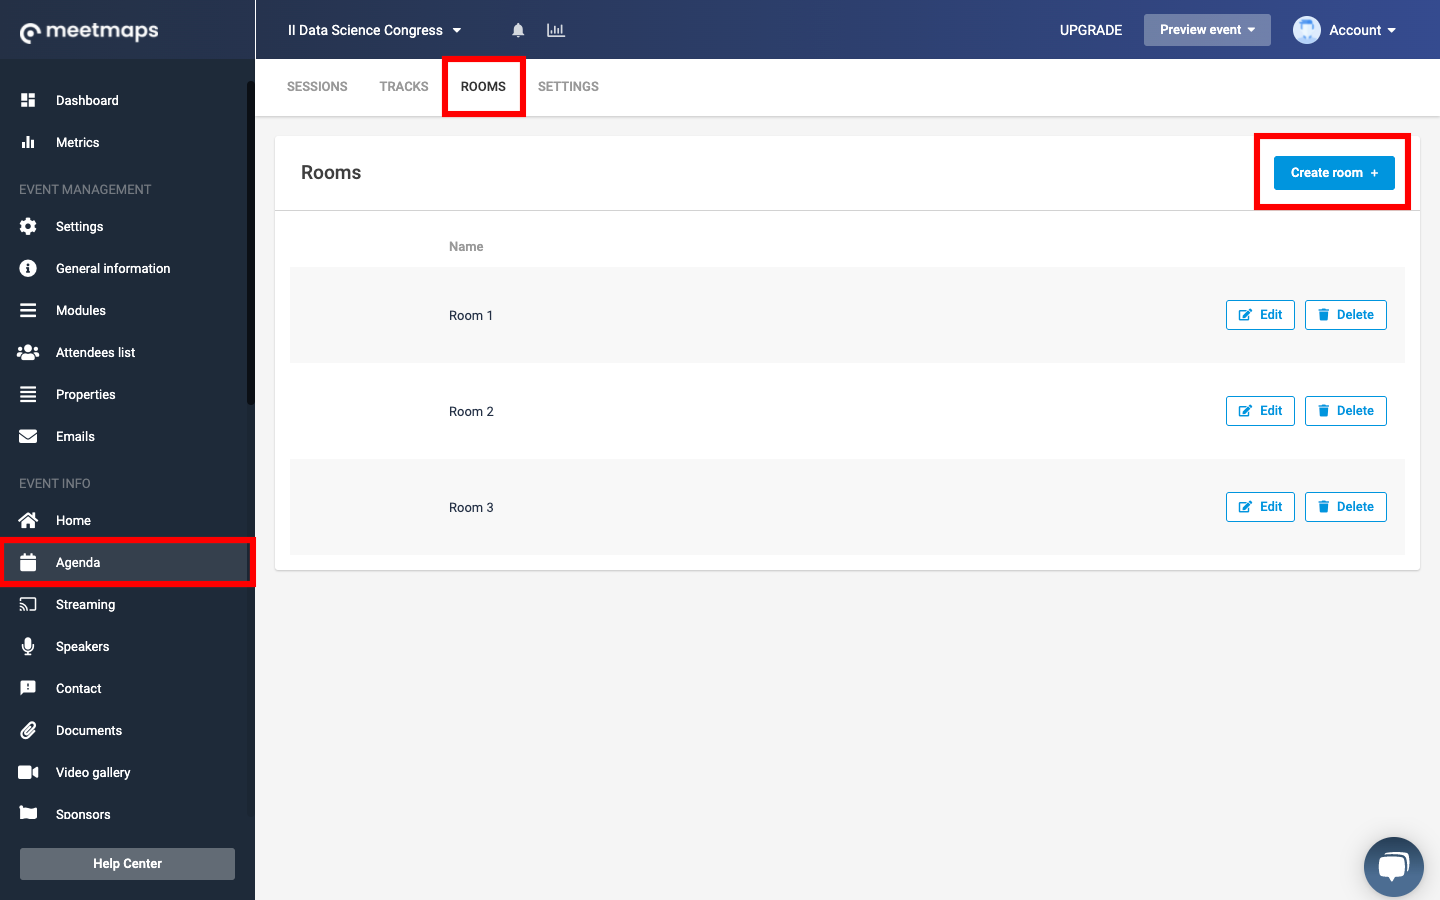
Do you want to know what is the agenda by rooms? Click here.
2. When you do so, a tab will open 👀 where you can assign a name to the Room, an image (optional field), a video (optional field) and determine the capacity of the room, i.e. the number of people that could access the room (if no specific number is indicated the capacity is unlimited).
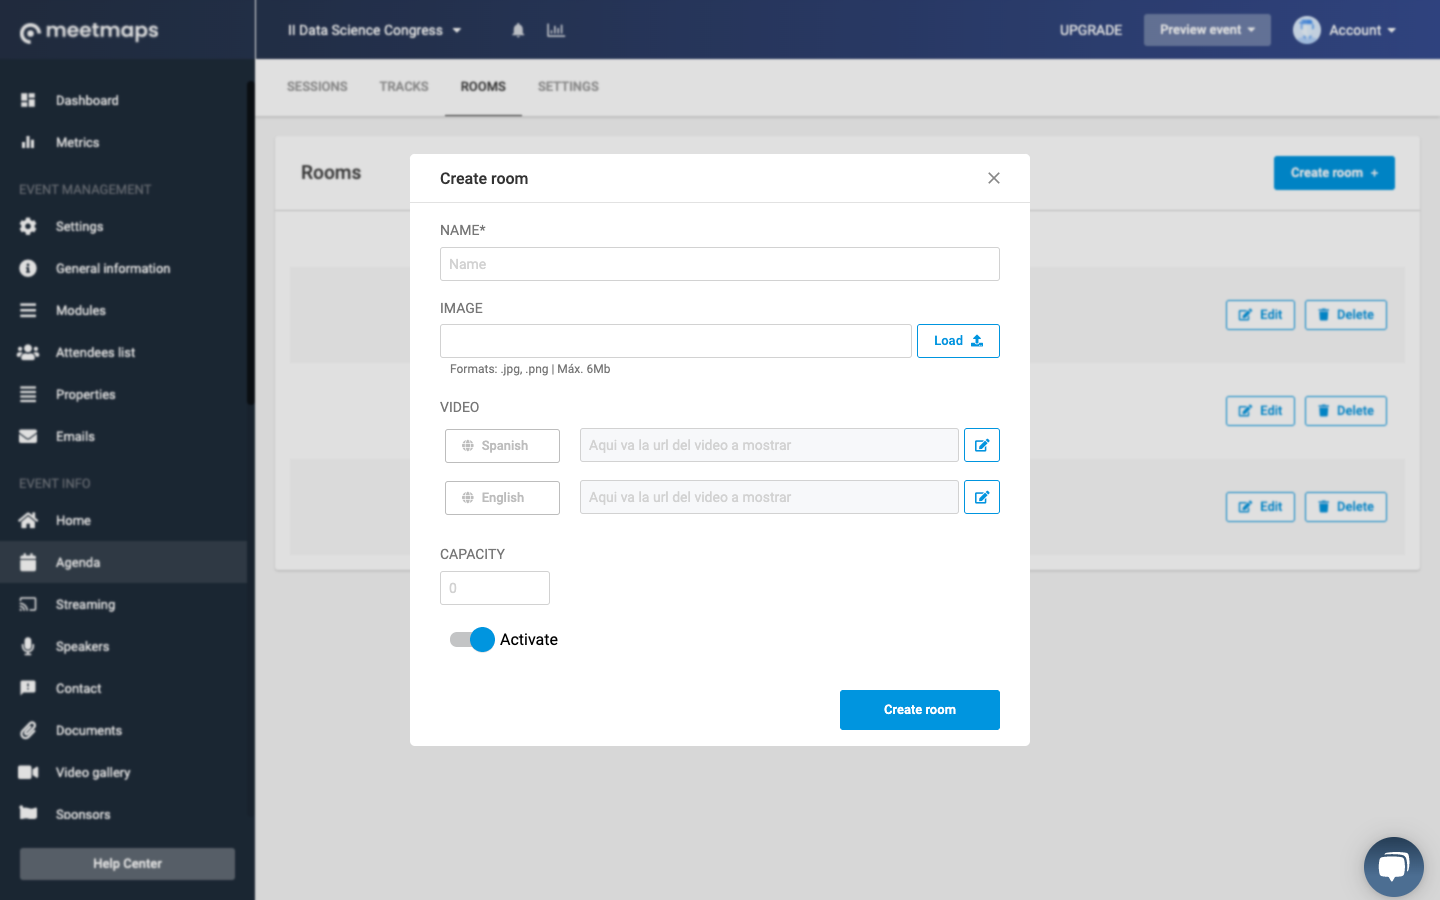
TIP 💡: setting up a video to the room is optional; however, we recommend it because if you have forgotten to activate the live in the session or if the transmission fails, the attendees will see the video you have set up in each of the rooms by default. It is also useful for pause intervals between sessions.
REMEMBER 📢: You must insert the video link in all the languages of the event. If you do not have it in every field, the attendees of the empty fields will not see the video content.
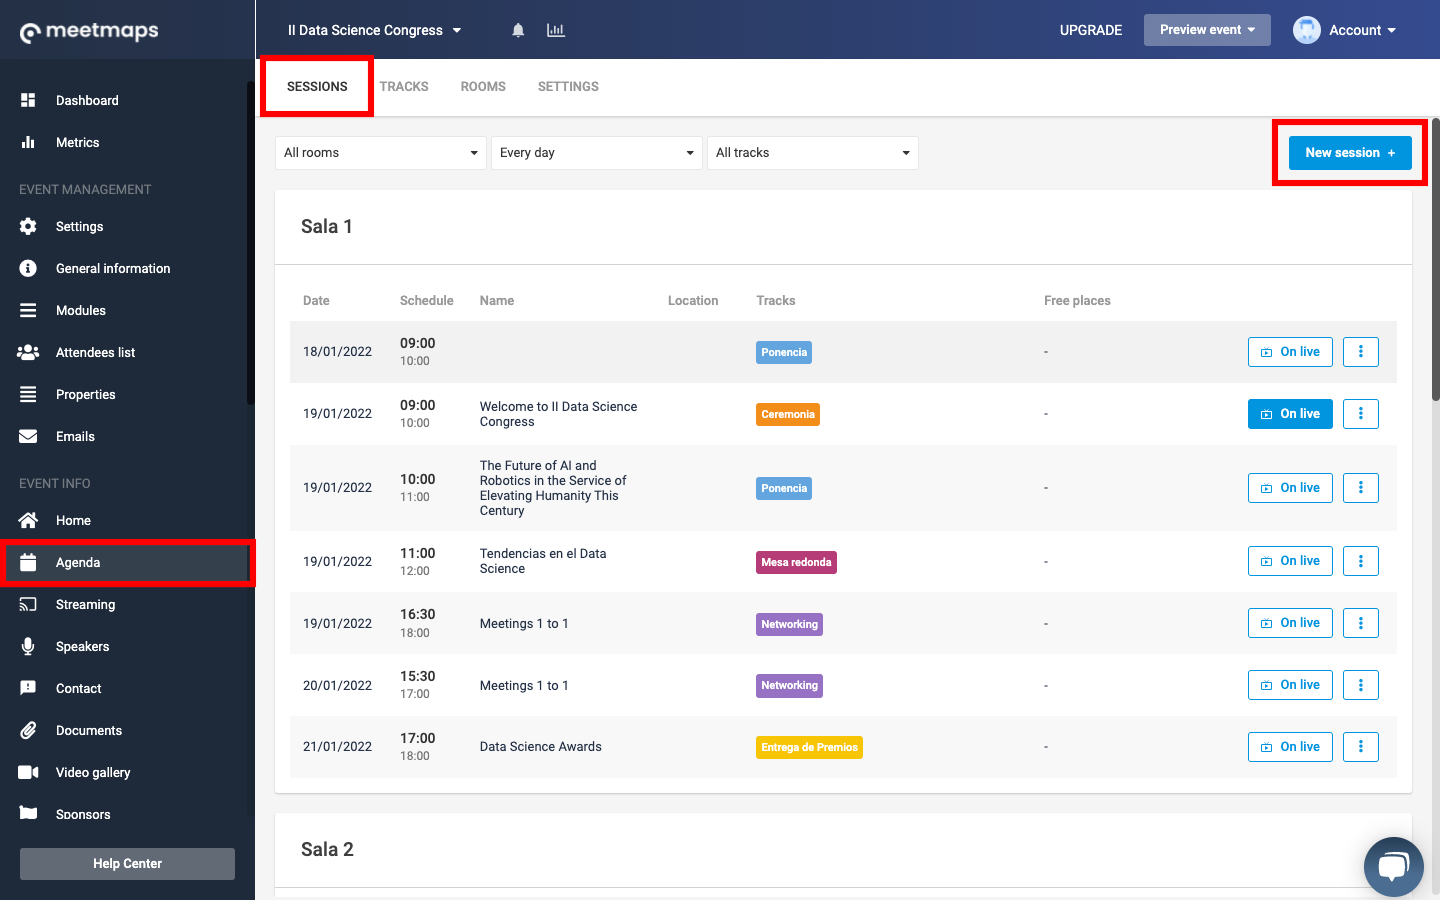
3. Once you have created the different rooms, you have to configure the different sessions of the agenda in the Sessions tab of the same Agenda section, by clicking on the "New session" button:
4. Within each session of the agenda, you must link the session to the Room to which it belongs.
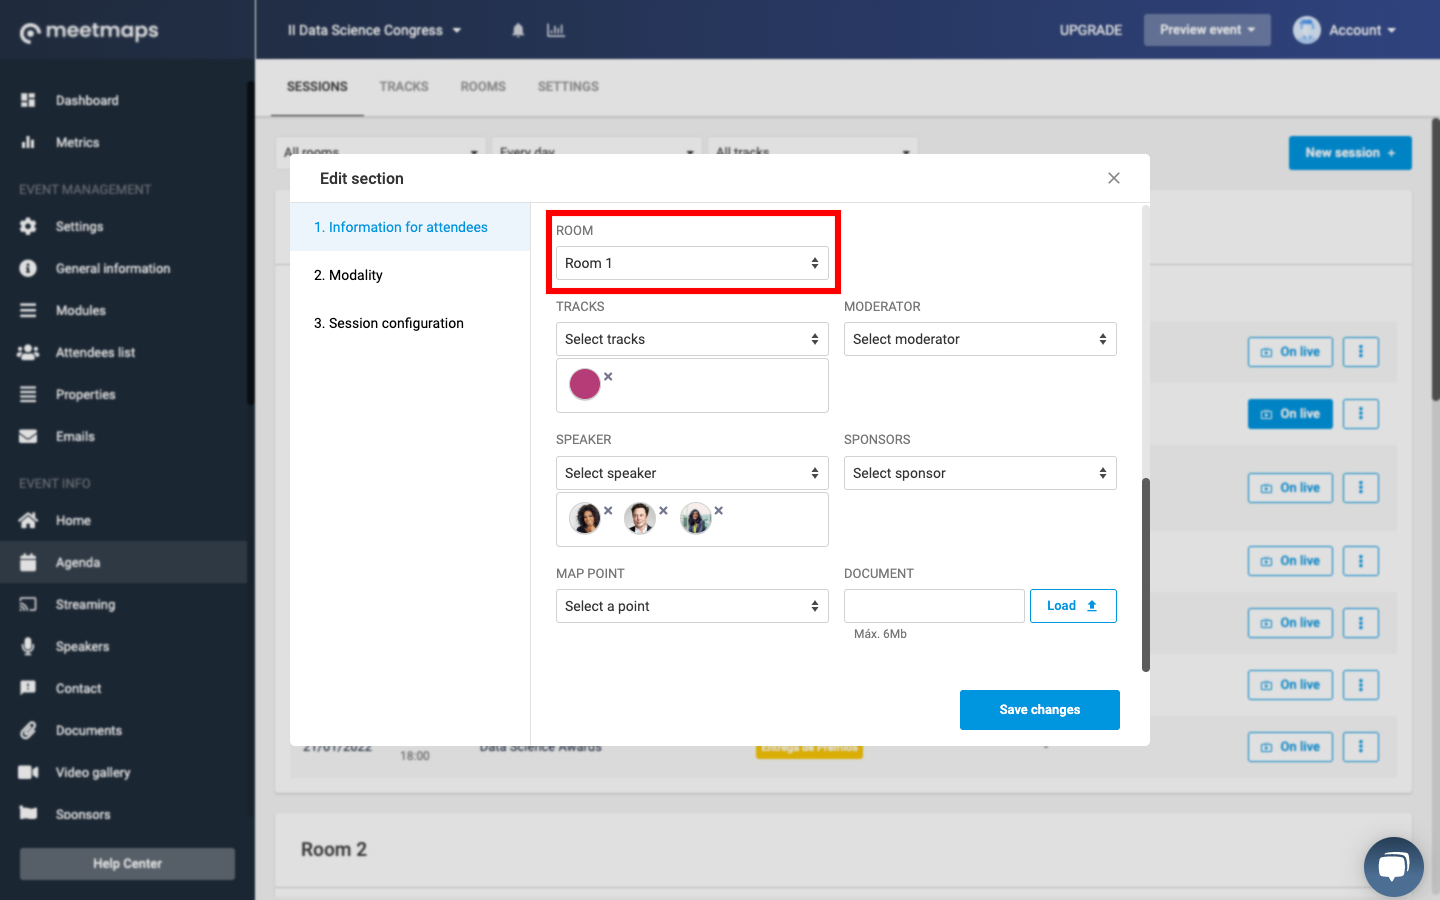
NOTE 📃: if you already have sessions created, simply click on the "3 dots" button and choose the "Edit" option. This will open the window to link the room to the session.

Now you have the rooms 📌 for your virtual event!
Do you want to know how the LIVE streaming works in the agenda by rooms? Click here.