Available for these licences:
![]() Access Pro, Enterprise *
Access Pro, Enterprise *
![]() Event App Pro, Enterprise *
Event App Pro, Enterprise *
![]() Virtual Venue Pro, Enterprise *
Virtual Venue Pro, Enterprise *
![]() Suite Pro, Enterprise *
Suite Pro, Enterprise *
* Basic Exhibitors: Pro licenses
Premium Exhibitors: Enterprise licenses
The Exhibitors module compiles a list of exhibitors present at the fair, conference, or event. It displays the stand numbers, provides contact information for the exhibiting company's representatives, and showcases basic information such as the logo, name, description, etc.
In this module there are 4 sections:
Exhibitors
In App & Web > Exhibitors > Exhibitors tab, you can create as many exhibitors as is needed for the event.
There are two types of exhibitors depending on the Meetmaps plan you have chosen:
1. For the creation of an exhibitor, click on the "New exhibitor+" button.
 2. In the pop-up window input all the basic information of the exhibitor.

IMPORTANT❗Exhibitors' logos should be squared and in either .png or .jpg format. Make sure to provide ample margins to prevent any cutoff on various screens where they will be displayed, including App & Web, and Landing.
NOTE 🗒️: There is the possibility to link the agenda sessions to exhibitors +info 👉How to link sessions from the agenda to exhibitors?
In this section it is also possible to activate the public catalog by clicking in the "Public Catalog↗️" button.


How to do a massive import of the exhibitors
If your event has several exhibitors, you can save up a lot of time by doing a massive import of the basic content of the exhibitors and their stands and this way avoid creating them manually one by one.

IMPORTANT❗In case there are premium stands, there is the advantage that the exhibitors will be created, however you must access their exhibitor profiles one by one and finish activating the rest of the functions and filling out their information.
1. In App & Web > Exhibitors click on the "Actions" button and select the option of "import exhibitors".
2. Download the template shown in the pop-up and open this on Excel or Google Sheets.
3. Add the information needed about the exhibitors by copying and pasting the data from your original database.
4. Download the finished document in csv. format ( .csv UTF-8 format for Excel)
5. Upload the file that was just downloaded.
NOTE 🗒️: When filling out the template, keep in mind:
Category: If you have categories for your exhibitors, you'll need to enter the category ID instead of the category name. In the Categories tab of the Exhibitors section, you'll see the ID you should use in the import template next to the category you created.
Social Media: You'll need to enter the full URL of each social media profile. For example: https://www.instagram.com/meetmaps/?hl=es
Logo: You can't attach a logo via Excel. To do this, the logo must be uploaded online, and therefore have a URL associated with it. If you don't have the logo posted online, you can use our internal image repository to generate the URL. If you want to know how, click here.
Video: Always remember to include the video's embed URL. How do I get the embed link from YouTube or Vimeo?
Description: By default, the downloaded template will have one column for each language available in Meetmaps. Just fill in the description of the language(s) you'll be using at your event.
Categories
There's an option to create different categories for exhibitors, allowing you to group the created exhibitors if needed.
1. In the Categories tab click on the "New Category+" button and complete the information in the displayed pop-up.

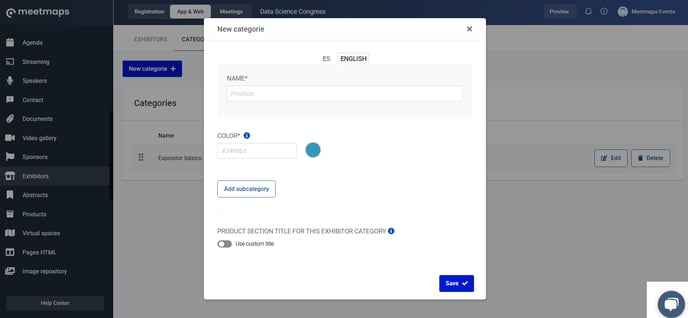
Exhibitor subcategories
Within the exhibitor categories, there is the option to create different subcategories. Thus, exhibitors previously grouped into categories can be grouped more precisely.
When you create a new category, click on the "Add subcategory " where you can add the ones you want.

Product Categories
The event organizer can create categories for the Premium exhibitors' products.
1. In the Product Category Tab click on the "New Category+".
 2. Assign a name to the product in the languages activated in the event. If needed, you can also select an exhibitor category.
 3. It is possible to edit or delete the category by clicking in the "Edit" 📝or "Delete"🗑️ button.

Settings
In this section there is the option to enable the exhibitors public catalog as well as activate the descriptive design, which will give more importance to the description of the product rather than its image.

EXPORTS 🔢: By clicking on Actions you can import the exhibitors, and you can download all the information of the stands (stand information, total visits and visitors, and documents downloaded per participant).
