-1.png?height=120&name=BLAU__EMBLEMA%20PRINCIPAL%20SENSE%20ESLOGAN%20(1)-1.png)
Meetmaps allows you to generate virtual attendance certificates and send them through email campaigns to all those attendees who have participated in the event
Available for these licences:
![]() Access Pro, Enterprise
Access Pro, Enterprise
![]() Suite Pro, Enterprise
Suite Pro, Enterprise
Certificates of attendance are very important to many event attendees and now it's easier than ever to set up, create and send them 😎.
NOTE 🗒️: An alternative is to use the Badge Builder section (easier to set up) to send this certificate. + info 👉 How to create a Badge with the Badge Builder?
Configuration
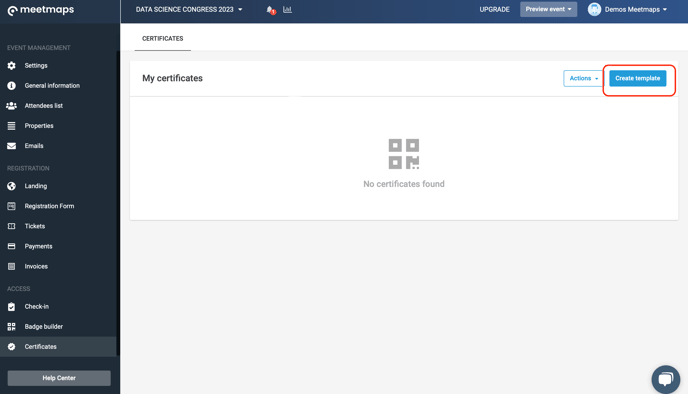
Certificates 🏅 are configured in the Registration Panel, within the "Certificates" section on the left side menu.
1. In Registration > Certificates, click on the blue button "Create template":
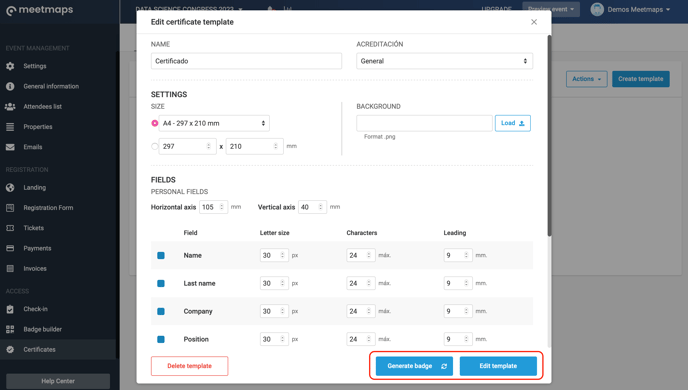
2. In the pop up add all the information that will apply to that certificate:
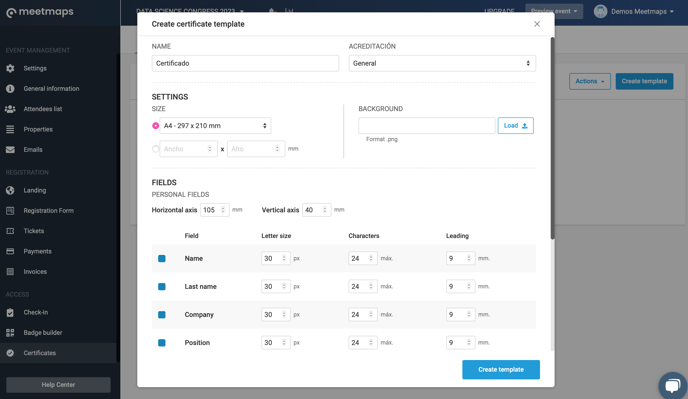
- Certificate name: this name is not visible by the attendees, it is a reference so that the organizer of the event can quickly identify it in case of having more than one
- Accreditation: here you have to select the property/role to which it applies, that is, only attendees who have a property assigned can have that certificate. If left in "General" all registered attendees will be able to receive the certificate.
NOTE🗒️: for a property to serve as a filter for that certificate, it must be created as a "single selection" property and the switch "Accreditation" in Properties > Import 👇 ¿How to create α property?
- Size: here you define the size of the certificate 📏. Automatically, the assigned size is 210 x 297 mm, but you can modify it as you need.
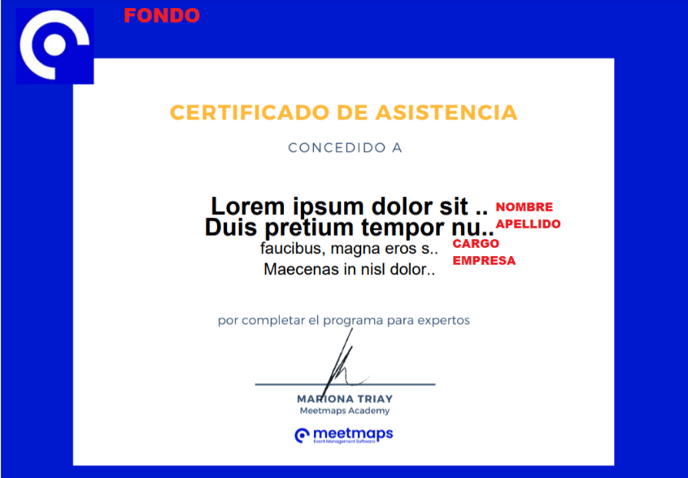
- Background: This background is the design 🖼️ that you customize for the certificate. This document must be uploaded in PNG format.
- Fields: you can organize the location of the "name", "surname", "company" and "position" fields in the certificate, the typography, the orientation of the text and, finally, if you want to add a QR code.
NOTE 📃: you have the option to choose the size of the text, the maximum number of characters it can have and the distance between the fields (interline spacing)
Once the certificate is configured, you must click on the "Edit template" button to save the new certificate created. By doing so, two new buttons will appear: delete template and generate certificate.
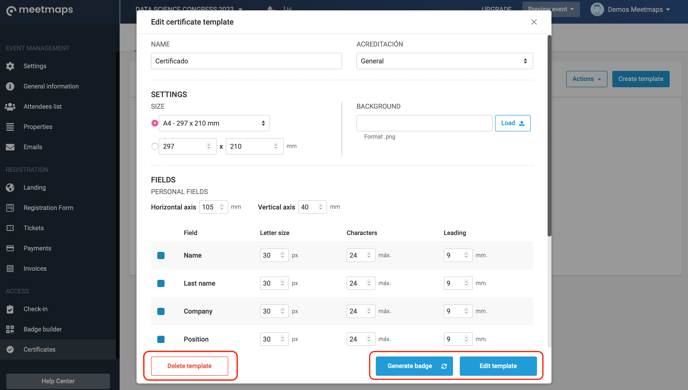
Every time you make any changes or edits to the certificate design, you must update those changes by clicking on the "Edit template" button.
To preview the design click on "Generate certificate" and "Download", doing so will open a page in a separate tab with the certificate, where you can see how the changes you have applied are:
Certificate sample preview
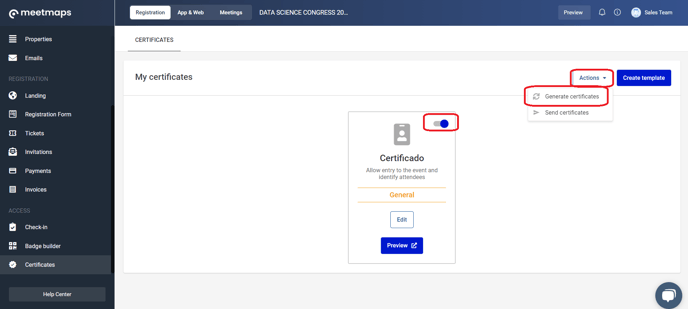
When you are happy with the design of the certificate 🏅, close the editor by clicking on the upper X, and in the menu activate the certificate by clicking on the switch and then click on the "Actions > Generate certificates" button, in this way the certificate is generated for all the selected attendees (doing this step does not imply sending the certificate yet 😜):

How to send a campaign with the certificate?
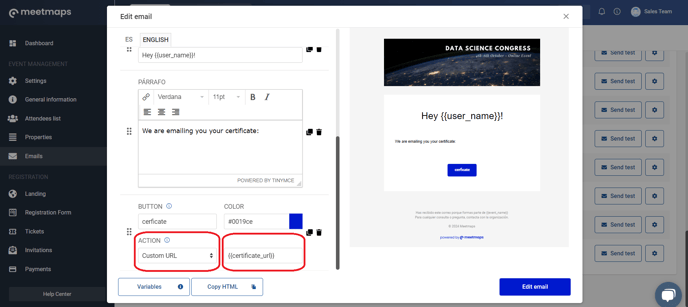
Create an email campaign and send this email to the segment of attendees you want.
+info 👉 How to create step by step an email campaign with templates?
IMPORTANT❗ this email has to include the variable { {certificate_url} } (no space between brackets)