-1.png?height=120&name=BLAU__EMBLEMA%20PRINCIPAL%20SENSE%20ESLOGAN%20(1)-1.png)
Creating one or multiple badges was never this easy. Our Badge Builder allows, in an intuitive and customizable way, to design your badges.
Let‘s start by going to the Registration Panel in the Dashboard. In the Access section you will see the Badge Builder module. When clicking on "New Design", a pop up will open on your screen. Here you will have to enter the Badge name, decide its size, and in the case you are creating multiple badges, assign them to the correspondent category.
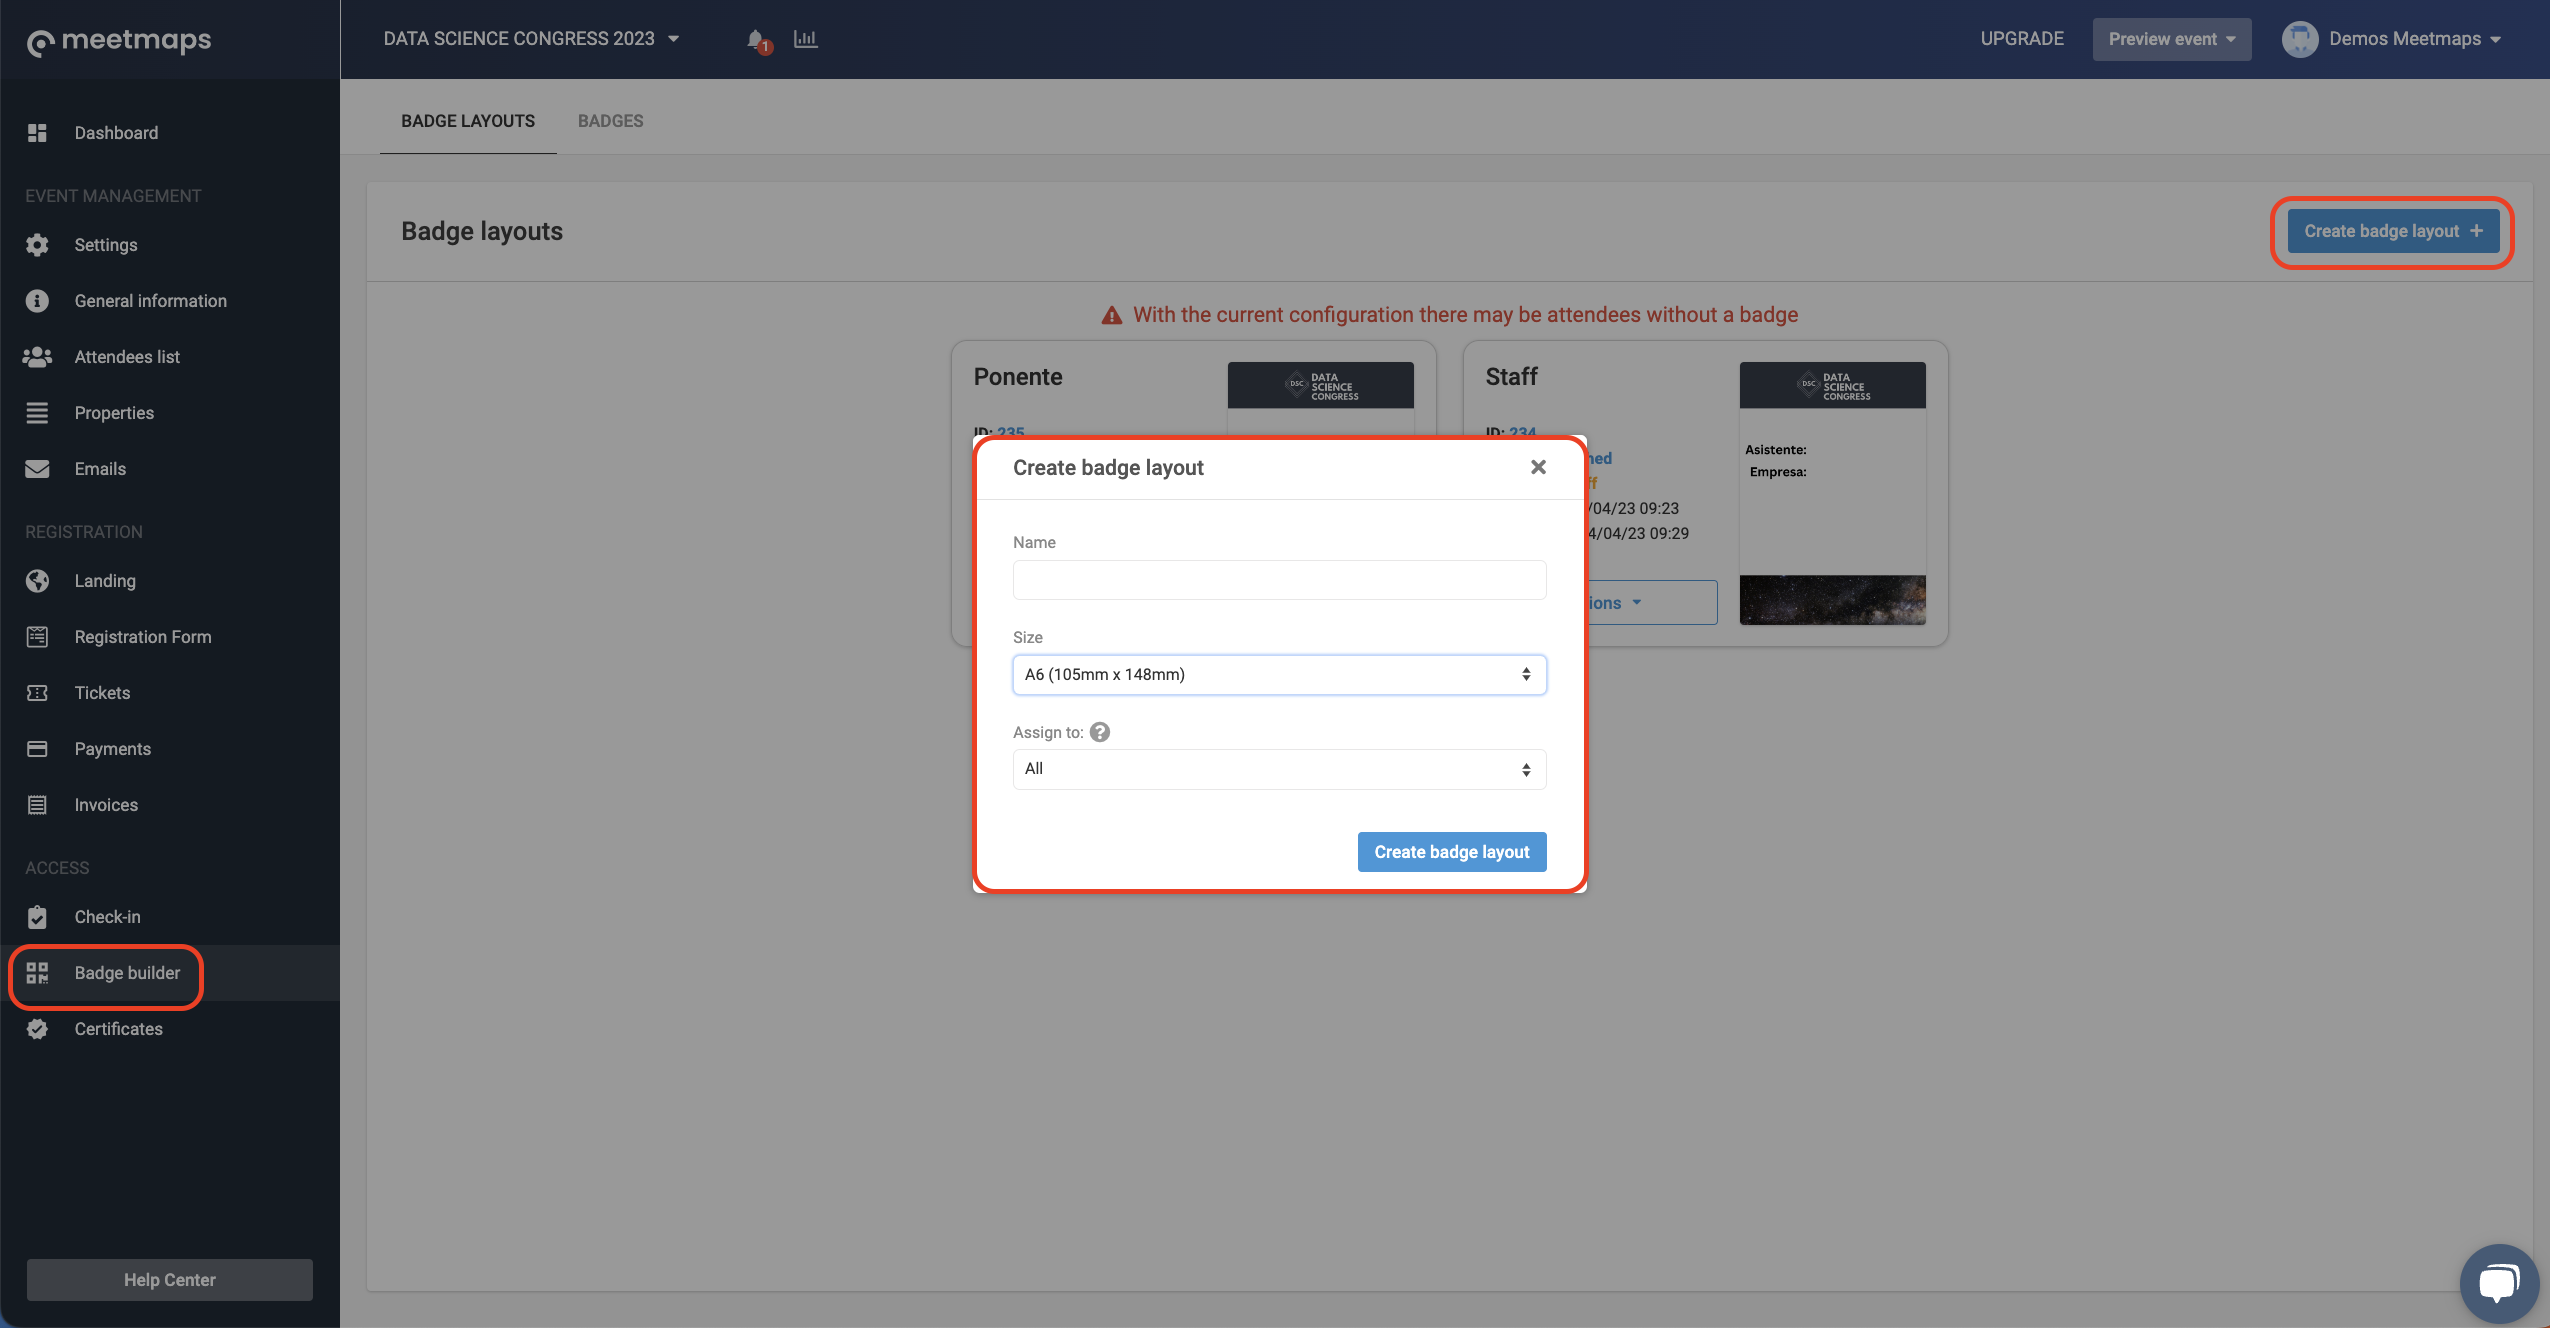
- Name: assign a reference name for the badge you are creating. It will only be visible for the admins.
- Size: you can choose among the several available sizes
NOTA🗒️: The minimum size of the QR so that it can be read by the readers is 25 x 25 mm
IMPORTANT ❗In case you want to use a background design, it will have to be the same size as the selected for the badge.

- Assign to: to be able to assign a property or role to the badge, you will have to first create it and activate the accreditation switch. Here you have some articles that will help you refresh the information on how to create and how to edit a property.
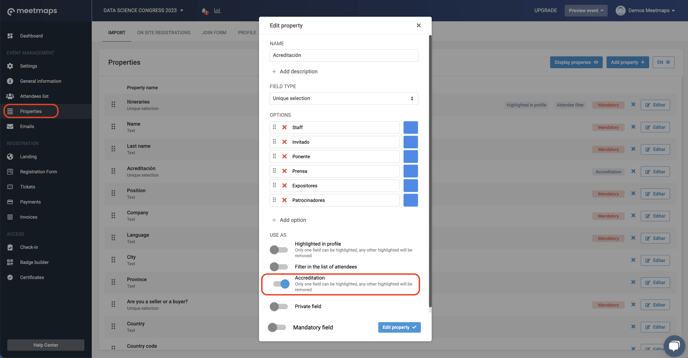
IMPORTANT❗You can only activate the "Accreditation" switch in one property.
After you have chosen the fields, is time to create the design. On your scree you will have the following tab
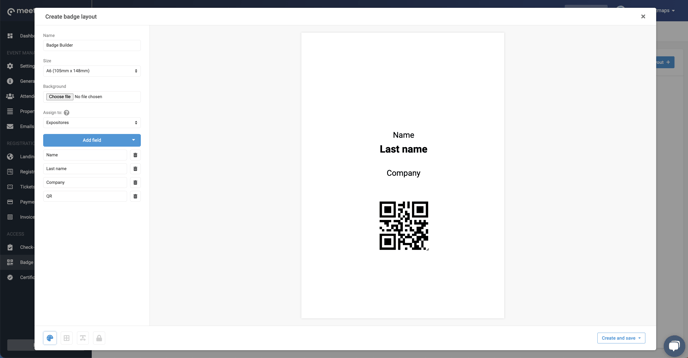
- Name, size and assign to will be the same as before
- Background: Upload the background image in .png It has to be the same size you chose for the badge
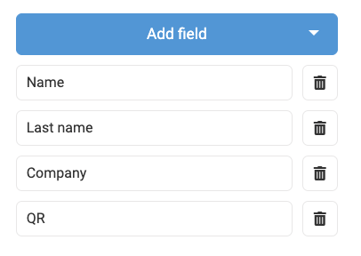
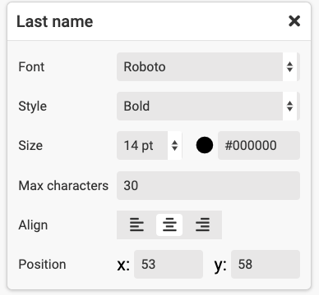
- Fields: in this section you will visualize all the created properties, activated or not, in any of the forms of the dashboard. If you want to add any specific field, you need to go to the Properties section and add a new one.
These fields are customizable and you can decide their size, font, color and position.

Finally, in the bottom left corner, 4 icons appear:
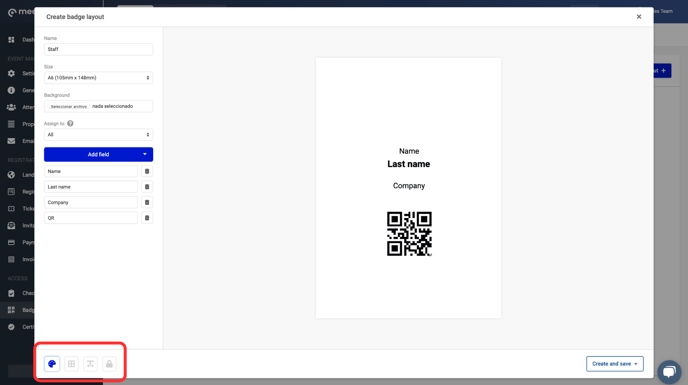
- Show background: display the badge with or without the background you have selected.
- Show Guides: vertical lines appear to use as reference.
- Expand text in fields to review margins: expand texts to the maximum number of characters indicated in each field to check margins and positions of each.
- Lock elements: lock fields so they cannot be moved with the mouse.
These icons activate or deactivate when clicked on.
TIP 💡
- If the icon appears in blue, that mode is activated.
- If it appears in gray, it is deactivated."
EXPORTS 🔢 : By clicking on Actions you can download the attendee badges.

Now that you know how to create a Badge with the Badge Builder, discover how to customize the badges here.