-1.png?height=120&name=BLAU__EMBLEMA%20PRINCIPAL%20SENSE%20ESLOGAN%20(1)-1.png)
Take advantage of the Email Builder to easily set up automated emails
📷 Image characteristics
Email header and footer: 1200px x 300px .png or .jpg format. In the event that there are texts and logos, make sure to leave margins.
❗An alternative to both is to insert the LOGO COLOR (Settings > Design)
STEP-BY-STEP - Create automated emails with templates
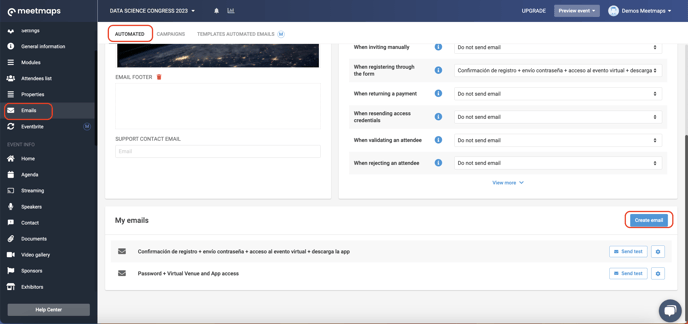
In Emails > Automated, in the Settings section:
-3.png?width=688&height=386&name=Dise%C3%B1o%20sin%20t%C3%ADtulo%20(5)-3.png)
- Sender email: This is the address from which emails will be sent.
NOTE🗒️: To prevent sent emails from ending up in the Spam folder, the default sending email (also known as the sender email) will always be "no-reply@meetmaps.com".
ℹ️ If you prefer another email address as the sender email, please contact the Meetmaps team.
- Sender name: This will be the name from which attendees will receive emails. For example: Data Science Congress Organization.
- Header and footer email images: Automatic emails allow the organizer to personalize them with an event banner.
- Support contact email: The address to which attendees will be redirected if they have any questions or issues -variable { {event_email_sender} } (no space between brackets)-
Next, click on the "Create email" button in the My Emails section:
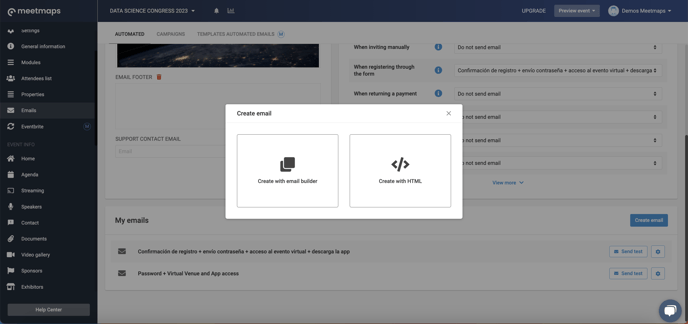
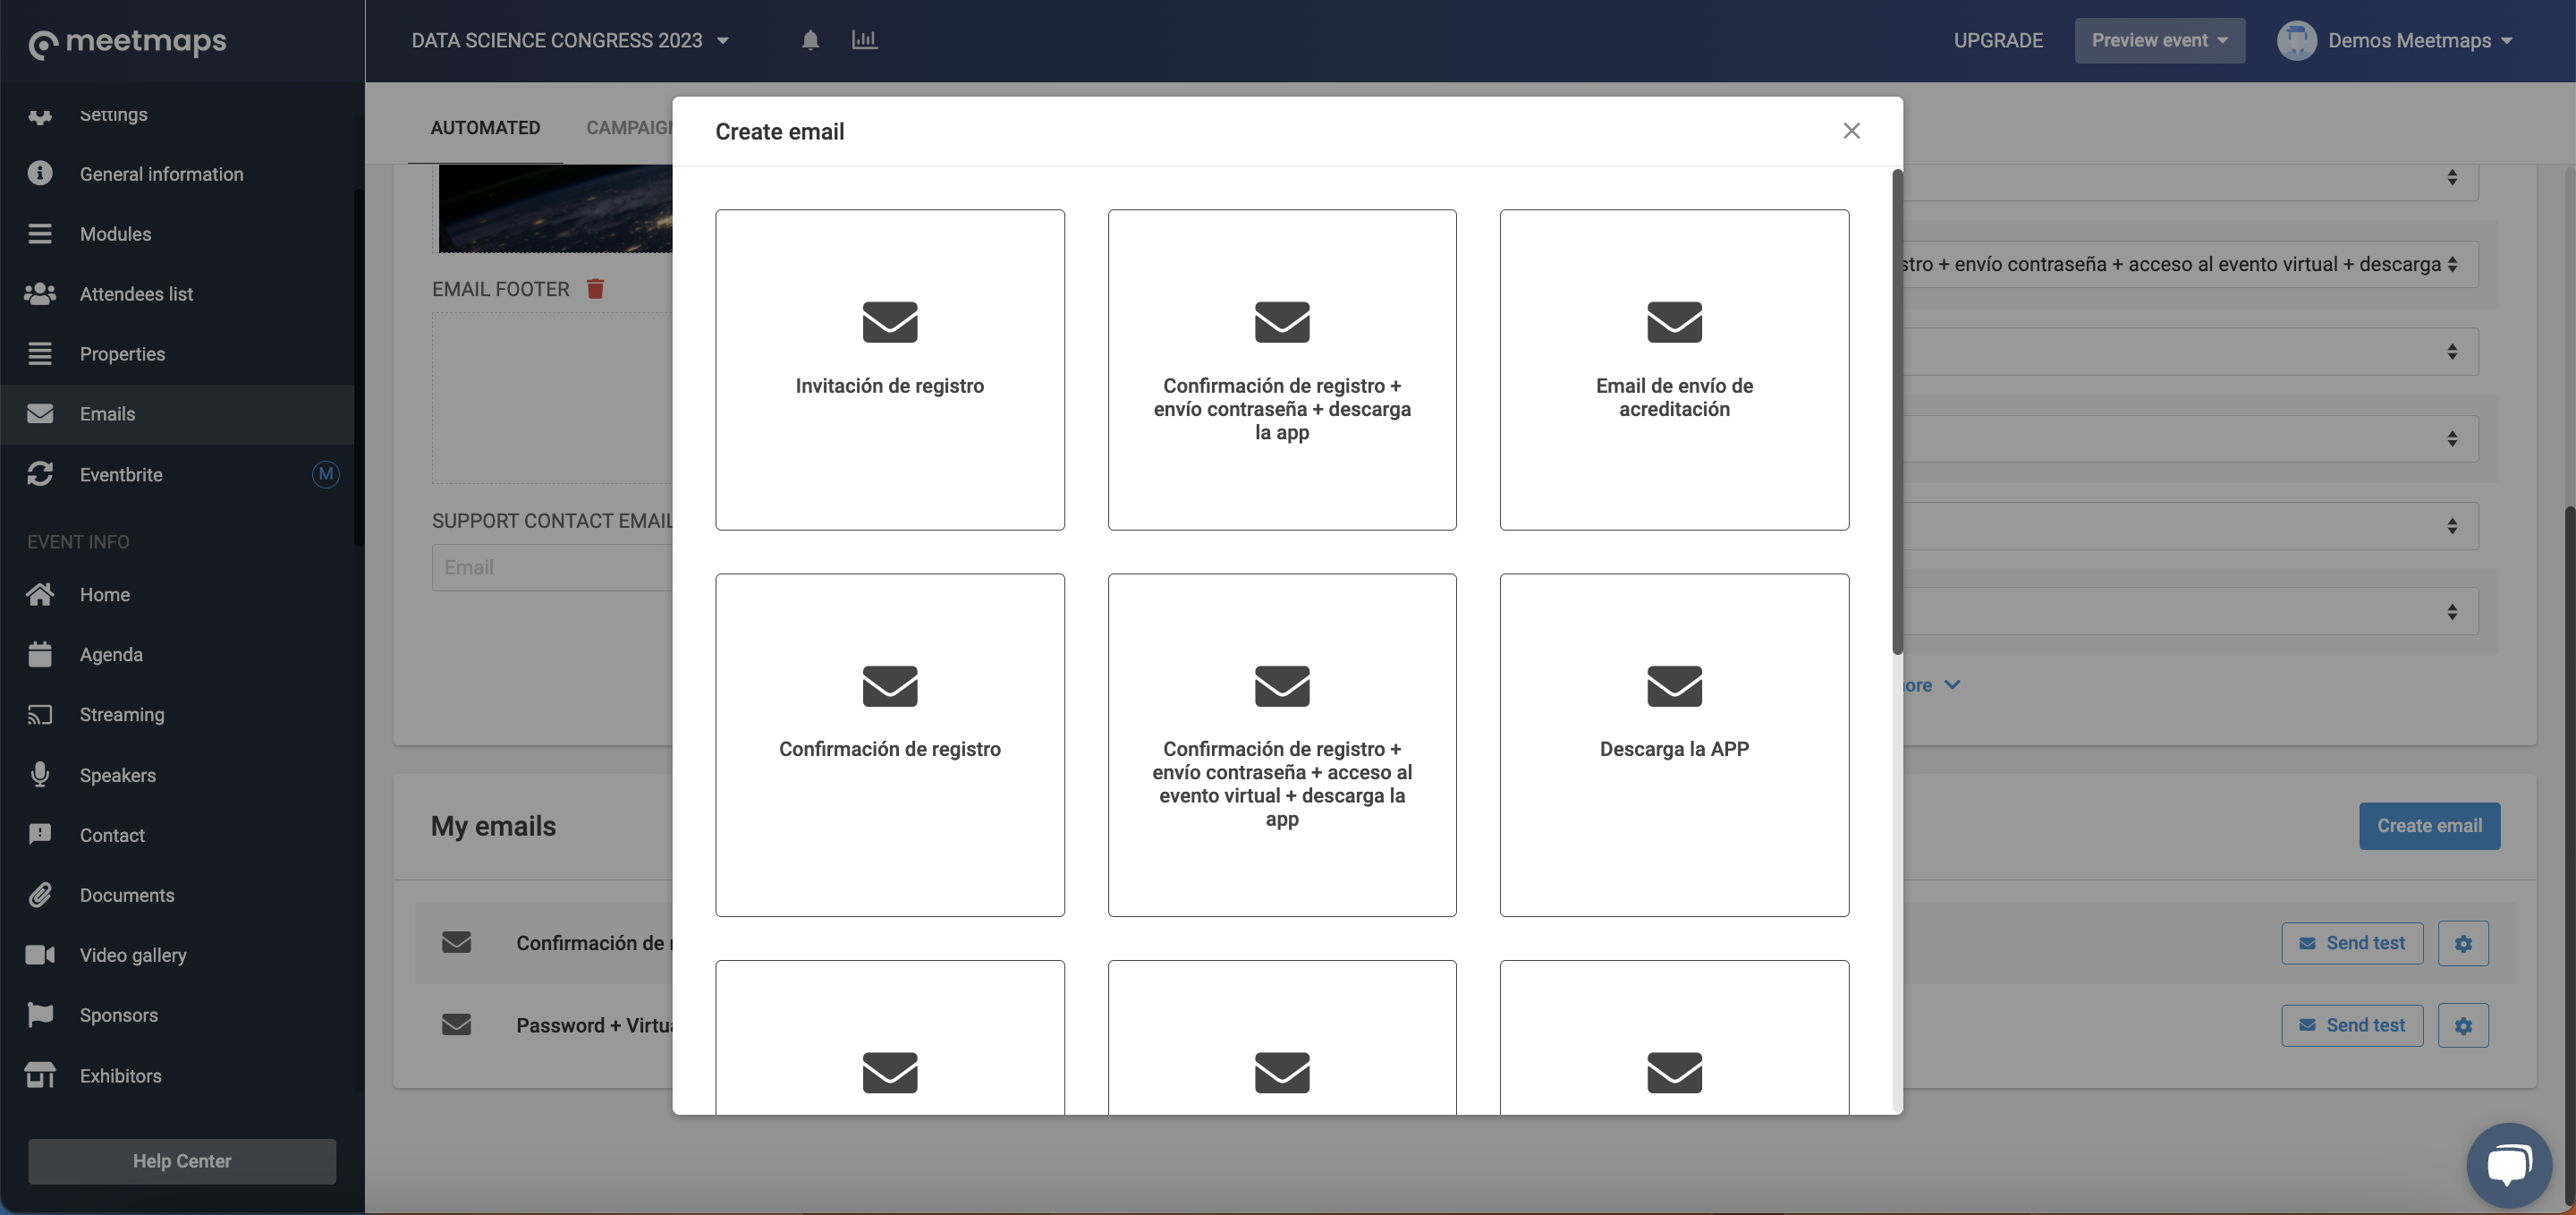
When you do this, the following pop-up appears with options to create the new email. Here, you should select "Create with Email Builder" and choose the template according to the message you want to configure:
NOTE🗒️: You can also create an email from scratch by uploading your own HTML and thus have an email designed to your liking.
If you have an account in Mailchimp or other email marketing systems, they allow you to generate the HTML, and then you can paste it into Meetmaps.
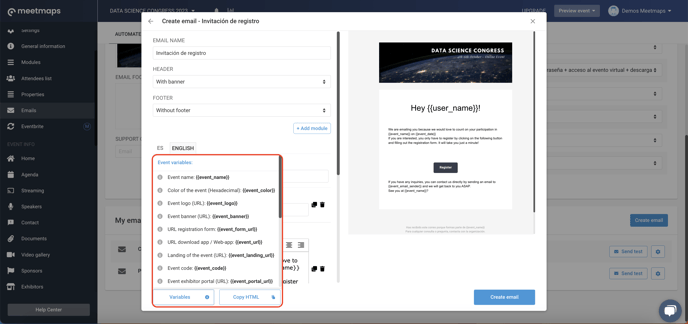
When you select one of the templates, a window where you can edit the content of the email and customize the message will open 📝 The changes you make will be displayed in real-time on the right-hand side.
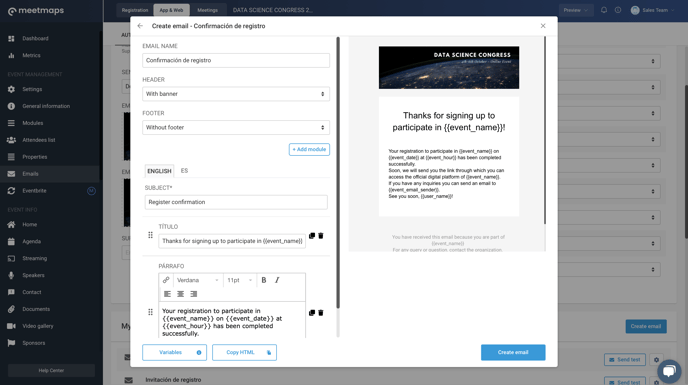
- Enter an email name: It is an internal name and the user will not see it at any time. It will serve to identify each email from the "My Emails" section.
- Write the subject of the email: It will be the subject that the email carries when sent, and therefore, it will be visible to the user.
The following modules are editable and can be added or deleted.
-2.png?width=688&height=386&name=Dise%C3%B1o%20sin%20t%C3%ADtulo%20(6)-2.png)
Also, you have the option to choose whether you want the header and footer image or the event logo configured in the Settings > Design section to appear at the top of the email.
NOTE🗒️: On the bottom left, you have two buttons, one for variables and the other for copy HTML. In the Variables button, you'll find a dropdown of all the variables you can include in the chosen template. If you click on the Copy HTML button, the content will be copied to your clipboard, which you can paste into another "Created from scratch" email.
Once you finish setting the content, click on the "Create email" button.
To review the content you have created, you can send yourself a test:

To finish, and once you have the final version of the email, you must link it to the corresponding action in which you want the email to be sent.
+ info 👉 "What does the moment of the delivery of automatic emails mean?"
-3.png?width=688&height=386&name=Dise%C3%B1o%20sin%20t%C3%ADtulo%20(7)-3.png)
IMPORTANT❗ As soon as you link the email, it will be sent automatically upon completing the corresponding action, and you must ensure it is the final version and that all links or buttons work correctly.
NOTE🗒️: learn how to create a campaign with Email Builder 👉How to create step by step an email campaign with templates?