-1.png?height=120&name=BLAU__EMBLEMA%20PRINCIPAL%20SENSE%20ESLOGAN%20(1)-1.png)
If you have already created a Badge, but you want to edit some elements, then keep on reading. Here we will teach you how to do it.
Once you have created a Badge for your event, you have added all the information and have selected the fields you wish to incorporate, on the right size of the screen yo
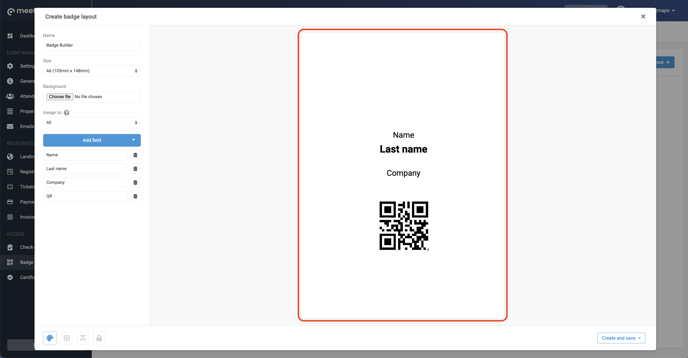 In this screen, you can drag and drop the elements where you wish them to be. Also, in the inferior left corner you can activate the guides, fill the text so you can preview hoy it would look with the margins, and lock the elements.
TIP💡: For the background you can create templates with specific elements of your event, like the logo, main colours, etc. You can totally customize these templates to your match your brand guidelines, always leaving the necessary spaces for the information that will be added once the badge is generated
Upload the background and organize the elements to match the corresponding spaces.
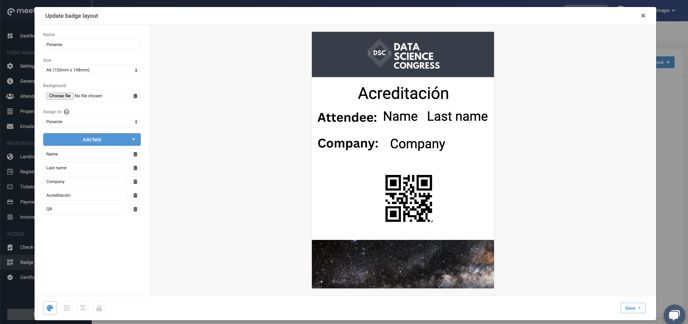
REMEMBER ❗: The background must be in .png format, without cut marks and the same size you had selected for the badge.
Once you have finish created the badge, don‘t forget to save your changes on the right lower corner.
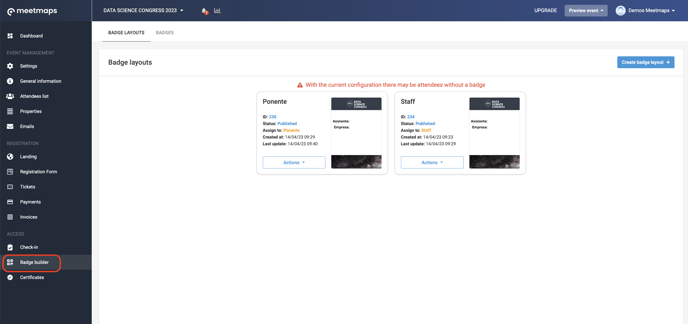
You can edit, duplicate or eliminate the already created badges.
In this screen you will visualize all the badges you have created.
Now that you have created and customized the badges for your event, learn how to generate and send them in 👉 this article.