NOTE🗒️:
- Learn how to design and generate badges in the article 👉 What is the Badge Builder section?
- This is a good option if you want your attendees to print their badge from home.
Another fully digital option is to send just the QR code instead of the badge.
1. Through a campaign
This step is very simple. After having created the badges 🎫 and generated the corresponding badges, you will need to set up a Campaign to deliver the badge to the attendees. 👉 What are email campaigns?
Step by step:
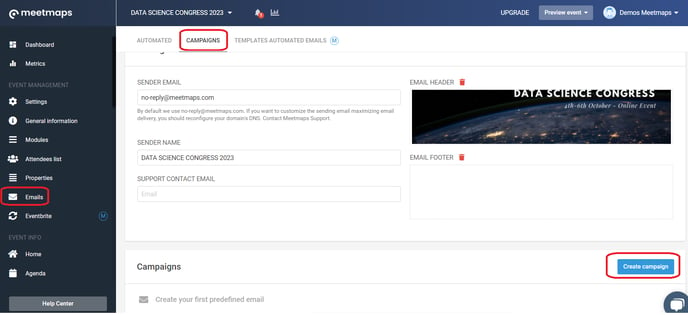
Creating the campaign:
1. In Emails > Campaigns click on the "Create Campaign" button.
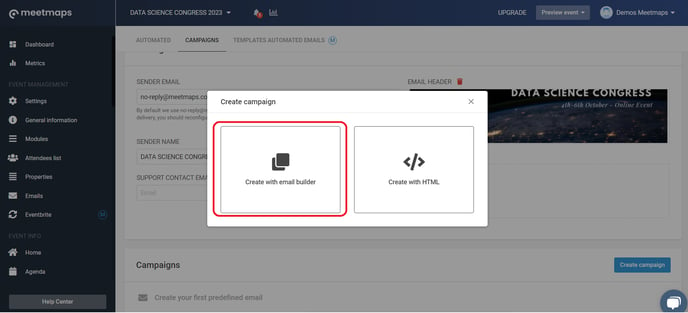
2. Select "Create with email Builder".
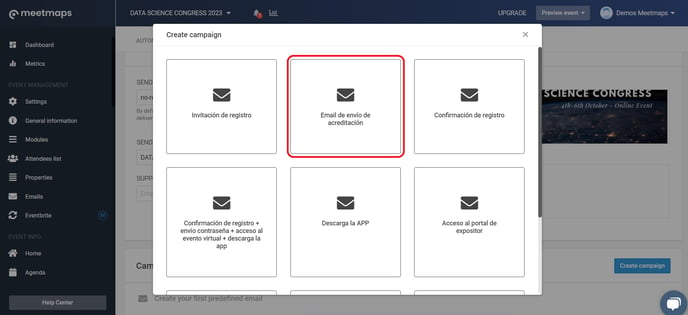
3. Choose the "Email de envío de acreditación" template.
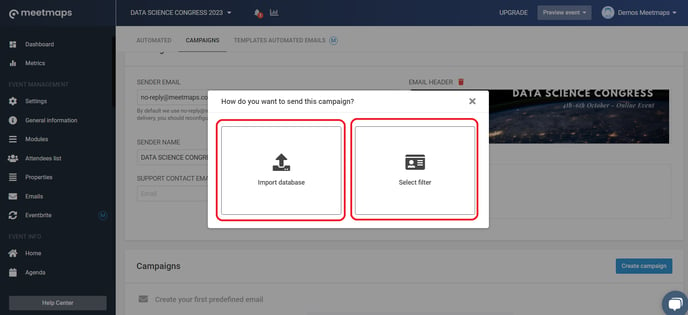
4. Choose the option to send the campaign with "select filter" (don't do it with "import database!).
5. While you'll need to edit the content and customize the message, this template includes a module to download each attendee's personal badge 🎫 and the option to download that document.
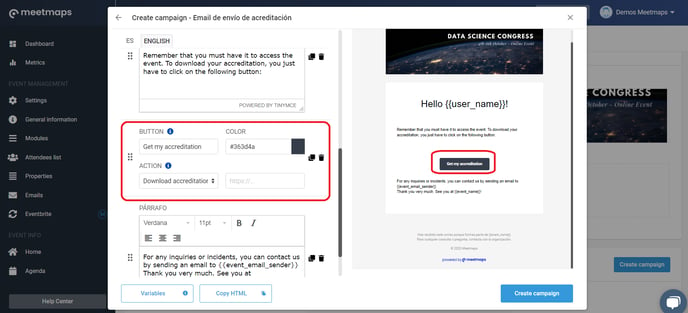
Finally, click on "Create Campaign" and you will have created it. 💪 Now, onto the sending!
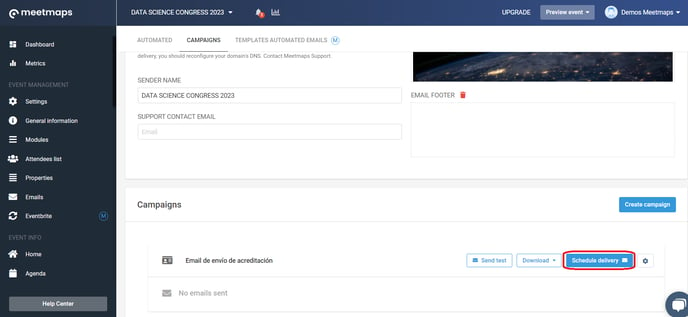
Sending the badge campaign
Click on the "Schedule Delivery", you'll have two options:
- Send Now
- Schedule Send
2. Through an automatic email
You can send the badge with these two sending times:
- By registering in the form 📋
- When registering manually
IMPORTANT❗ the import of registered attendees and the email linked to this action (When registering manually) would not correctly send the accreditation since it will not have been created in the Badge Builder module.