Available for these licences:
![]() Access Pro, Enterprise
Access Pro, Enterprise
![]() Suite Pro, Enterprise
Suite Pro, Enterprise
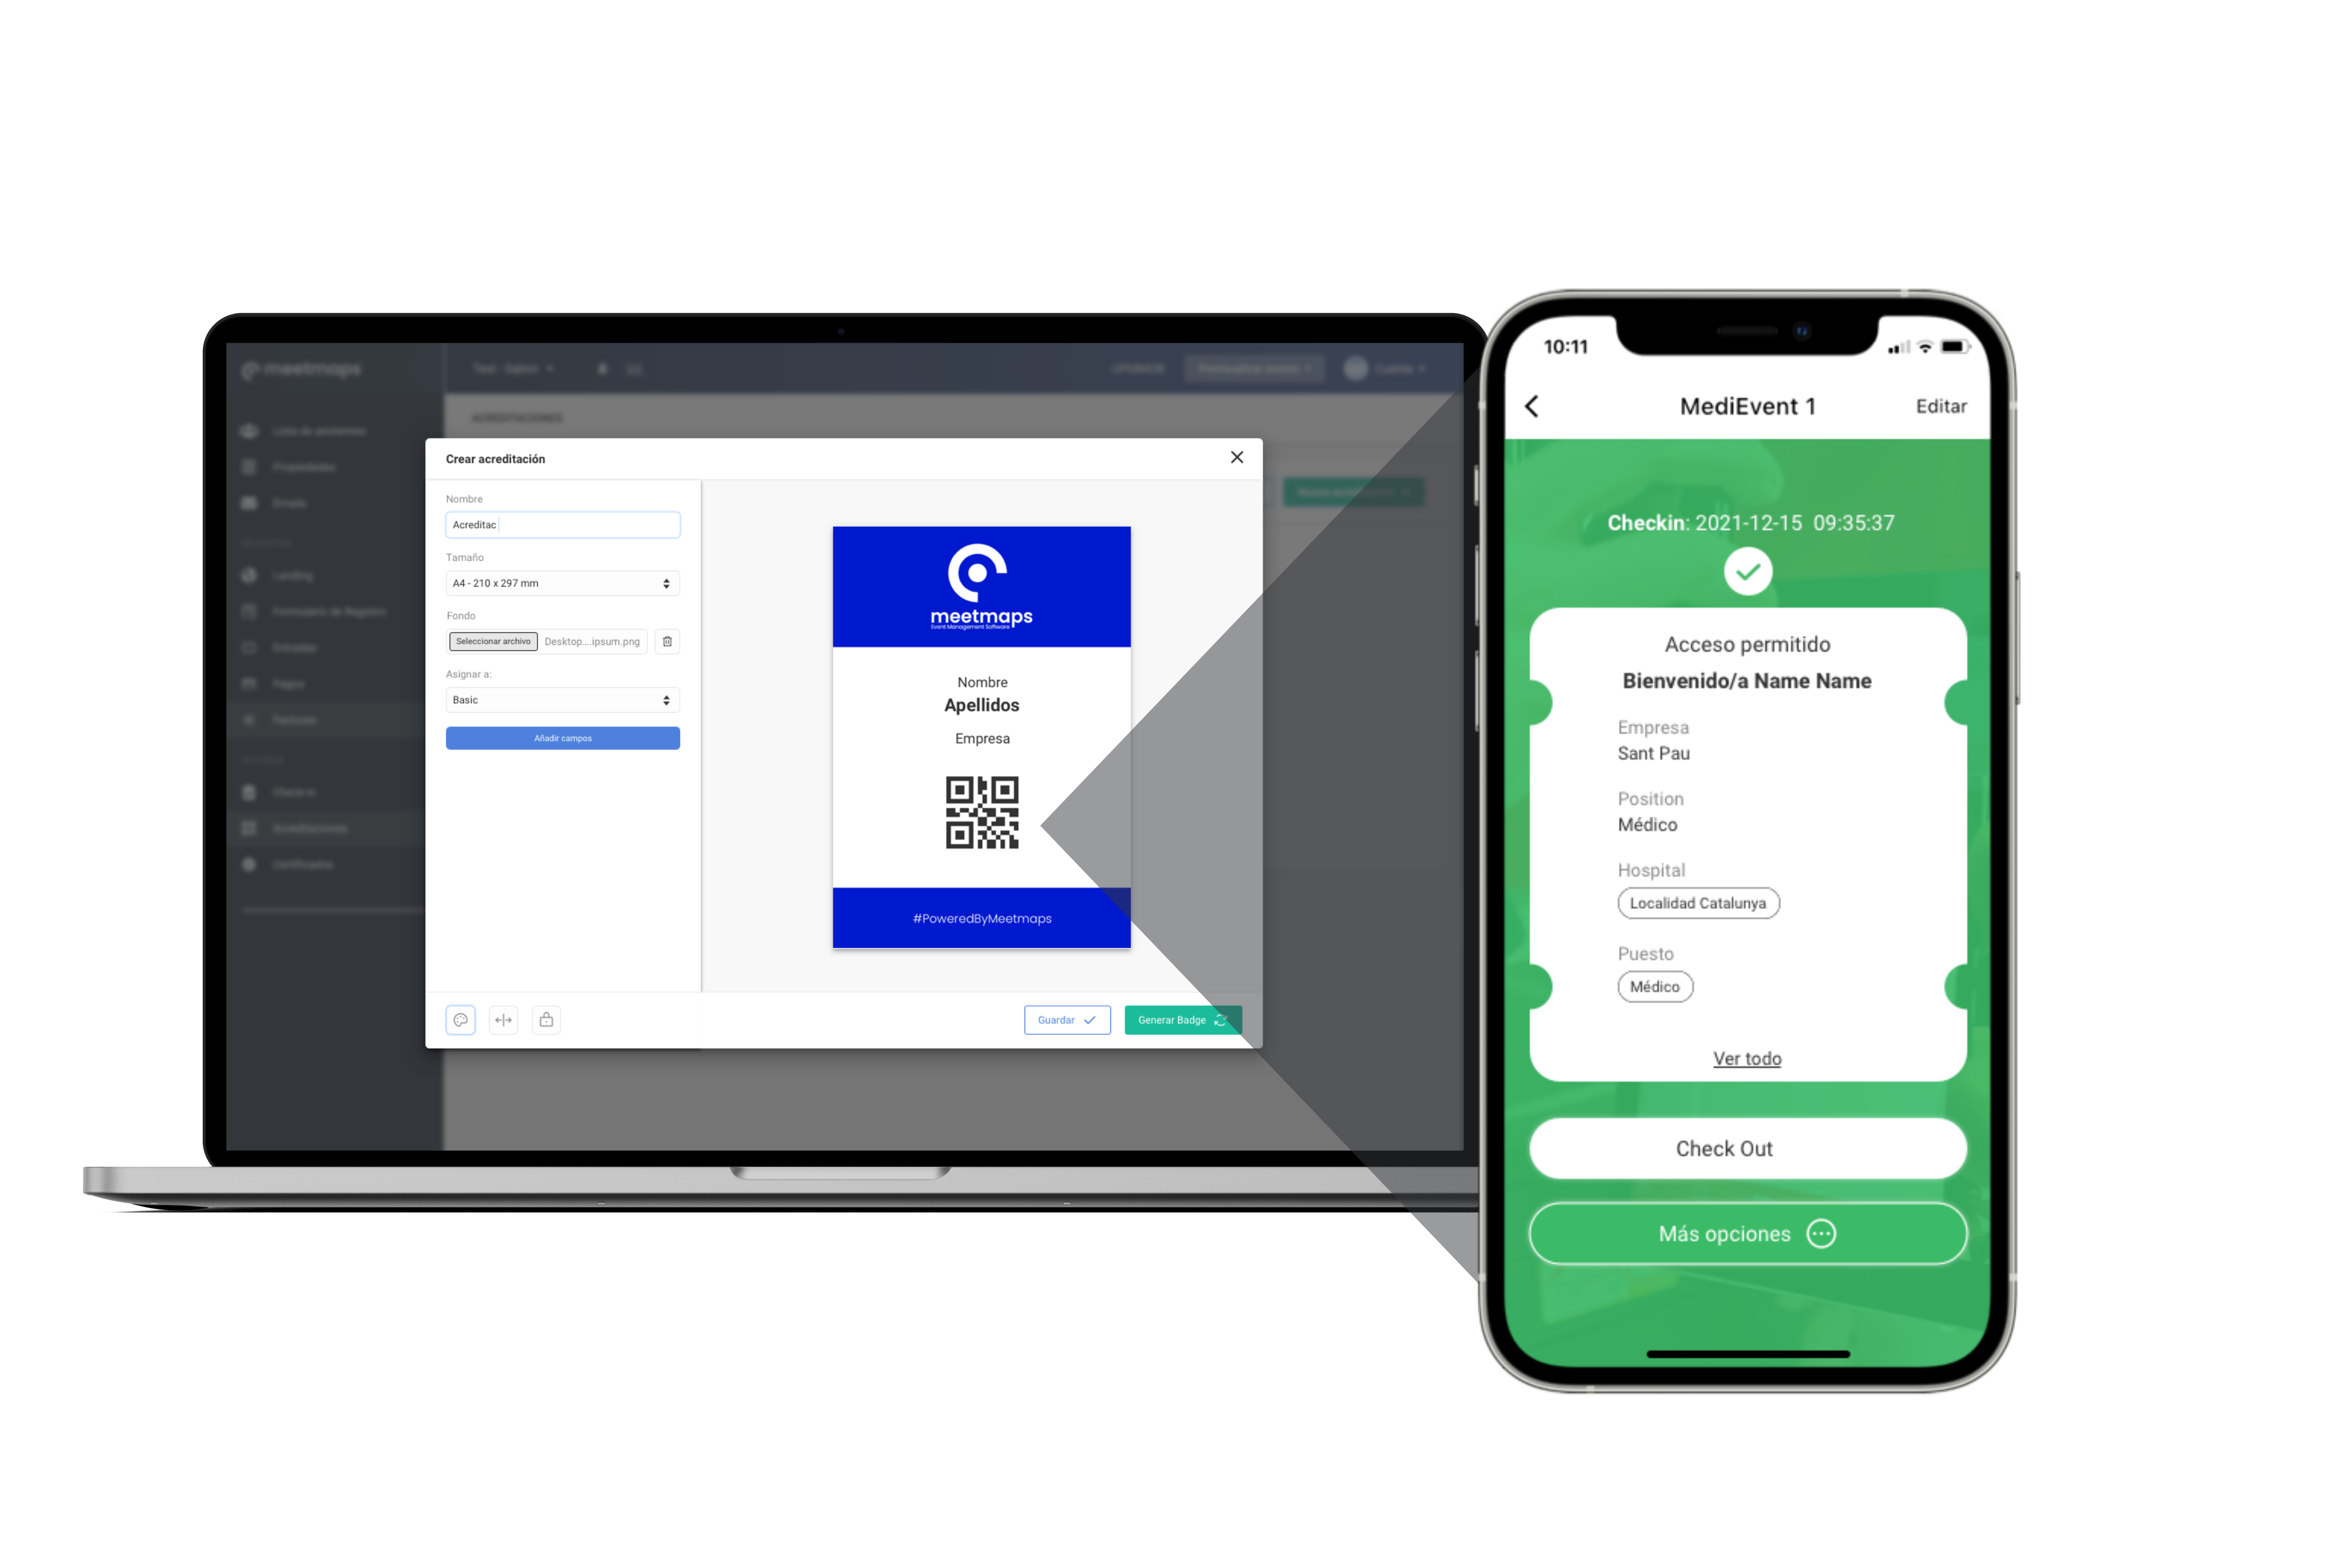
The Badge Builder is a innovative tool that will allow you to create customized badges for your events attendees.
Do you know 👉 Meetmaps Check-In App? It complements the Badge Builder perfectly to allow a seamless process.
With the Badge Builder you will be able to personalize the badge according to your needs and preferences. This tool is fully intuitive; therefore, you won‘t need advanced knowledge in graphic design or photoshop to create an amazing badge. The editing process is simple and easy to understanding. It allows you to change the color, shape, font and text in a matter of seconds.
Additionally, if you have assigned your attendees with different categories, you can create different badges for each one of them.
For example, if in your event you have staff, exhibitors, speakers, sponsors, VIP attendees or general attendees, you could create one different design for each.
NOTE 🗒️: At Meetmaps, we also offer access control services—contact us for more information about this.
Start creating your badges in three simple steps:
1. Badge design
A) Go to Registration > Badge Builder > Badge Design, then click on "New Design."
.png?width=688&height=363&name=1%20(2).png)
- Name: Assign a reference name for the badge you’ll create. This name will only be visible to admins.
- Size: Choose the desired size for your badge.
NOTE 🗒️: The minimum size for a QR code to be readable by scanners is 25 x 25 mm.
- Assign to: To assign a property to the badge, you must first create the property and enable the badge option. Here’s a reminder of how to create and how to edit a property.
.png?width=688&height=363&name=2%20(1).png)
IMPORTANT ❗ You can only activate the badge option for one property.
B) Once the badge is set up, design the badge
.png?width=688&height=363&name=3%20(1).png)
-
The name, size, and assign to settings will match the ones you previously configured.
-
Background: Upload a .png image to serve as the badge background and add your design (it must match the badge size).
TIP💡 For the background, you can create images with event-specific elements such as logos, primary colors, etc. Make sure to leave space for fields (properties) to be added when generating the badge.
- Add fields: This section will display all properties created under Properties and Registration > Registration Form. If you need a new property, create it from scratch in Properties.
Fields are fully customisable, ou can adjust their size, font, color, position, and more.
3. Use Tools for Precision. At the bottom left of the editor, there are four icons:
- Show Background 🎨: View the badge with or without the selected background.
- Show Guides 🏁: Display vertical lines as reference guides.cia.
- Expand Text in Fields 🔛: Maximize text fields to their maximum character count to verify margins and positioning..
- Lock Elements 🔒: Lock fields to prevent them from being moved with the mouse.
Click on these icons to activate or deactivate them as needed.
Examples of badges:
.jpg?width=332&height=250&name=2%20(5).jpg)
.jpg?width=332&height=250&name=3%20(5).jpg)
.jpg?width=664&height=500&name=1%20(4).jpg)
2. Badge Generation
Go to Badge Builder > Badges. Create badges individually or all at once.
.png?width=688&height=364&name=4%20(1).png)
.png?width=688&height=361&name=5%20(1).png)

NOTE 🗒️: If a message indicates that some attendees might not have a badge, it’s likely because they haven’t been assigned one of the categories in the selected property.
Once badges are generated:
- They’ll appear next to each attendee’s name. Attendees with a badge will have their status in blue, while those without will appear in gray.
- You can also download badges with or without the background.

IMPORTANT❗ If you generate badges and later modify the design in Badge Builder > Badge Design, you must delete the previously generated badges and regenerate them with the new design.
3. Badge Sending
1. To a Single Email Address: This option is for cases where someone manages the badges or for mass printing.
Specify the email to send the badges to, with two options:
-
- Combine all badges into a single PDF with the background.
- Send badges without a background, with each badge as a separate PDF showing only the properties.


2. Directly to Attendees: Send badges via a campaign or an automated email.
In this case, attendees can print the badges themselves.
+ info 👉 ¿Cómo enviar los badges a los asistentes?