-1.png?height=120&name=BLAU__EMBLEMA%20PRINCIPAL%20SENSE%20ESLOGAN%20(1)-1.png)
Learn step by step how to create emails and automatize their sending
To create emails and automatize their sending, you can do it by conducting the following steps:
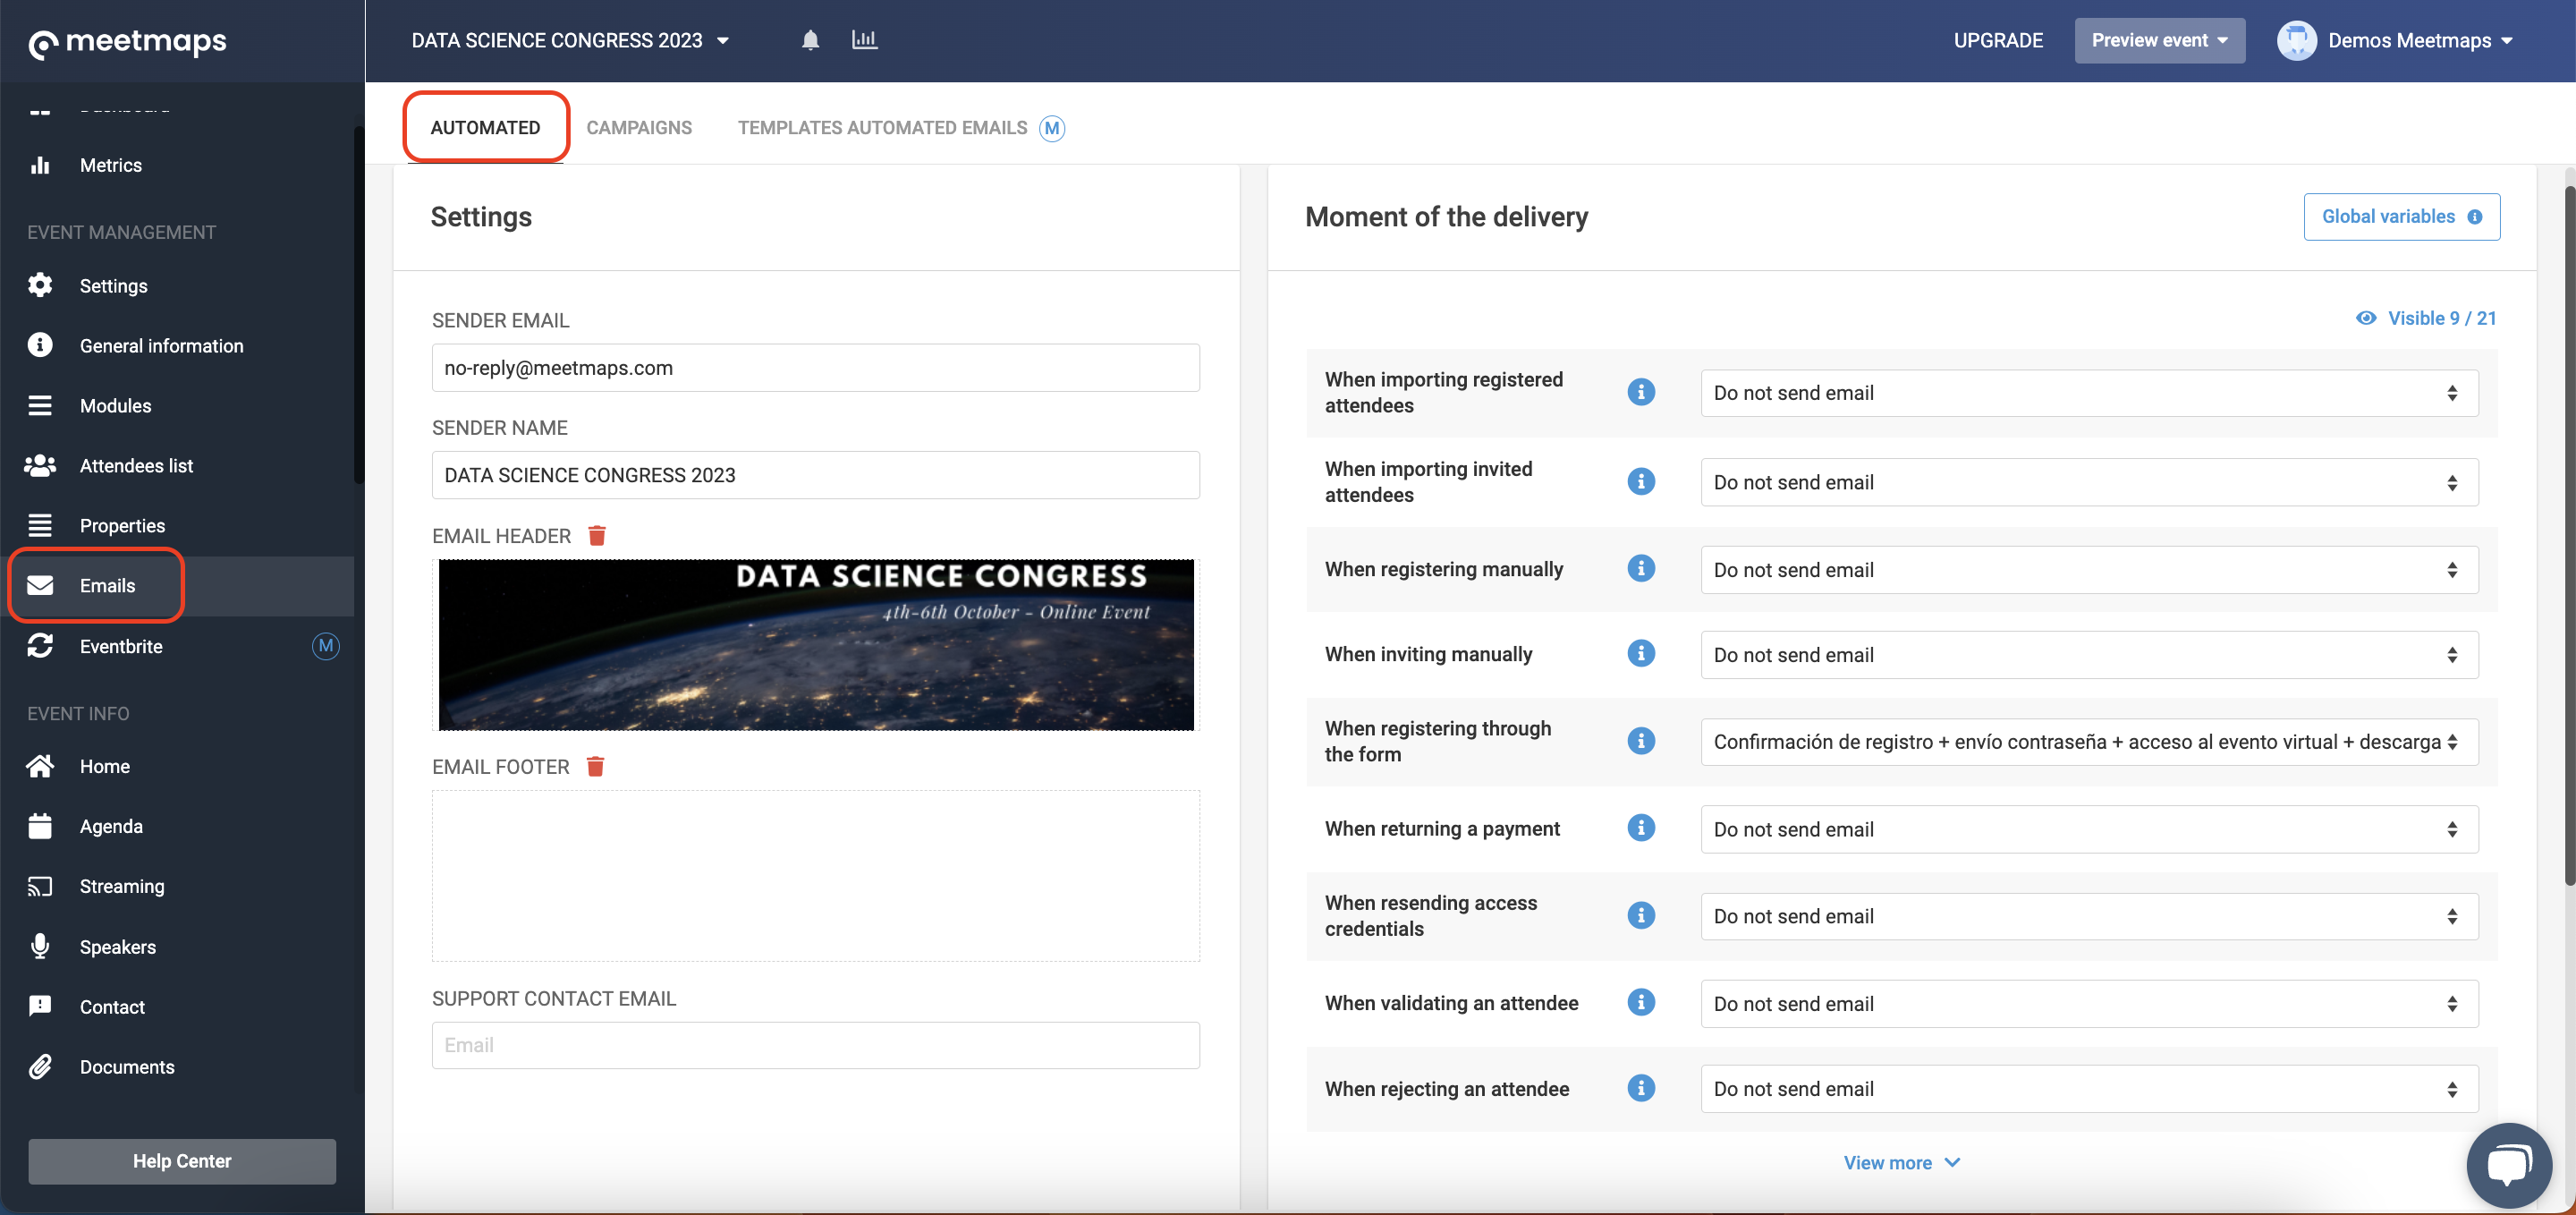
Go to the Emails module from the left side menu, and then click on the Automated tab.
Step 1: Configuration
- Add the sender name: it will be the name from which attendees will receive the emails. For instance: Data Science Congress Organization
- Upload an email header: automated emails allow adding a personalized header. Place the cursor in the blank square of the Email Header, and the recommended measures will appear.
By default, to prevent emails from being sent to the Spam folder, the sender email will always be "no-reply@meetmaps.com".
ℹ️If you want another email to appear as the sender email, contact the Meetmaps team, and we will explain the conditions and implications.
Step 2: Create an email
Once conducted the previous step, you will have to click on the "Create email" green button and choose if you will create it with a template or from zero:
- From template: Meetmaps provides several templates that you can use to send your emails. You will only have to adapt the text and links.
- From zero: this option allows you to upload your own HTML and have your preferred email design.
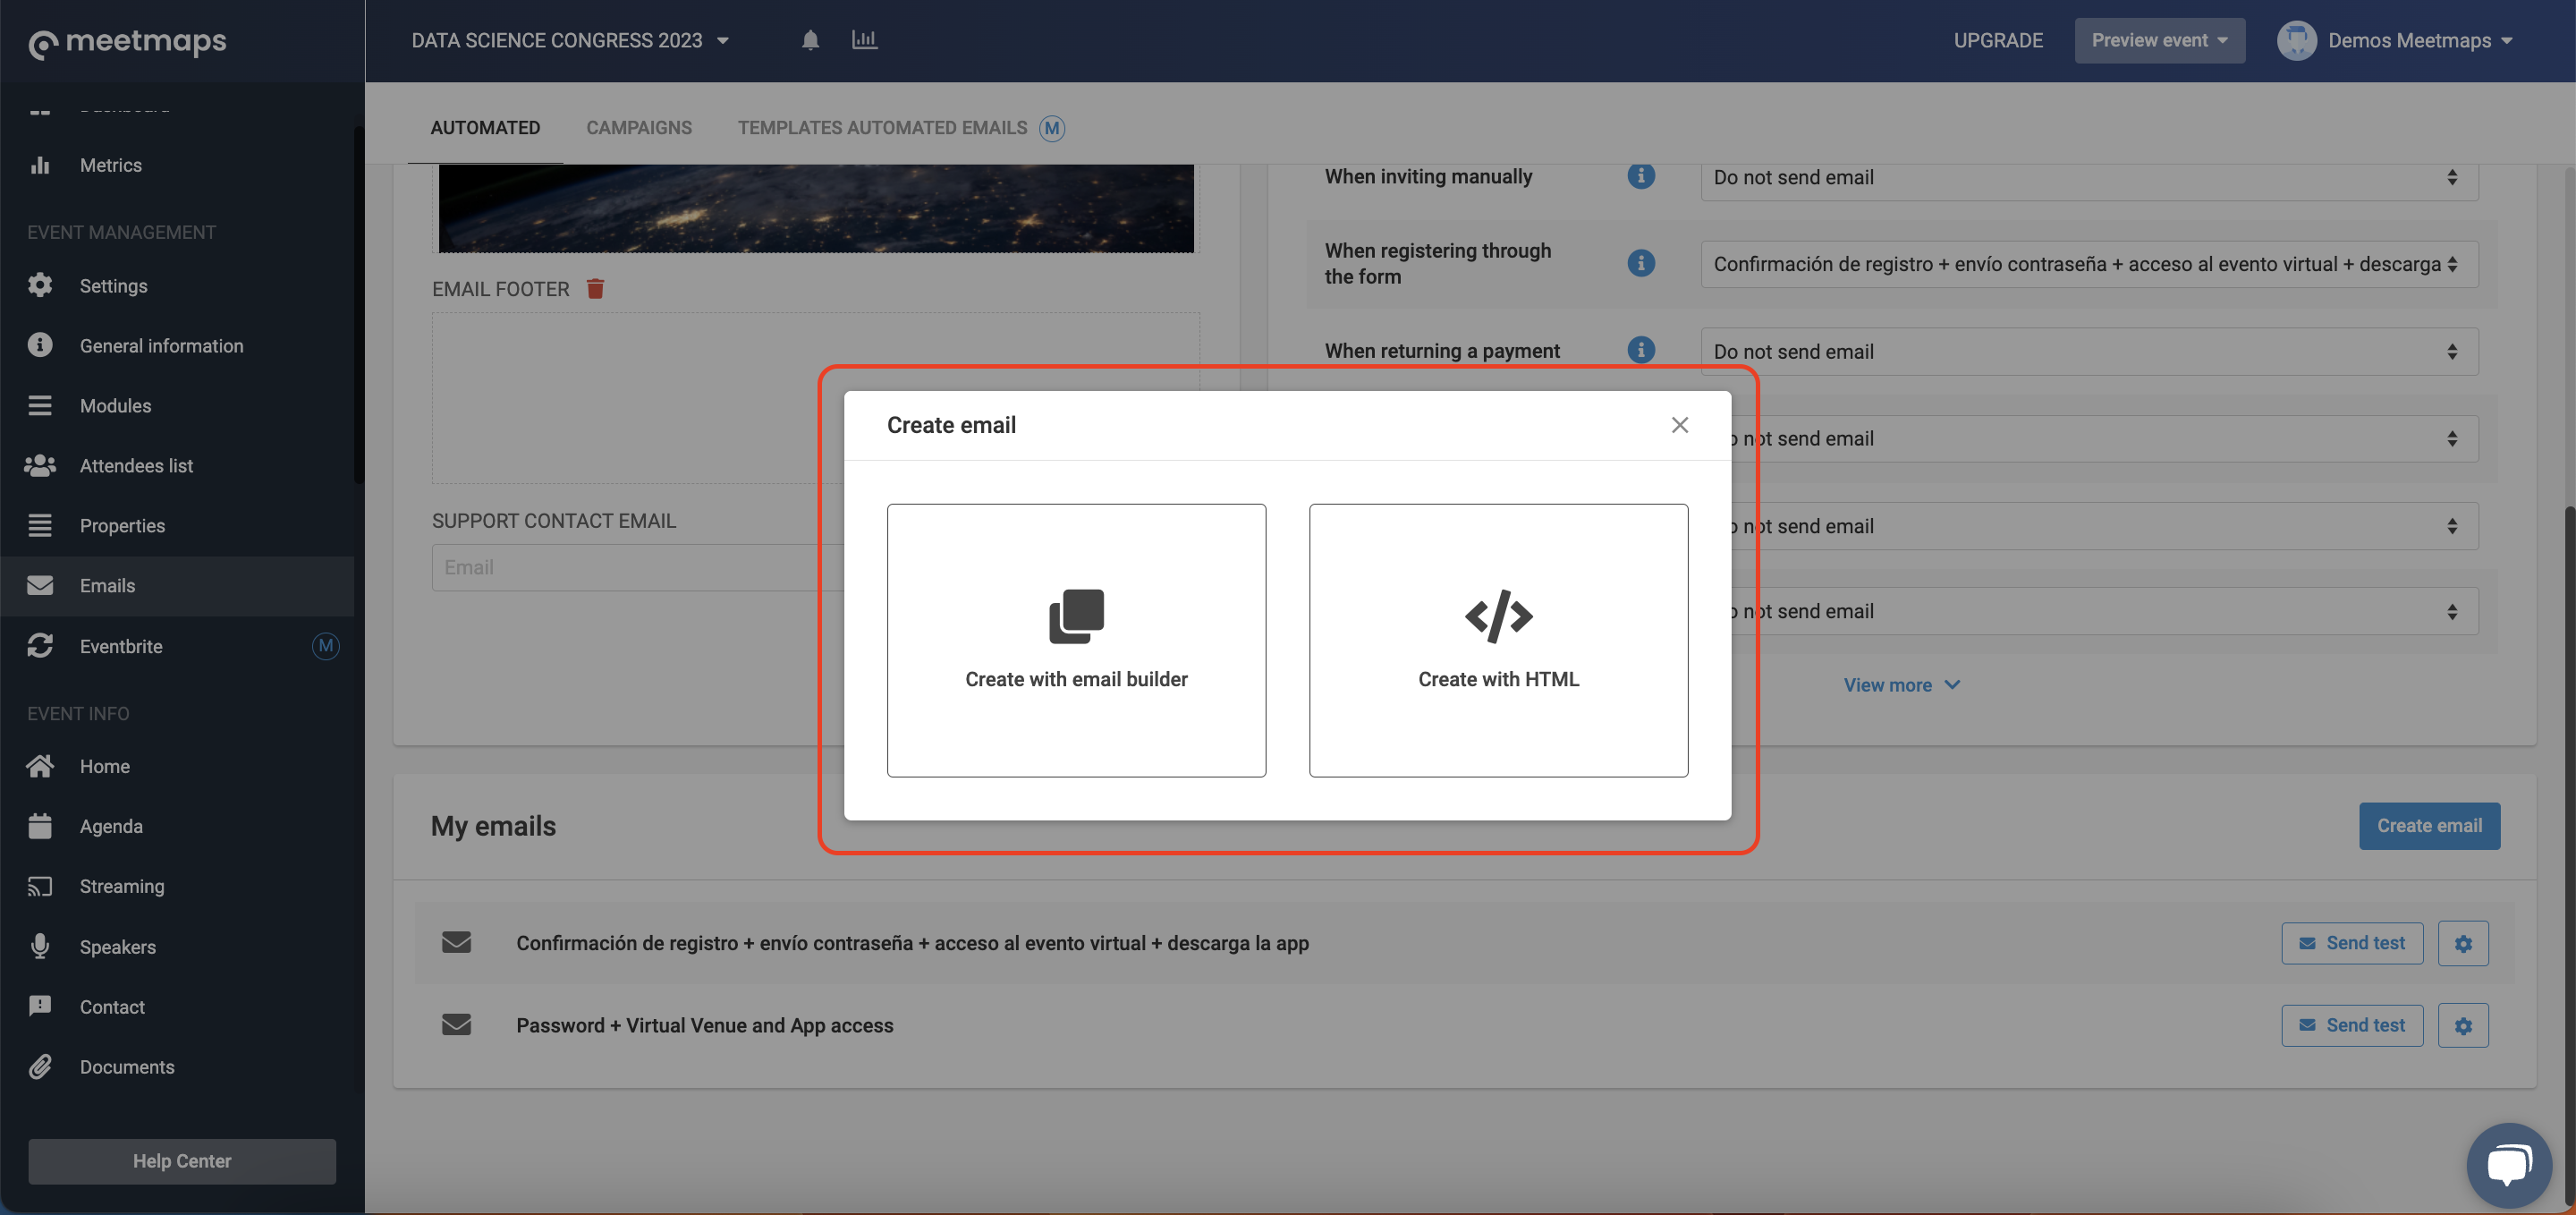
REMEMBER 📢: If you have a Mailchimp account or other email marketing systems, these allow you to generate the HTML and later upload them on Meetmaps.
Then, a pop-up will appear, and you will have to:
- Add an email name: it's an intern name; the users will never see it. It will be useful to differentiate between the different emails in the "My emails" section.
- Write the email's subject: it will be the subject that the email has when sent; therefore, it will be visible to the user.
❗IMPORTANT: You will have to write the subject in the the languages you have in your event. To change the language, you will only have to click on the language tab.
- If you chose to create an email from a template, you will have to ensure the texts and links' adaptation.
- If you chose to create an email from zero, here you will be able to paste the HTML
❗IMPORTANT: Do not leave any language without content. If a user has configured receiving the email in that language, they will receive an empty/blank email. If you are going to generate emails in just one language, copy and paste the same content into the different language versions.
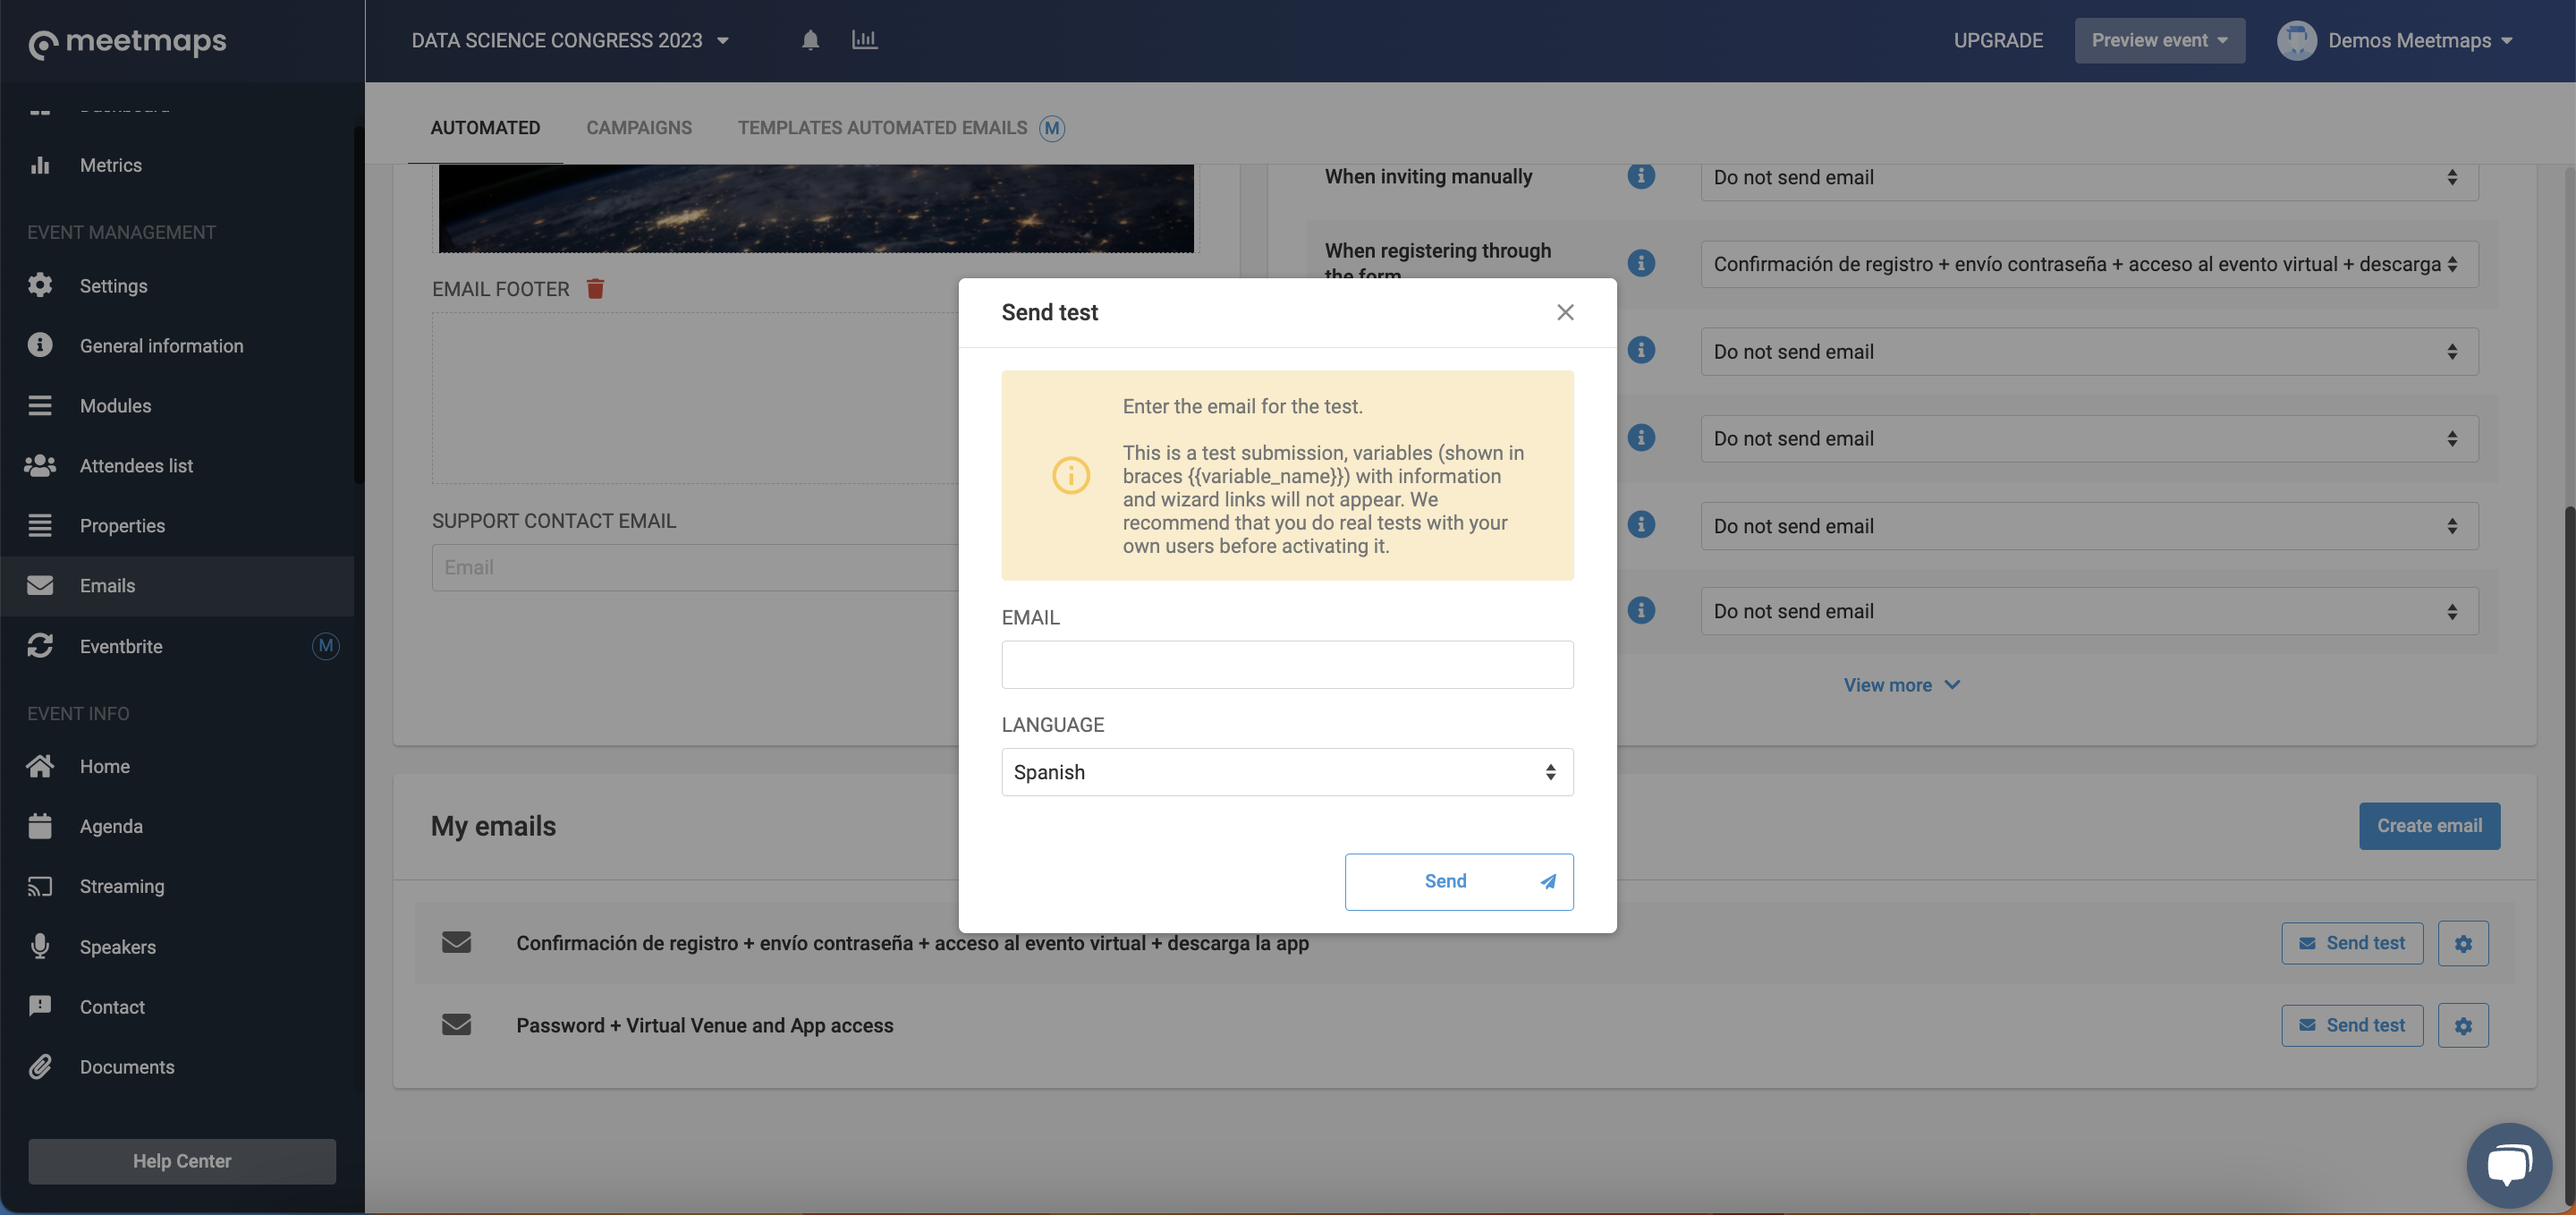
Step 3: Send a test
When you have created the email, you will be able to send as many tests of the email as you want. To see this process step by step, check the👉 How to send an automated email test? article.
It is important that when you receive the test, you check that the links or buttons function correctly.
Step 4: Linking the email to the sending time
To conclude and once you have the final version of the email, you must link it to the corresponding action in which you want the email to be sent. To do this, go to the section Moment of delivery and link it to the action you want.
To understand what each sending time means, take a look at the article👉 What does the sending time of automatic emails mean?
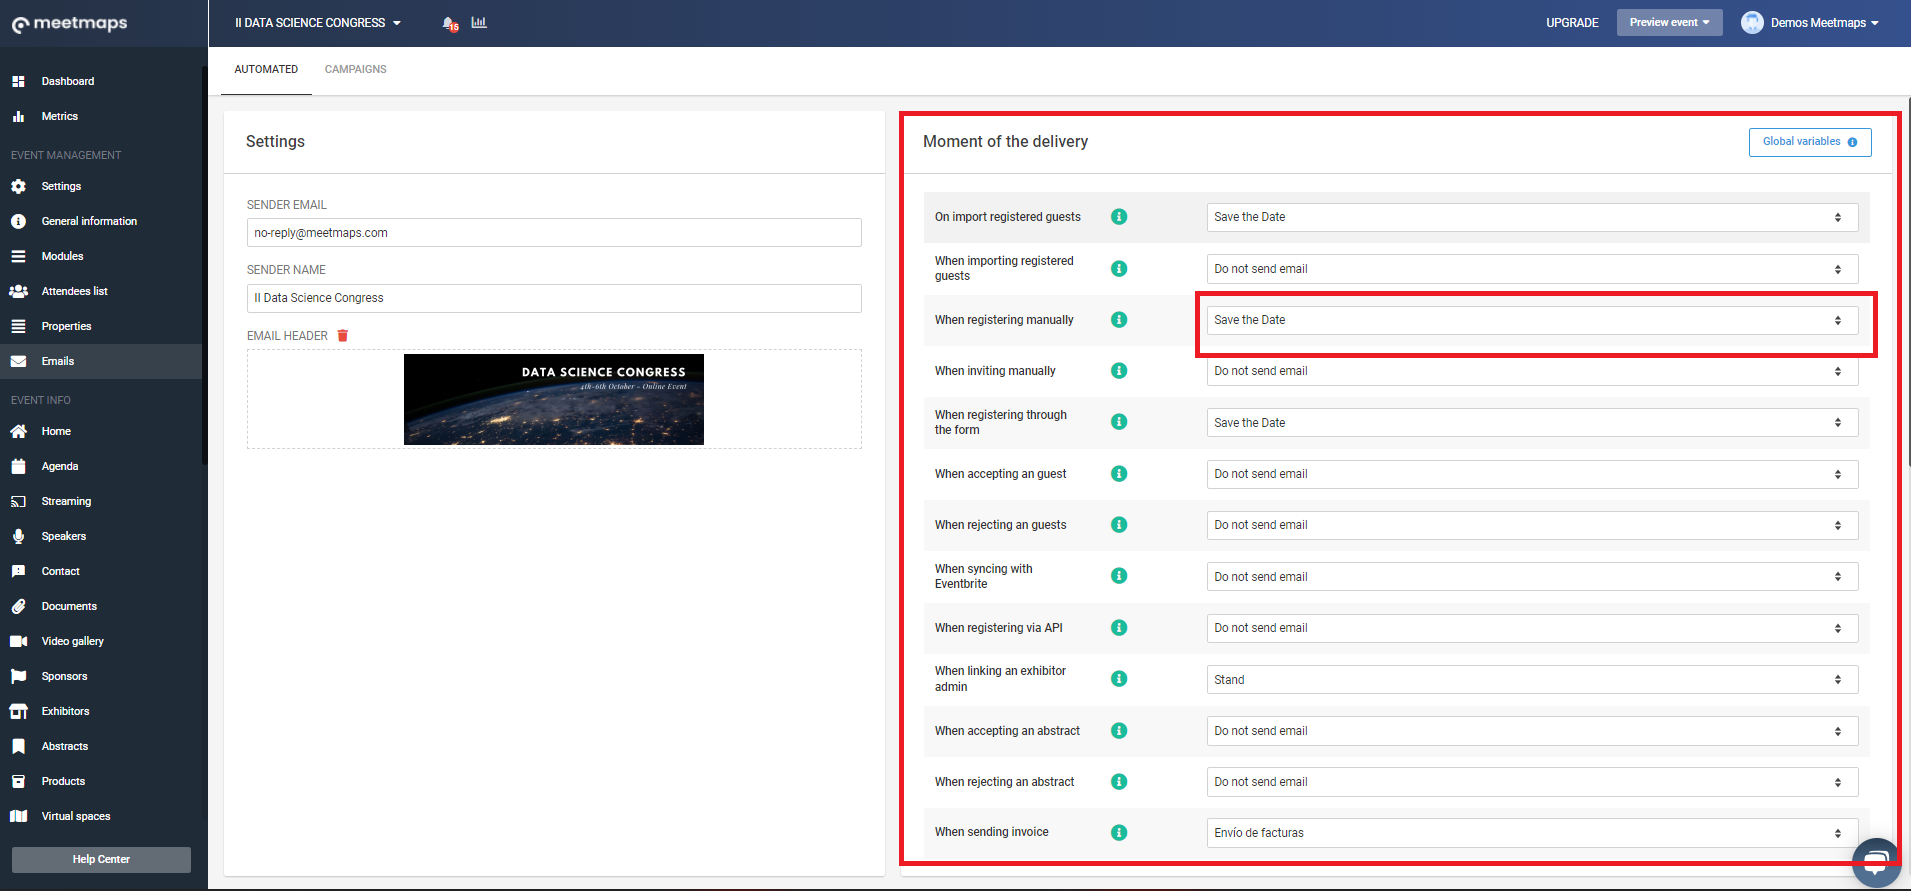
❗IMPORTANT: When you link the email, it will be sent automatically when performing the corresponding action and you must make sure that it is the final version and that all the links or buttons work correctly.
👀 Be careful, because if the user or organizer performs the action before making this linking, the users will not receive any automatic email and the only way you will have to send them the email will be by sending a campaign. 👉 What are email campaigns?
Congratulations! You now know all the steps to follow to schedule automated emails ✉️ 🚀.