Available for these licenses:
![]() Event App Pro, Enterprise
Event App Pro, Enterprise
![]() Virtual Venue Pro, Enterprise
Virtual Venue Pro, Enterprise
![]() Suite Pro, Enterprise
Suite Pro, Enterprise
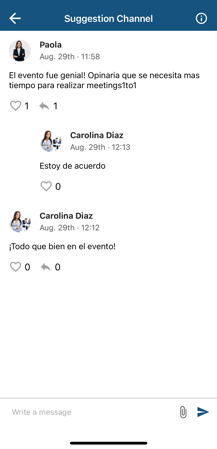
In the "Channels" section, attendees will be able to share ideas, participate in a lively discussion forum or answer questions on a specific topic and thus liven up the day. This way, they will have a sense of community and connection when sharing their opinions.
This section allows you to have:
- Public channels: accessible to all event attendees.
- Private channels: accessible only to a limited group of attendees (previously selected and assigned to a unique selection property)
Configuration
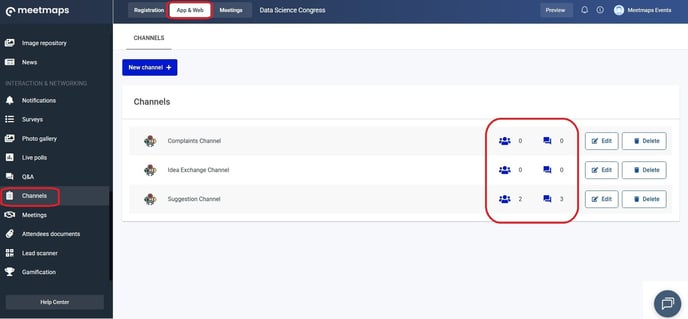
1. In App & Web > Channels click on "New channel +".
 2. Customize the settings for that channel.
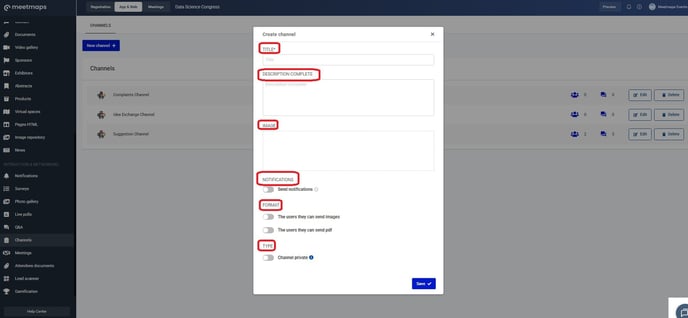
IMPORTANT ❗To make a channel private, activate the "Private Channel" switch and then select the attendees who have access. They must be registered on the attendee list.
NOTE 🗒️: If you enable the Send notifications button, a push notification will be sent to all attendees in the channel whenever an attendee posts in that channel. If you have a web event, you can configure an automatic email in the Emails section so that attendees receive it.
3. From the Dashboard you can see the interactions:
NOTE 🗒️: There is an automated email linked to the Channels section that needs to be sent and activated:
- New message in a channel
As the event administrator, you have the option to delete messages written by attendees by clicking in "Delete message"..

As shown
Web 💻
To access a channel, the attendee has to click on the "Enter" button.

- Attach files: click on the clip icon and select the document you want to attach to the channel.
- Like the messages contained in the Channel.
- Attach links to other websites in the messages you write so that other attendees can see its content.
- Reply to messages from other attendees: click on "Reply" under the message you are interested in replying to.
App 📱