You can create tags in the video gallery to sort and filter them in your virtual event.
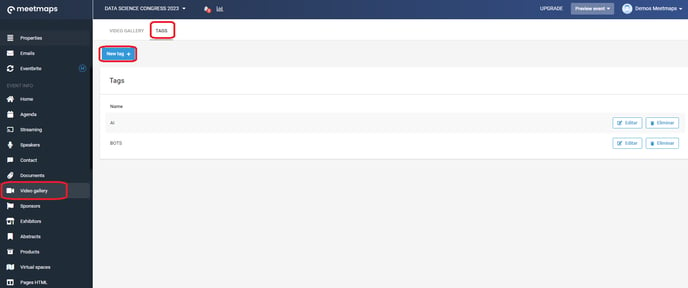
In the video gallery module, you can create tags to classify the different videos you upload. To do so, you must go to the App panel, in the Video Gallery section of the left side menu and click on the Tags tab.
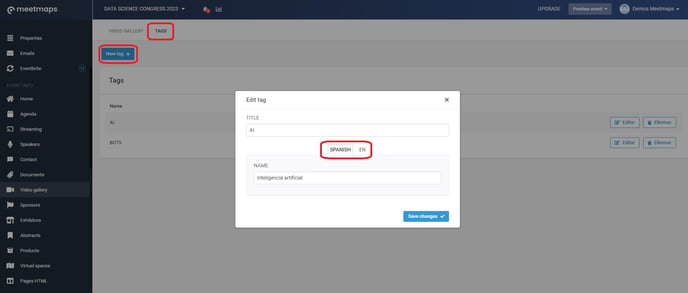
To create a tag you must click on the "New tag" button and the following tab will open:

- The title section will only be visible to the event administrator, it will never be visible from the virtual event.
- The category name will be what appears in the virtual event.
NOTE: Keep in mind that if the event is multi-language, you will have to put the name of the tag in as many languages as the event has.
Once the tag is created, click on "Save".
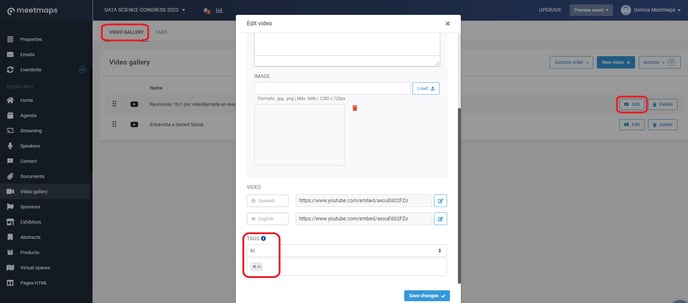
Once all the tags are created, go to the "Video Gallery" tab in the top left menu.
Click on the "edit" button of the videos and in the "tags" section a dropdown will open with all the tags you have created. Select the tags you want to link to the video.

NOTE: we can allocate more than one tag per video.
Once the labels are assigned click on the "save changes" button.
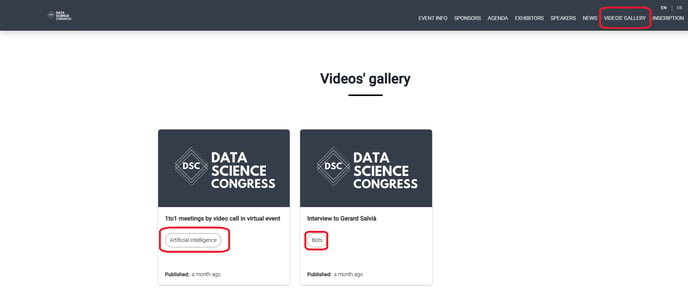
How it is displayed in the virtual web event
From the virtual event, attendees will see in the video gallery the different tags on the left side, and by clicking on them, they will be able to filter the videos of the category they are interested in. In addition, these tags will also appear on the video when it is playing.

You now have the tags ready for the video gallery of your virtual event 🚀.
If you want to know how to configure the video gallery module, do not miss this article
-1.png?height=120&name=BLAU__EMBLEMA%20PRINCIPAL%20SENSE%20ESLOGAN%20(1)-1.png)