IMPORTANT❗ This function is only available if the event organizer has contracted PREMIUM EXHIBITORS.
If you are an exhibitor of an event you can customize your stand with your company information and corporate branding.
How to access your stand?
You will receive this access through an email sent to you by the event organizer, providing the link to your stand's portal, a username, and password.
How to customize your stand?
Below, we discuss each step and the options available to you to get the most out of your exhibitor stand 💪:
1. Access the portal link and enter your username and password.
2. Once done, you will enter the portal of the stand, with 5 sections:
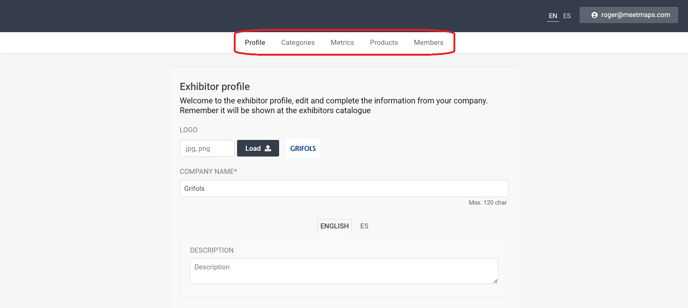
PROFILE
- Logo: square, in .jpg or .png format.
- Company name: up to 25 characters.
- Description: you can add a brief description of the company. Remember to fill in this field in the different languages enabled in the event 💁.
- Phone number.
- Contact email.
- Web page.
- Social networks: LinkedIn, Facebook, Twitter, Instagram.
NOTE 🗒️: both the website and social media require the full URL (including https://).
- Custom banner: if you activate the switch, you will be able to upload a 1600px x 250px image as your stand's banner.
- iCustom background: you will be able to configure a background image for your stand. The recommended sizes are 2400px x 1536px (remember to activate the switch to make it visible).
- jVideo: here you have the option to upload a company video in some of the platforms.
NOTE 🗒️: take a closer look about the format of the video depending on the video platform
- Contact: you will be able to activate your profile for attendees to send you messages 💬 or request meetings.
- Custom HTML: section to configure with HTML (only available for the Web version of the event).
- Documents: if you have brochures or any other documents that you think are interesting to share, you can add them in this section, in .pdf, .jpg or .png format up to 6Mb per file. You will have to assign a name to each document when you upload them and click on the "Add" button.
- Photo Gallery: Add photos below, they will appear on your event exhibitor profile.
- Configure the lead scanner privacy policy: in case you are going to use this function (check with the event organizer).
IMPORTANT❗remember to activate the switch ✅in these sections so that the configuration is visible.
CATEGORIES
You will be able to assign the category to which your company corresponds, according to the classification established by the event organizer.
METRICS
In this section you will have the metrics and data about your stand, such as: visits to the exhibitor, documents downloaded, meetings scheduled, agendas held, etc.
+info 👉Stand Administrator Guide - Metrics
PRODUCTS
Here you can add the products or services that you want to advertise on your stand.
NOTE 📃: The product categories will be defined by the event administrator.
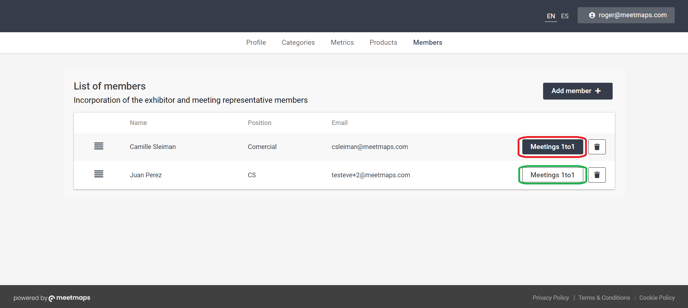
MEMBERS
Here you can add members of your team so that attendees can contact them via messages.
Additionally, if there are meeting sessions with exhibitors at the event, you can activate the members with whom attendees can schedule meetings.
NOTE 🗒️: Additionally, if there are meeting sessions with exhibitors at the event, you can activate the members with whom attendees can schedule meetings. Activate it by clicking on Meetings 1to1
🍎 > you have chat + Meetings activated
🍏 > only chat activated