This type of Meetings 1to1 is ideal when you want to allow meetings among your attendees, taking into account their different profiles.
If you have attendees at your event who fit certain roles or profiles, you can create custom meeting sessions, making it possible for some roles to request meetings from others.
IMPORTANT❗ you need to have previously created a Property with the different characteristics or roles and link it to the attendees' profiles. In this article, we explain how to do it.
NOTE 🗒️: activate the module Meetings 1to1 in App & Web > Modules.
How to create Meetings 1to1 meeting sessions with roles 🗨️?
1. In Meetings > Summary of Sessions click on the "Create session" button and choose the "Matchmaking" option.
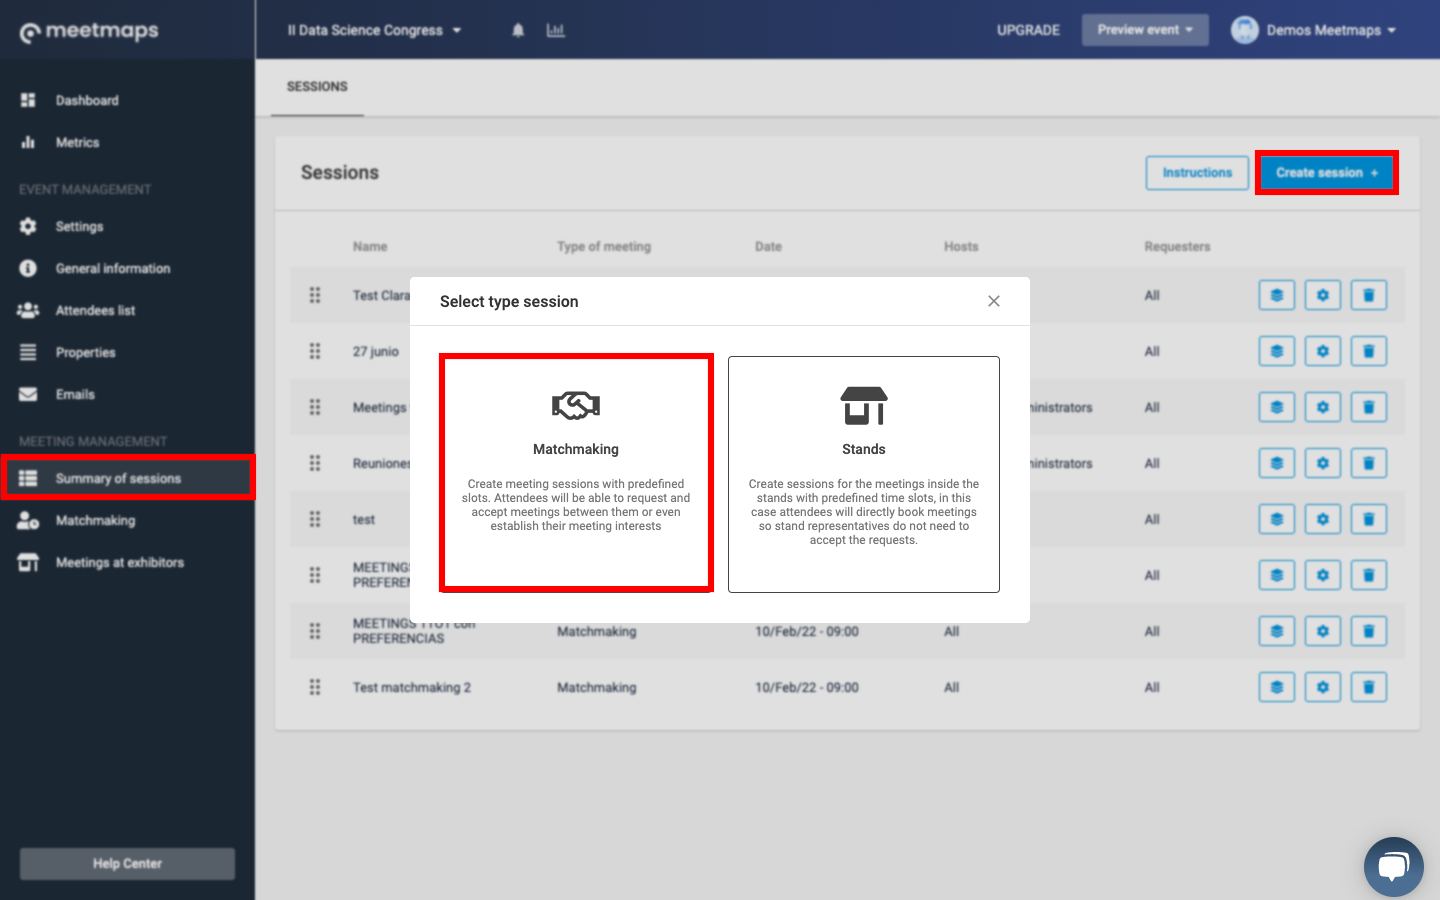
2. A pop-up appears to complete the configuration fields, which include 3 different sections:
"Session information" section:
- Name: you will need to assign a name to the session. This name will be visible to the attendees, so make sure it is appealing 💁.
- Duration ⏰ : duration time of each meeting slot.
- Start date 📅 : date on which the Meetings 1to1 session with roles of your event will take place.
❗There is no end date because for each day of the event you will have to create a different session. - Start time and end time: time range in which the meetings will take place.
- Hosts: in this case, you must select one or more of the profiles from the drop-down, so that only these roles will host the meeting, i.e. these roles will receive meeting requests.
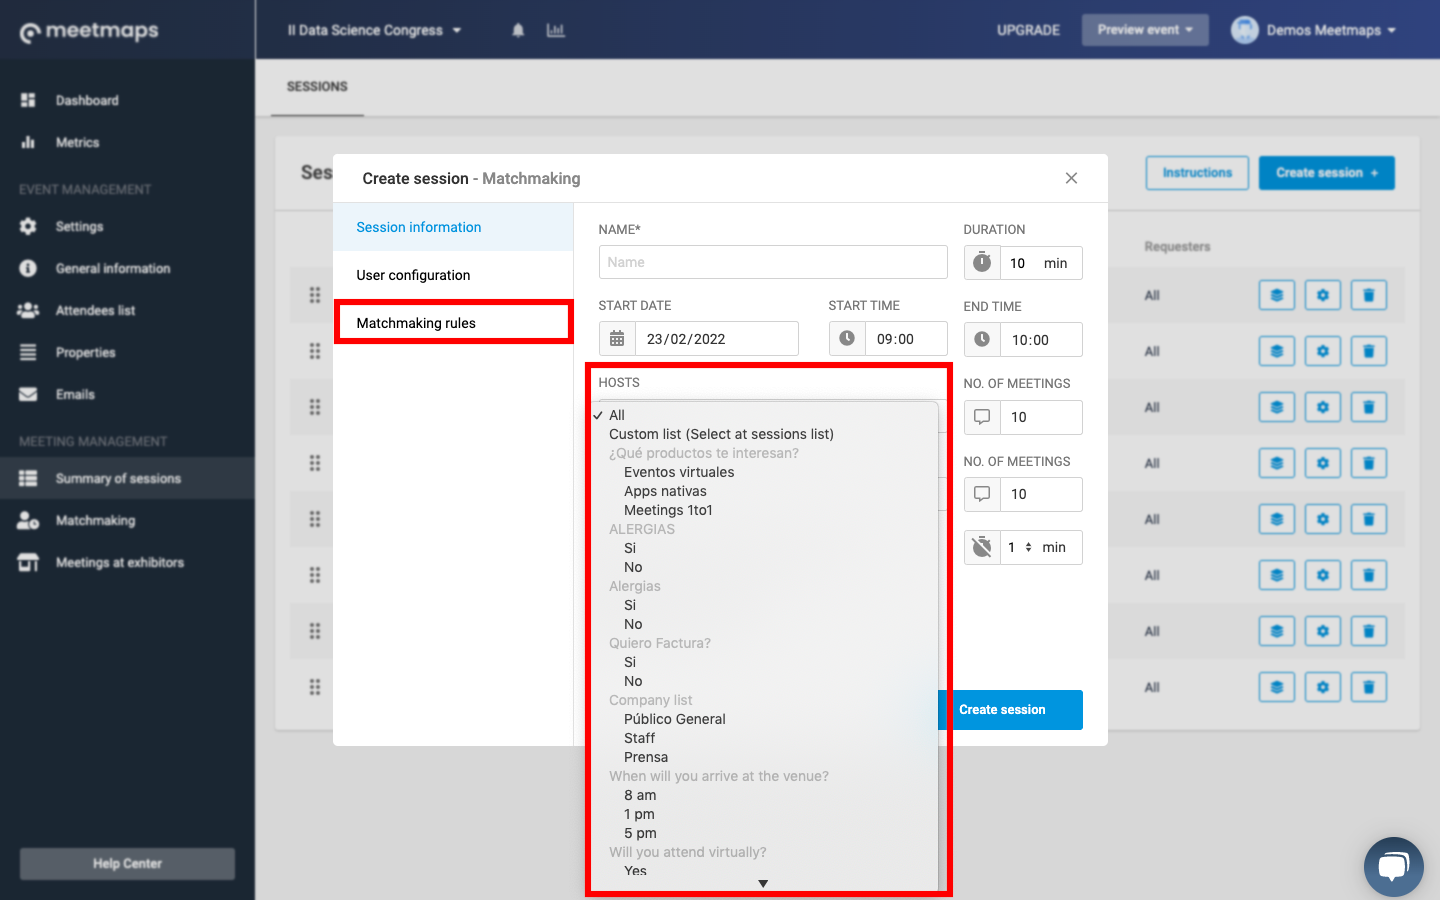
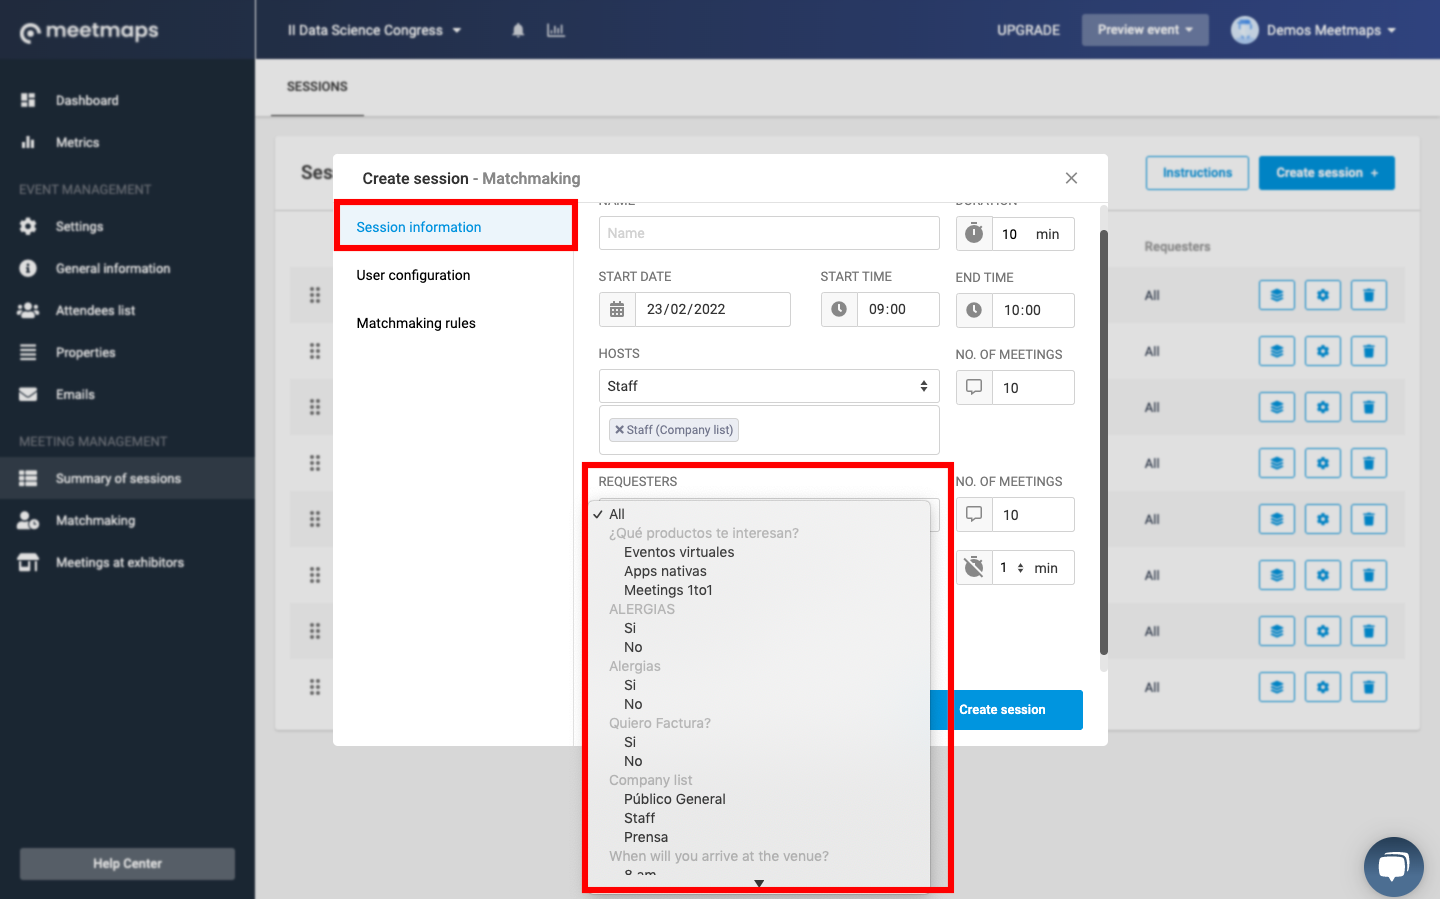
- Requesters: here you will also have to choose one or more roles that will have the possibility to request a meeting to the host role configured in the previous step.
- Number of meetings 🔢 : indicate the maximum number of meetings you want to allow to attendees during this Meetings 1to1 session with roles. It should be related to the start and end time, and the duration of the meeting slots.
- Pause time between meetings ⏳: you can enable the possibility of a few minutes pause between meetings. To do so, activate the switch and indicate the time.
- Video call meetings: for online or hybrid events 💻 , you must activate this option. In the case of face-to-face events, it is not necessary.
- Meeting preferences: for Meetings 1to1 meetings with roles this variable does not apply.
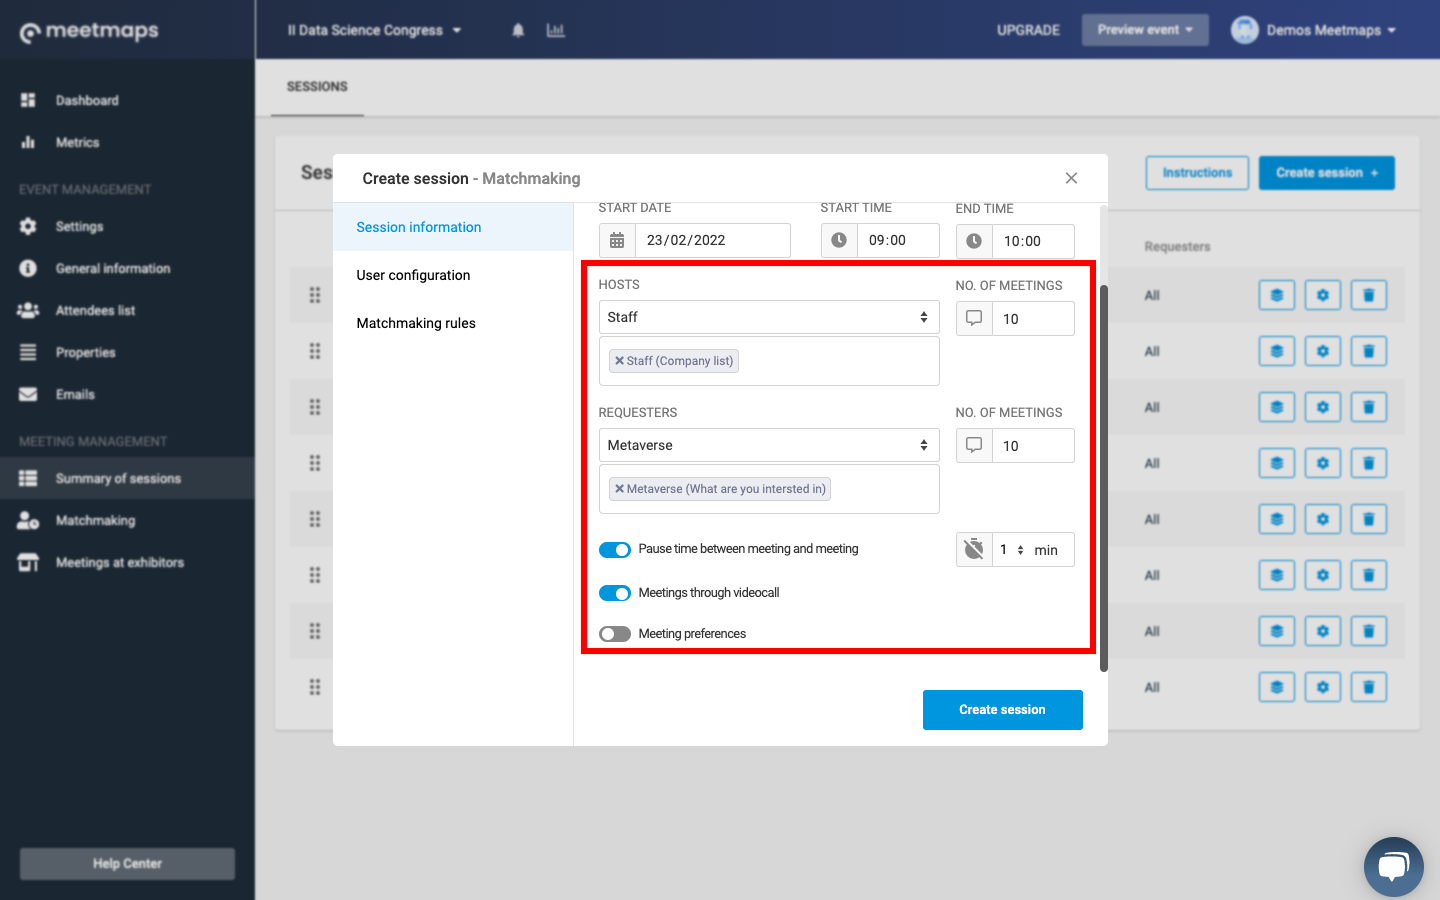
IMPORTANT❗The date, start and end time, hosts and requesters can't be modified once the meeting session has been created.
"User configuration" section:
Activate here the tabs that will be displayed within the session in the event so that the attendee can manage their meetings.
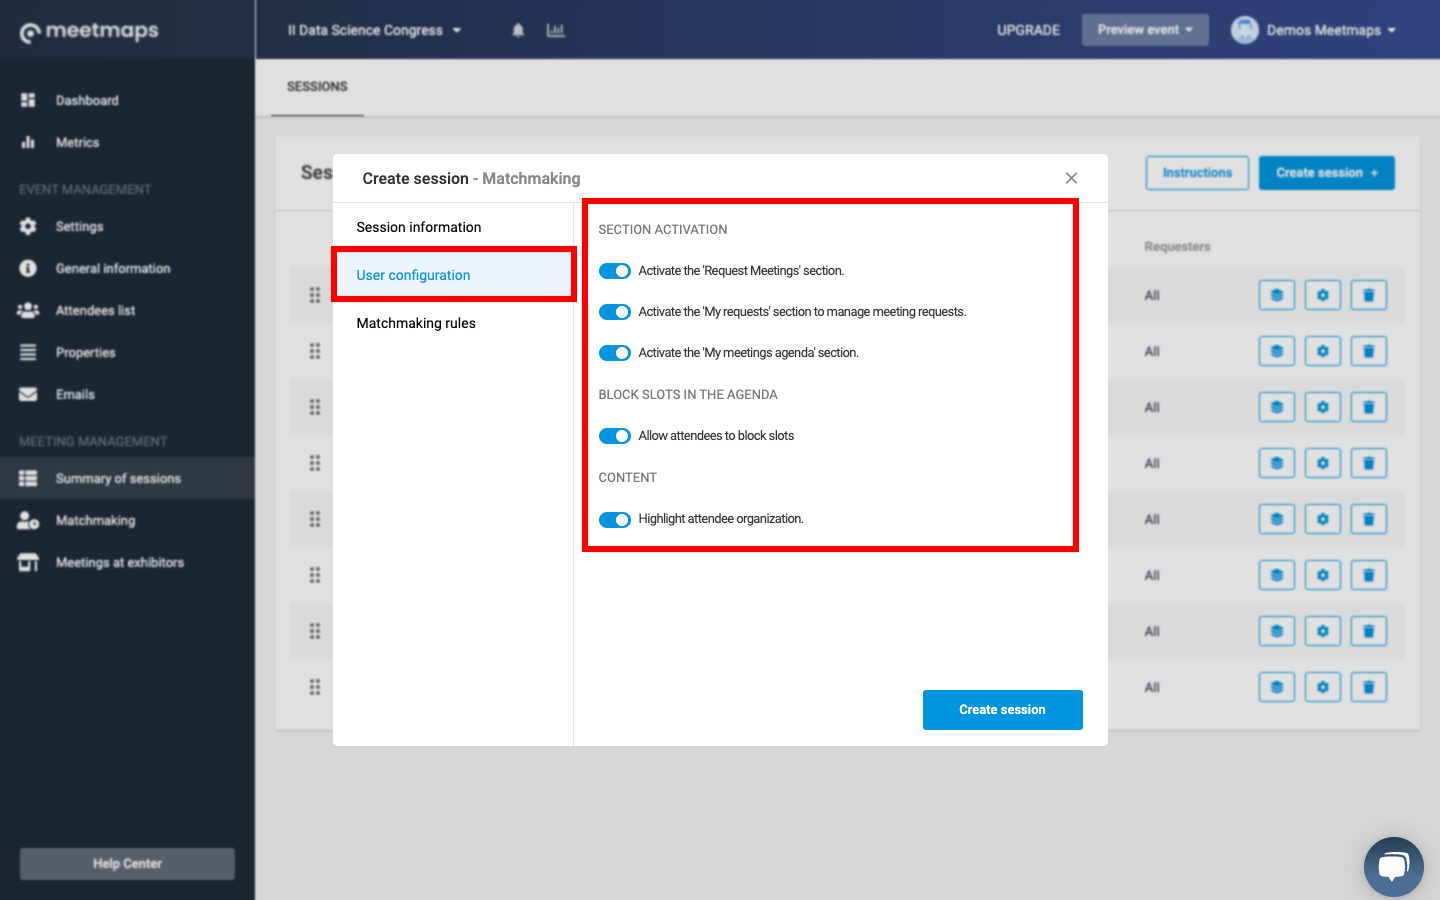
- Activate the "Request meetings" section 💐: in this section users will be able to view the profiles of all attendees to request a meeting.
- Activate the "My requests" section 🎁 to manage meeting requests: this section will display the meeting requests and their status.
- Activate the "My meetings agenda" section 📋 : here the attendee will not only be able to see the meetings that have been confirmed, but also access them once the day and time arrives.
- Allow blocking slots to attendees 📵: this feature allows attendees to block certain time slots so that others cannot request a meeting from you.
NOTE 🗒️: to recommend certain profiles to users, configure the "Matchmaking rules" section.
"Matchmaking rules" section:
In this optional section you have the possibility to recommend certain profiles to your attendees and highlight them in the "Request meetings" section to offer a higher quality networking and make it easier for your attendees to find profiles that may be of interest to them. + info 👉 What are Meetings 1to1 with suggestions ?
NOTE 🗒️: When you select more than one role, it means that it will suggest the profiles with role 1 and the profiles with role 2, i.e. it will not show as suggested the profiles that have role 1 + role 2, instead it will show the assistants that have role 1 (even if they do not have role 2) and the assistants that have role 2 (even if they do not have role 1).
If you are interested in showing suggestions to other user roles, you will have to create more suggestions in this section. Simply fill in a title and press "Enter" on your computer and repeat the process.
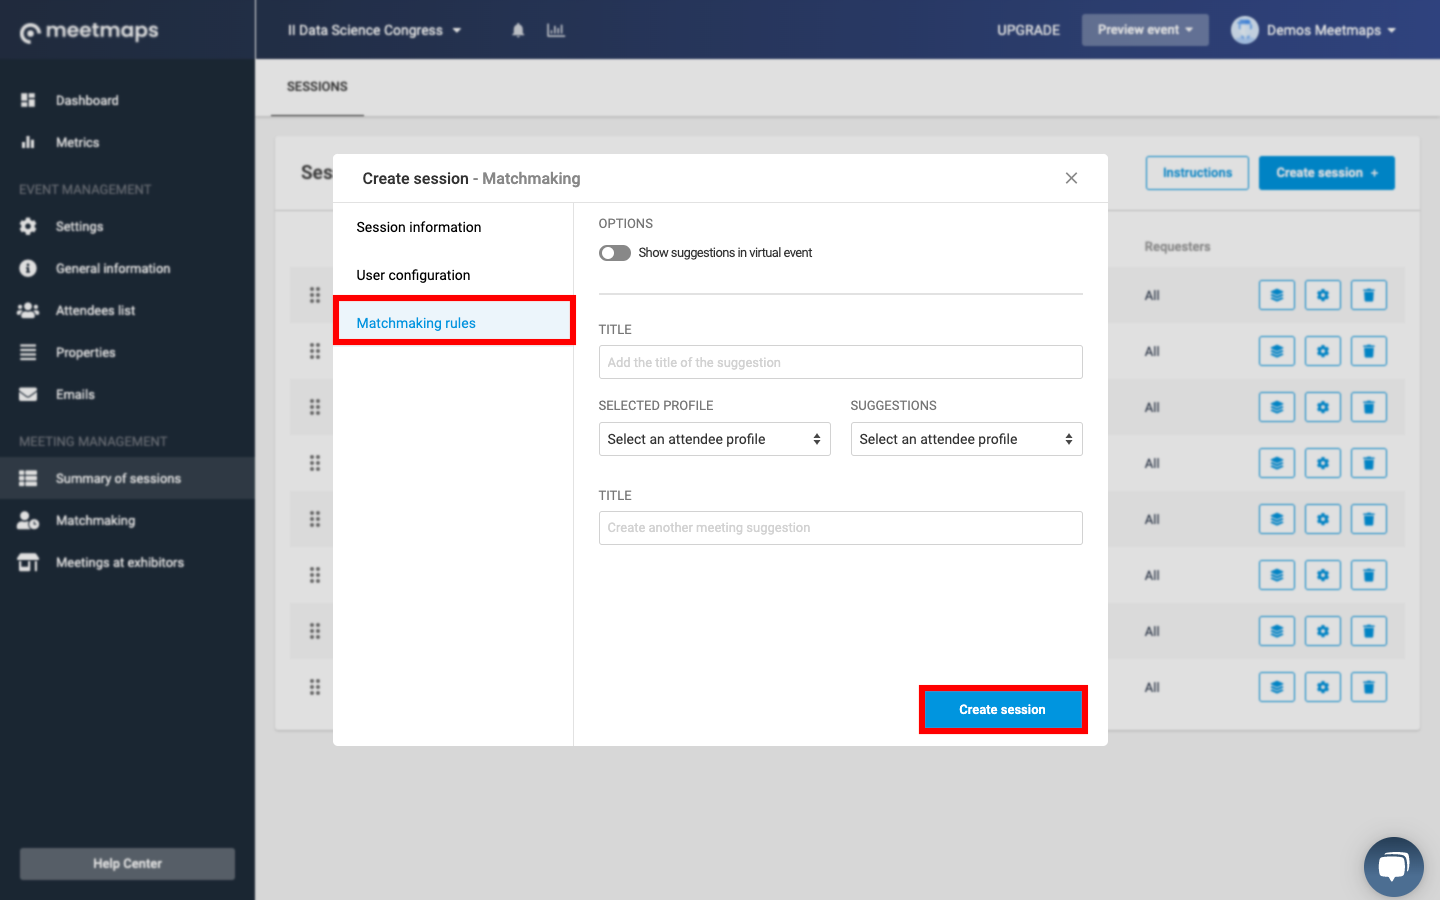
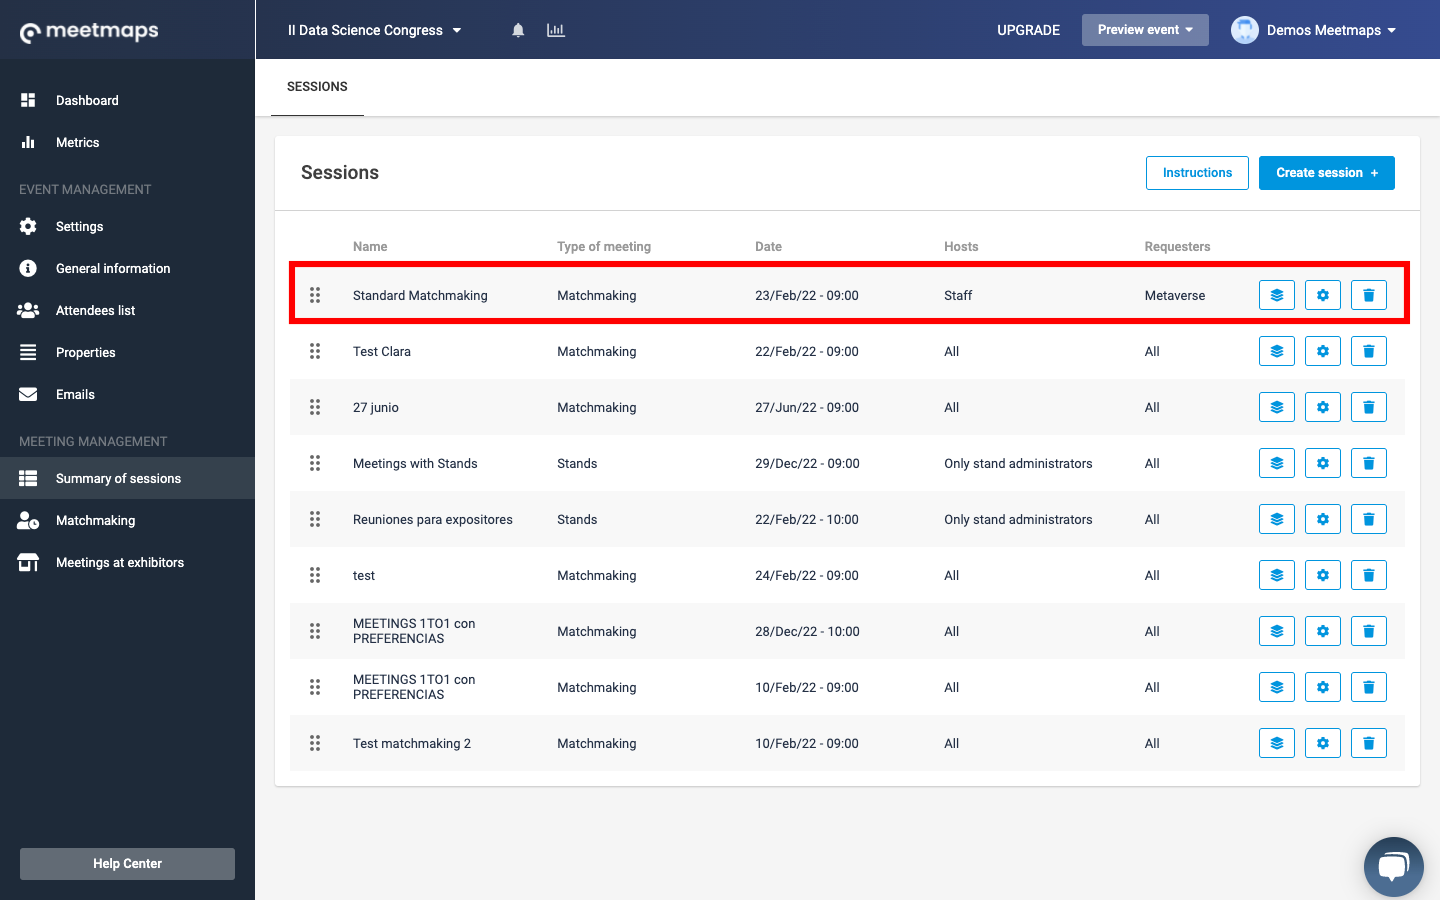
3. Lastly, you will need to click on the "Create Session" button and the Summary of Sessions section will appear. Here, you will be able to edit some settings ⚙️of the session, assign tables to hosts (useful only in face-to-face events), delete 🗑️ the session and sort it among the other sessions with the "6 dots" button on the left (it is a drag and drop🔃 button).
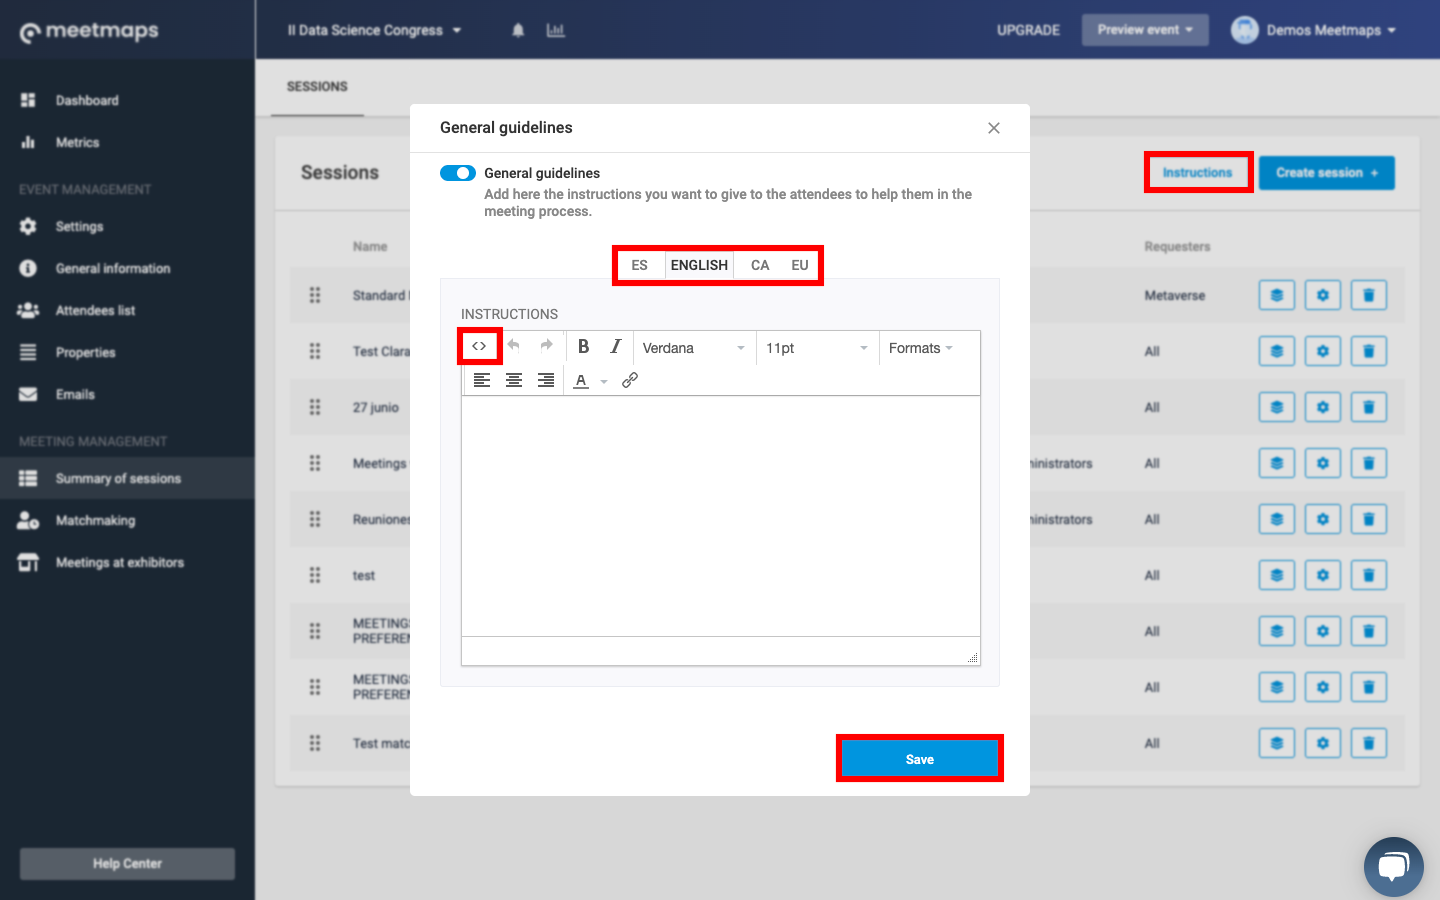
NOTE 🗒️: you can write brief instructions for your attendees by clicking on the "Instructions" button. You can do it in any of the languages of your event, and it will be visible in a common way for the different sessions you create.
To learn how Meetings 1to1 sessions with roles are displayed 👉 Meetings 1to1 between attendees from the attendee's point of view
-1.png?height=120&name=BLAU__EMBLEMA%20PRINCIPAL%20SENSE%20ESLOGAN%20(1)-1.png)