It is very common to send a post-event email to those who have attended, in the case that you have checked in attendees to the event through the Check-in App of Meetmaps (+ info👉 What is the Check-in section?).
Typical post-event emails are:
- Thank you email, with or without a survey.
- Email with the certificate of attendance.
Configuration
We explain how to do it step-by-step, with an example of sending the certificate of attendance.
Creating the segment/audience
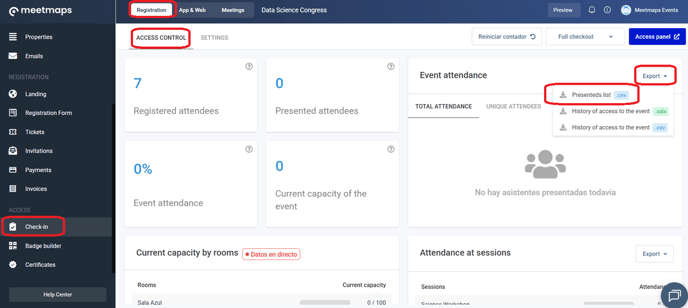
1. In Check-In > Settings, export the List of presented (those who have been checked in).
2. In Properties > Import, create a single-selection property to segment the attendee list. Name it Check-in, and give it one option: Attended YES.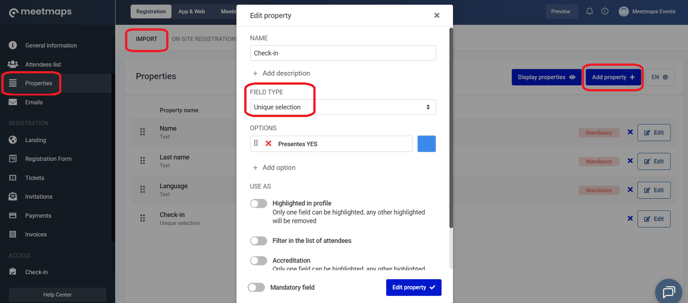
3. In the Attendee List, export the import template.

4. Fill in only the following two columns in the Excel file, using the data from the list you exported in step 1:
- Check-in > Attended YES

Then, import this file, making sure to leave the switch "Make empty fields modify the previous value, the password is not affected" disabled.

This will ensure that only the Check-in > Attended YES column is updated, leaving all other attendee properties unchanged.
Sending the email
5. In Emails > Campaigns, create the email for sending the certificate. Use a module like "Add Button" and set it up as follows:
- If you created the certificate in Registration > Badge Builder, use the "Download badge" action.

- If you created the certificate in Registration > Certificates, use the variable { {certificate_url} } (without spaces between the brackets).

6. Send the campaign to the Check-in > Attended YES segment.
IMPORTANT❗Remember to generate the badge or certificate beforehand.
