-1.png?height=120&name=BLAU__EMBLEMA%20PRINCIPAL%20SENSE%20ESLOGAN%20(1)-1.png)
Discover how to upload basic information about exhibitors for your virtual event more quickly and easily.
If your event has multiple exhibitors, you can save a lot of time by importing the basic content for the stands in bulk, thus avoiding manual creation one by one.
IMPORTANT❗: If you have premium stands, you have the advantage that exhibitors will already be created, but you will need to enter each one to activate the premium stand's specific features and upload content.
Here are the steps you should follow:
- Go to the Exhibitors section, which you can find in the left sidebar menu.
- Next, click on the "Actions" button and select the "Import Exhibitors" option.
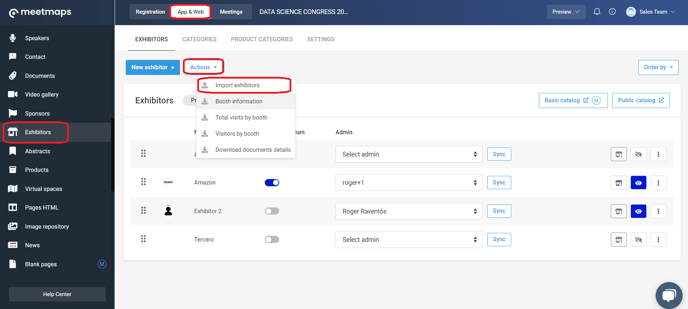
- After completing the above steps, a pop-up called "Import Exhibitors" will appear, outlining the steps to follow in the process of importing your exhibitors.
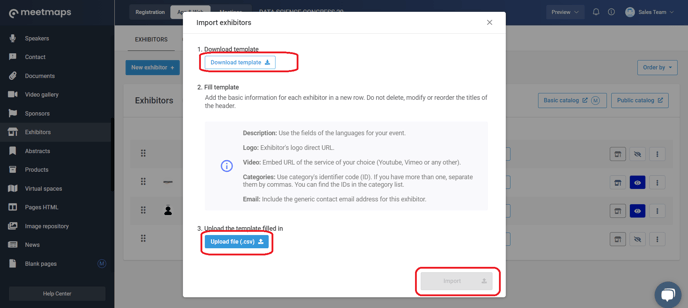
- The first step is to "Download the Template." Clicking this will download the document in .csv format, as you must keep in mind that when uploading the template's content, it must be in the same format.
- Once you have downloaded the template, add the information you need about the exhibitors by copy-pasting from your original database.
Para rellenar la plantilla ten en cuenta:
- Category: If you have categories for exhibitors, use the category ID instead of the category name. In the Exhibitors section's Categories tab, you will see the ID next to the created category to be used in the import template.
- Social Media: Provide the full URL of each social media profile, e.g., https://www.instagram.com/meetmaps
- Logo: You can't attach a logo directly through Excel; it must be uploaded online with an associated URL. If the logo is not online, you can use our internal image repository to generate the URL. Learn how by clicking here.
- Video: Always use the embed URL for the video.
- Description: The downloaded template will have a column for each language available in Meetmaps. Only fill in the description for the language(s) used in your event.
IMPORTANT❗❗: Do not change the order of the template columns, and do not delete or modify the header titles.
PRO-TIP💡: As a recommendation, upload the template to Drive and use Google Sheets to manage and fill in the data from there.
6. The second step is to download the filled document in .csv format. This allows you to proceed to the third step and upload it to your Event Management Software using the green button in the "Upload File (.csv)" pop-up. Once this step is completed, the "Continue" button will turn green, and you can click on it.
Once the exhibitor import process is complete, you will see them on the Dashboard of your Event Management Software.
Congratulations! 🚀 You now have the content of your exhibitors imported into your virtual event."