-1.png?height=120&name=BLAU__EMBLEMA%20PRINCIPAL%20SENSE%20ESLOGAN%20(1)-1.png)
- Knowledge Base
- Event information
- Sponsors
How to create Sponsor categories?
Use the categories to organize and give different levels of importance to the Sponsors of your event.
Sponsor's categories are used to divide and give different levels of importance and/or prominence to the Sponsors of your virtual event.
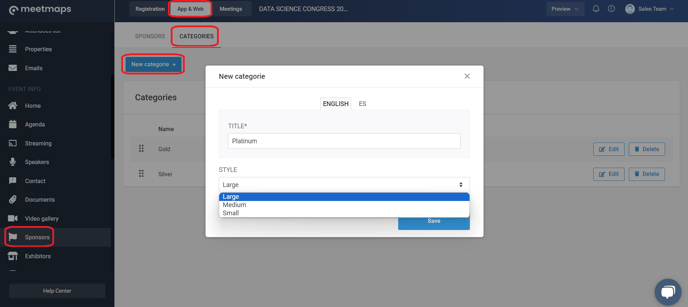
To create categories of Sponsors, go to the Sponsors tab that appears in the side menu, on the App&Web Dashboard. Once there, click on the "Categories" tab:
- Click on the "New Category +" button.
- Then, two options for the configuration of your Sponsor Category will appear. The categories to complete are the following:
- Title: in which you will indicate the name of your Sponsor Category, such as Gold, Silver, Sponsor.
- Style: this field will determine the importance you give to the Category indicated in the previous step by its size, to choose between Large, Medium, or Small. - To save the content you have entered in "New Category+" be sure to press the green "Save" button.
NOTE 📒 If you want to sort your Sponsors or change their arrangement in your virtual event, you can click on the six dots that appear on the left side of each sponsor and drag them up or down as you wish.
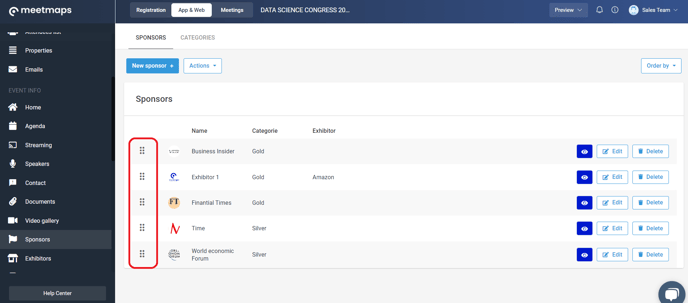
4. Once the Category is created, simply add the information of the category to the sponsor.