-1.png?height=120&name=BLAU__EMBLEMA%20PRINCIPAL%20SENSE%20ESLOGAN%20(1)-1.png)
Discover how to import your database of attendees -invited or registered- in a very easy and fast way
To import attendees in bulk, you can do it by carrying out the following steps:
- Click on Attendees List > Import > "Import registrants" or "Invite people to register" -invited- option.
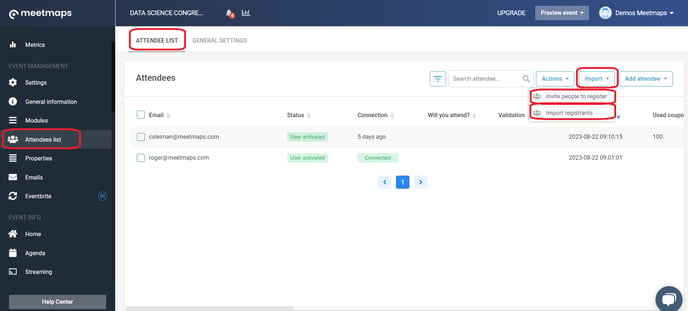
NOTE🗒️: If you want to know the difference between "Registered" and "Guest" status👉What status can an attendee have in a virtual event?
2. Once the previous step has been conducted, a screen called "Import Attendees List [1/3]" will appear, in which the steps to follow in order to import your attendees are mentioned.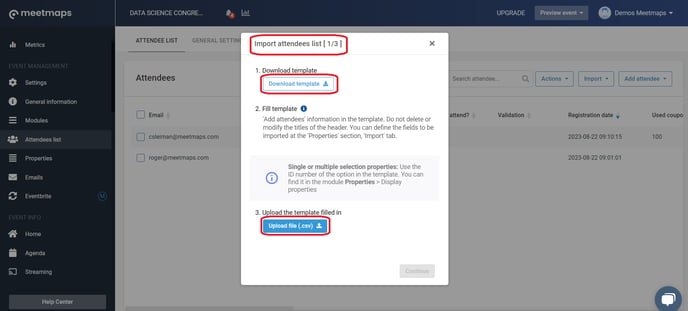
3. The FIRST STEP to follow is "Download the template", by clicking you will see two download options, "Download in .xslx format" or "Download in .csv format". Download the option that you feel the most comfortable with, taking into account that to upload it later, you will have to do it in .csv format.
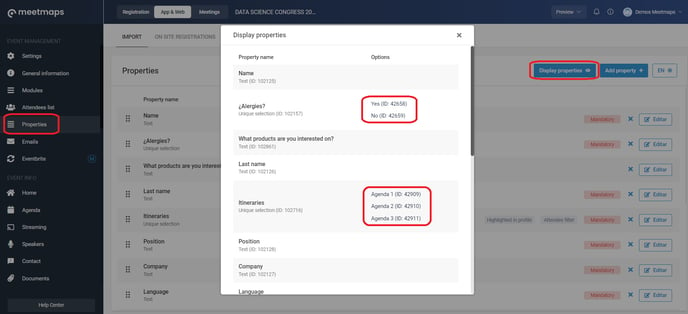
NOTE 🗒️: The properties to import are the ones defined in the Properties > Import section.
+ info 👉What can I do in the "Import" tab of the properties module?
4. When you have downloaded the template, add in it the information that you consider the most relevant about your attendees by copying your original database.
NOTE 🗒️: For the properties of unique selection and multiple selection, you need to enter the variable ID in Excel.
IMPORTANT ❗: Do not change the order of the template columns, delete or modify the header titles.
It is also important to note that each attendee must have a unique email 🙋.
TIP 💡: As a recommendation, we suggest you upload the template to Drive and use Google Sheets to manage it and fill in the data from there.
- Online Spreadsheet Editor for Google Drive / Docs
If possible, avoid using Microsoft Excel as it may have problems formatting and encoding the information and will not allow the platform to import the list correctly.
5. Export the document in .csv (UTF-8) format, so you can upload it to your Event Management Software using the "Upload File (.csv)" button.
6. Subsequently, the window "Import attendees [2/3]" will appear.
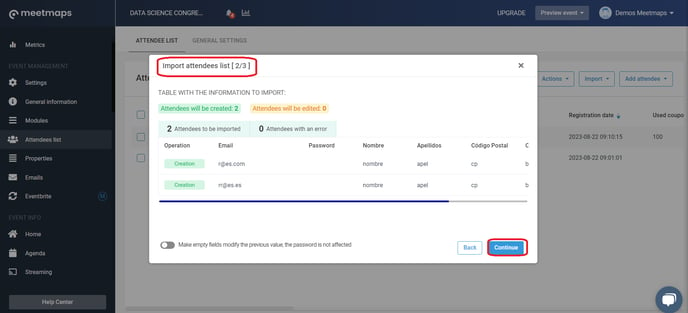
Here you can view the attendees that will be created from scratch, that is, who are not at the event. And the attendees who will be edited, that is, those attendees who are already at the event, but who have additional or modified data.
On the screen you will also find two tabs:
- "Attendees to be imported", where you will see all the attendees that the platform has correctly recognized and are ready to import.
- If there is an error, a second tab will appear called "Attendees with an error". Here you will be able to see all the attendees that the platform did not recognize along with the reason for the error.
This way you will always have control over the attendees you are importing and those that are not being recognized, allowing you to correct them in your database and restart the process if necessary. When you have verified that the content has been entered correctly, simply click the "Continue" button.
NOTE 📃: If you have already performed a database import on the platform and need to do a second import to include new registrants, we recommend that you delete the attendees that have already been added to the event database.
However, if there are repeats, the platform will automatically detect these emails and show you this information in the "Attendees will be edited" tab.
It will indicate that these attendees are already registered on the platform, which will allow you to maintain clear control over the data you are importing. This way, you can add new records without duplicating previously entered information.
TIP 💡: In this step, you will always have a visible counter of the number of attendees you are importing, so you can check that it matches the number of attendees that you are supposed to import.
8. Finally, another document will appear called "Import attendees list [3/3]", in this segment you do not have to fill in its content, click on the "Import" button to finish the import process.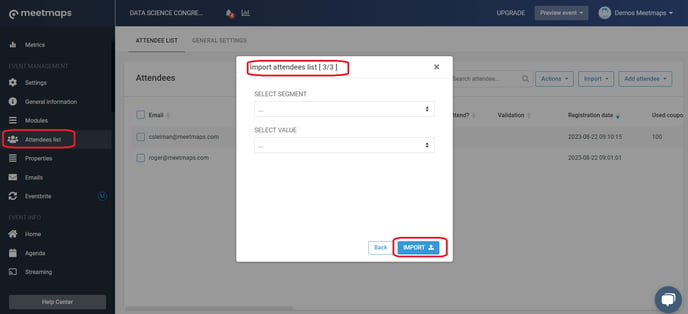 Once the Import process is finished, the imported attendees will appear in the Attendee List section with the Registered or Invited status (depending on your step 1 import choice).
NOTE 🗒️ There are two automatic emails linked to the mass import of attendees to be configured, depending on whether they are GUESTS or REGISTERED:
- When importing registered attendees
- When importing guest attendees
If you want to know how to add an attendee/attendee manually (1 to 1)👉 How to manually register an attendee?
Congratulations, you already have your list of attendees imported to your virtual event 🚀!