Discover how to create HTML pages for your event.
Available for these licences:
![]() Access Starter, Pro, Enterprise
Access Starter, Pro, Enterprise
![]() Event App Starter, Pro, Enterprise
Event App Starter, Pro, Enterprise
![]() Virtual Venue Starter, Pro, Enterprise
Virtual Venue Starter, Pro, Enterprise
![]() Suite Starter, Pro, Enterprise
Suite Starter, Pro, Enterprise
What are HTML pages?
Meetmaps' Event Management Software is highly modular but has its limitations. Therefore, you can create HTML and embed them in:
- Landing
- Home web
- App
For example, content could be paragraphs, a bulleted list, buttons with links, images, and data tables.
How to create an HTML page 📄?
- In App & Web > HTML Pages click in "Create section+".

- Put a title and a description. Click "Save".

- Click "Add page+".

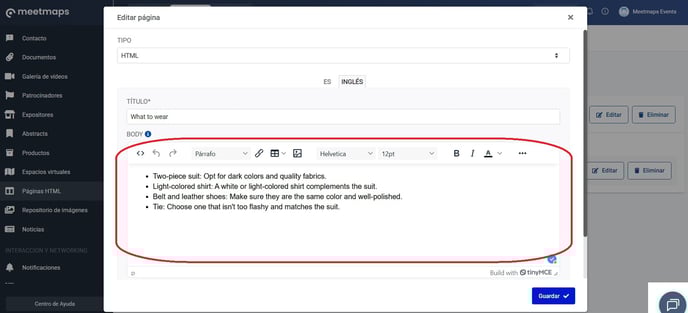
- In the pop-up window, add a title in the languages you've configured. To add the body of the HTML page, you can:
- Use the editor box and its functions
- Click on the "< >" button and edit the code there.

NOTE 📃: to see how the HTML looks:

Both in sessions and in the HTML pages themselves, you can also:
- Make it visible with the "eye button 👁️"
- Delete it with the "Delete' button" 🗑️.
- Edit the content with the "Edit' button" 📝.
- Organize the sections with the "Organize Sections🔃" button.
- Organize the HTML pages within the sections by dragging up or down from the six points on the left.
IMPORTANT❗ The creation of code and HTML modules is the responsibility of the event organizer, as we do not create them at Meetmaps.
How do I embed an HTML page?
Landing💻
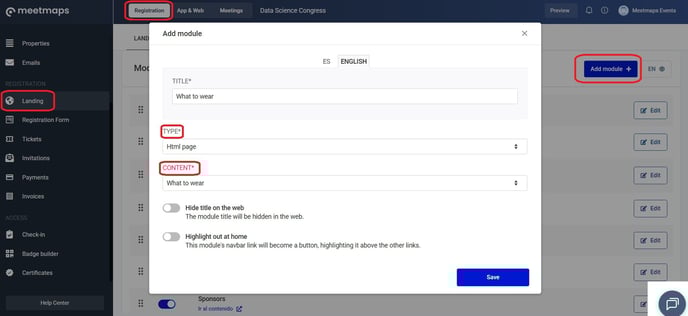
In Registration > Landing add an HTML Page module. Select the content you want (previously added to the HTML Pages section following the steps above). Save the module, activate the button, and it will appear on the landing page.

Home Web💻
In App & Web > Home > Home Web add a "HTML Page" module and the content (previously added to the HTML Pages section following the steps above). Click "Save", activate the switch and it will appear on the Home page.
 App / Web Superior 📱💻
In App & Web > Modules click "New menu+" to create an HTML Page module and select the desired page. Activate it, and select where you want it to be displayed: top web, side app, main app, or lower app.

How it looks on
Landing 🌐

Home Web💻

App/Web superior 📱


-1.png?height=120&name=BLAU__EMBLEMA%20PRINCIPAL%20SENSE%20ESLOGAN%20(1)-1.png)