-1.png?height=120&name=BLAU__EMBLEMA%20PRINCIPAL%20SENSE%20ESLOGAN%20(1)-1.png)
Discover how to configure the modules, streaming and upload content thanks to the Event Management Software
In the previous article we detailed the first 2 steps to follow to configure an event: configure language, time zone, add administrators, configure branding, event name and dates, as well as a brief description of the event.
STEP 3
Once the general configurations have been made, the next step will be to go to the Modules section:
- Configure the modules of the Web and/or App virtual event.
On the right side of the screen, there will appear, by default, some activated modules, and to make each module visible, you will only have to tick on the module you want to make visible and where you want to make it visible
Activated modules Deactivated modules


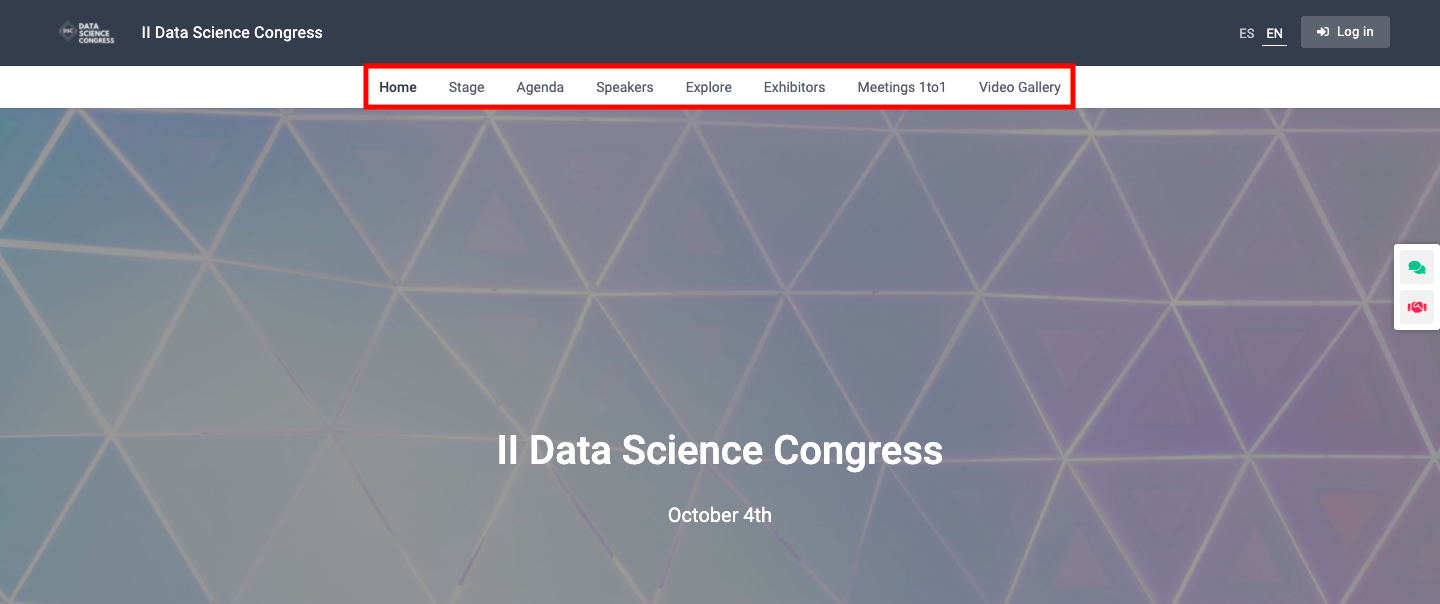
NOTE: A module is the menu item that the virtual event will have. On the web, the modules are available in the upper menu; and in App, both on the main screen, in the lower menu, and the side menu.
Modules in virtual event
Modules in App
-jpeg-1.jpeg?width=214&name=WhatsApp%20Image%202021-12-17%20at%2011-00-23%20(1)-jpeg-1.jpeg)
-jpeg-1.jpeg?width=215&name=WhatsApp%20Image%202021-12-17%20at%2011-00-23%20(2)-jpeg-1.jpeg)
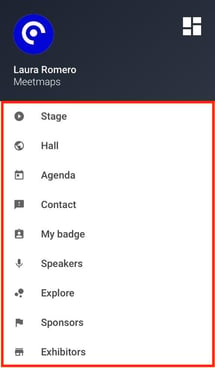
App Principal App Inferior App Lateral
Depending on the plan you have hired, you can activate some modules or all of them.
If you want to learn more about how to set up modules, click here
STEP 4
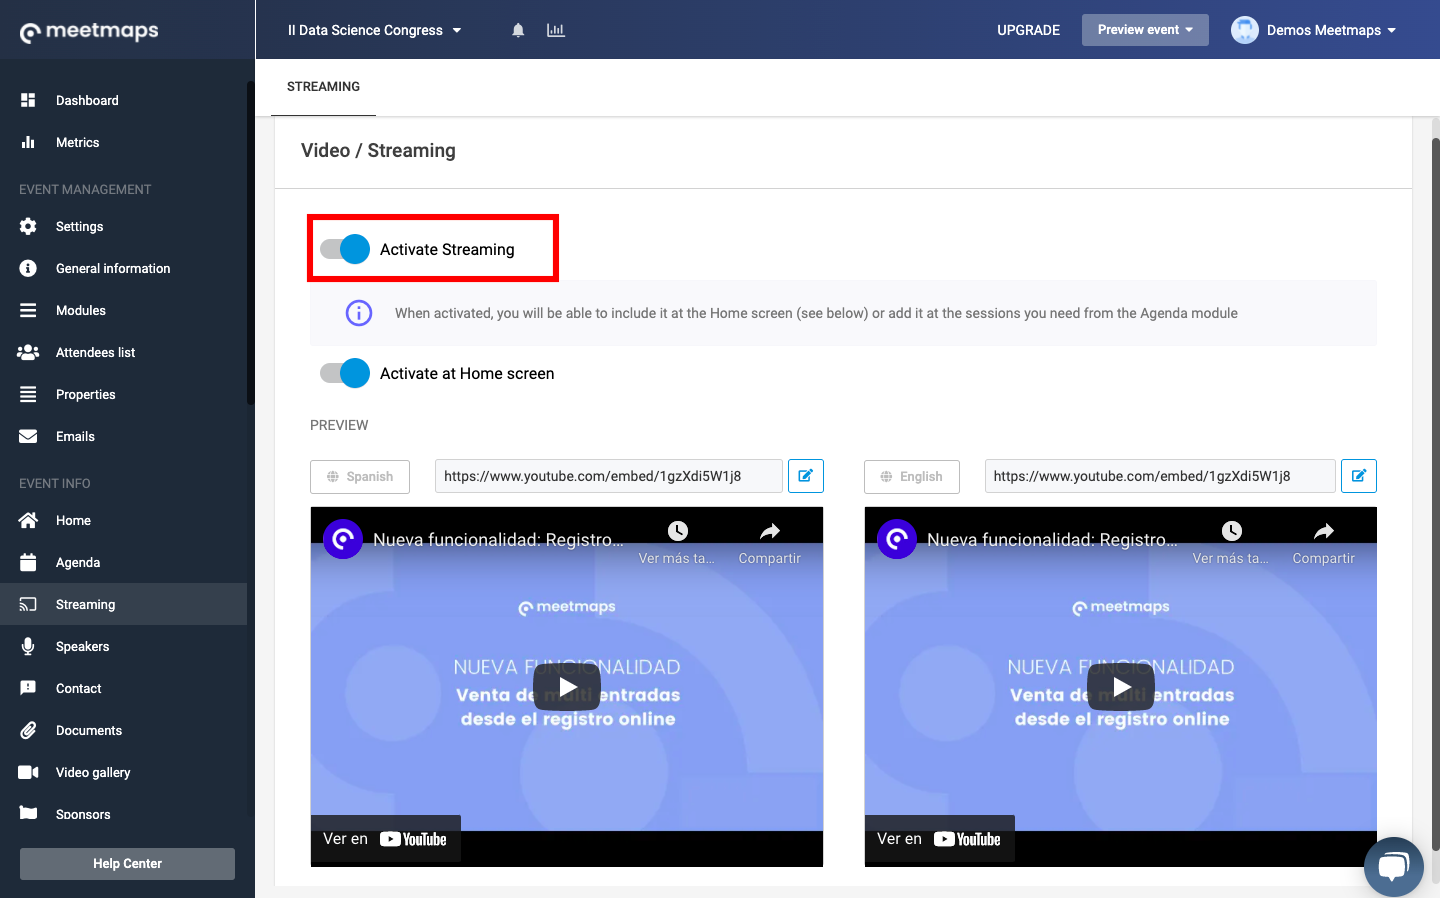
Next, you have to activate the streaming of the event. To do so, go to the Streaming section (from the side menu) and activate the Activate Streaming button.
STEP 5
Once the streaming is activated, the next steps are to dump content to the virtual event:
- Create a session in the agenda. Go to the Agenda section, from the side menu, and click on the New Session button. Here you can enter all the information related to that session. If you want to know more about this step, read the following article.
- Upload the speakers. Click on the Speakers section of the side menu and enter the speakers with the New Speaker button. A pop-up window will appear with the configurable fields. The only mandatory information to create a speaker is the name and a picture.
PRO-TIP: If you still don't have a photo of the speaker and you want to create it anyway, you can upload an avatar and you can update it at any time
- Upload sponsors. If your event has sponsors; you can create them from the Sponsors section. First, you must create a category in the Categories tab (for instance: Silver, Gold, Platinum), and then in the Sponsors tab, you must create a New Sponsor. In this step, you must put the name of the sponsor, upload the logo and assign the category. If you do not assign a category, the sponsor will not be visible in the Sponsors section.
Congratulations, you have completed the first steps of your event 🚀!
To see how all the settings of your virtual event have been, you can easily access the button "Preview event" >> "Open web event" that is always visible in the top menu.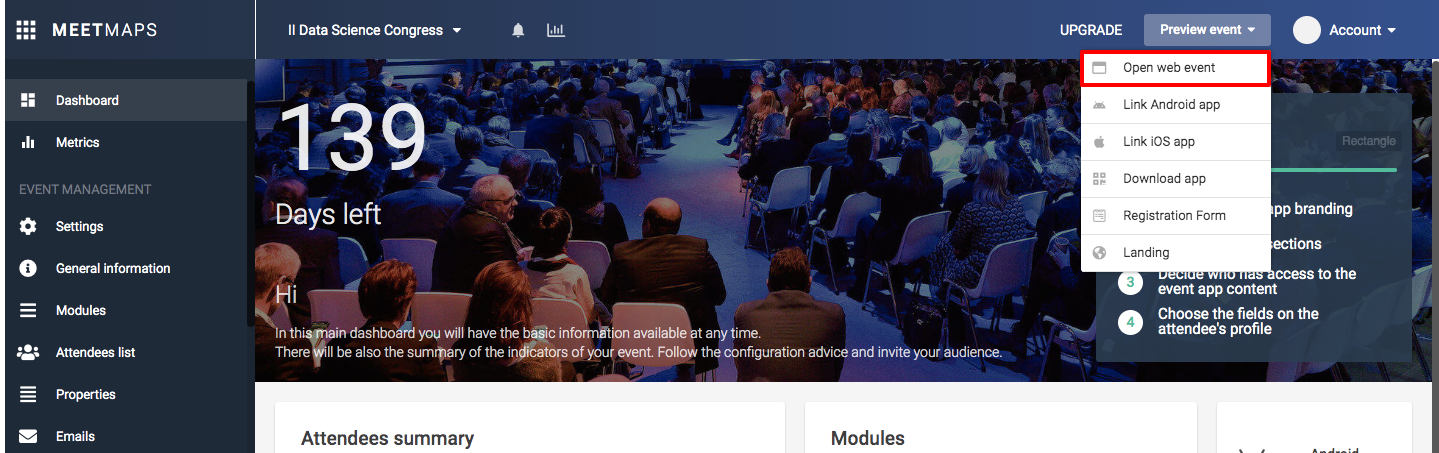
IMPORTANT: To enter the event it is essential that your email appears registered in the list of attendees. For this reason, you must first add yourself as a registered user through the button "Add Attendee" >> "Add registered". Then enter at least your name and email and click the green "Add Attendee" button. Now you can access the event!