Context
- You want more people to register for your event than will ultimately attend.
- Some attendees may confirm their attendance but then be unable to attend.
- You want complete control over registrations.
To achieve this, configure a registration form with "Attendee Validation":
Step 1: Activate Registration Validation
In Registration > Registration Form > Settings, activate the "Validate inscriptions" switch.
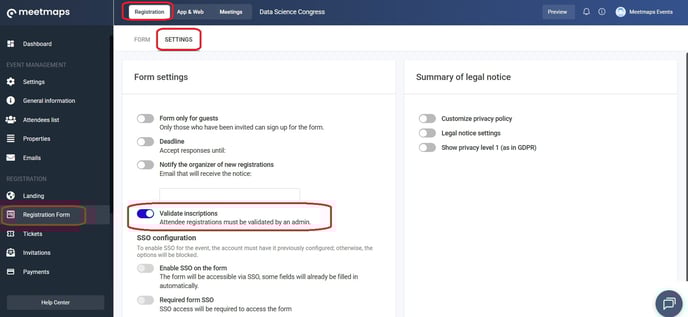
NOTE📄: This feature requires you to manually approve each registration.
+ info👉 What is attendee validation?
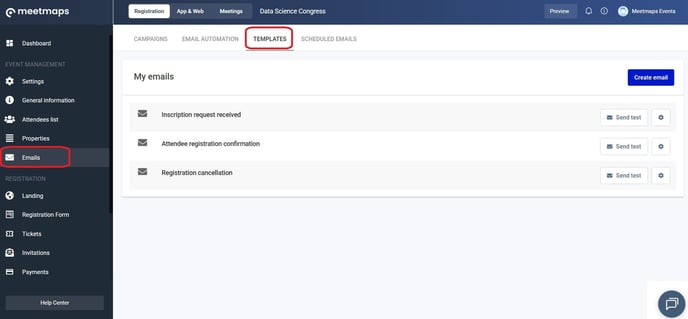
Step 2: Configure Automatic Emails
In Emails > Email Automation, it is essential that you prepare three types of automatic emails to manage communication with attendees at each stage:
1. Email Upon Registration (Application Received):
- When it's sent: Immediately after someone completes the form.
- Main message: Informs the attendee that their application has been received and is pending approval.
2. Email upon Validation (Confirmation of place):
- When it's sent: When you (the organizer) manually approve the attendee.
- Main message: Confirm that the attendee has their place.
Example: "Your registration is complete! You now have your spot for the event."
3. Email Upon Rejection (Cancellation):
- When it's sent: When you (the organizer) decline the registration.
- Main message: Inform that the registration has been cancelled or not accepted.
Example: "Your registration request has been cancelled."
Operation and Management Flow 🔀
Let's look at an example of an event with a limit of 150 places.
Phase 1: Capacity is reached (Attendees 1 to 150)
- The first 150 attendees register.
- They all automatically receive the "Upon Registration" email (application received).
- As the organizer, you see their registrations as "Pending" and validate them manually.
- Each attendee you validate receives the "Validated" email (spot confirmed).
- At this point, you have 150 validated attendees and your event is full.
Phase 2: Start the Waiting List (Attendee 151 onwards)
- The 151st attendee registers.
- Receive the "Upon Registration" email (application received).
- You see their registration as "Pending", but since the event is full, you do NOT validate it.
- This person (and all subsequent attendees) remain in "Pending" status. This is your waiting list. They will not receive an email confirming their registration until you offer them a spot.
Phase 3: Managing a Cancellation
- One of your 150 confirmed attendees contacts you (for example, by email) to let you know they can no longer attend.
- Find this attendee in your list and select the option to "Decline" their registration.
- This attendee automatically receives a "Declined" email (confirmed cancellation).
- At this time, one spot has become available. Your event capacity is now 149/150.
Phase 4: Assign the available space
- Go to your list of attendees in "Pending" status (your waitlist).
- Select the next attendee on the list and click Validate.
- This attendee on the waitlist will now receive the "Validated" email (confirmed spot).
- Your capacity is now at 150 validated attendees.