-1.png?height=120&name=BLAU__EMBLEMA%20PRINCIPAL%20SENSE%20ESLOGAN%20(1)-1.png)
Take advantage of the Email Builder to create campaigns easily.
📷 Image characteristics
Email header and footer: 1200px x 300px .png or .jpg format. In the event that there are texts and logos, make sure to leave margins.
❗An alternative to both is to insert the LOGO COLOR (Settings > Design)
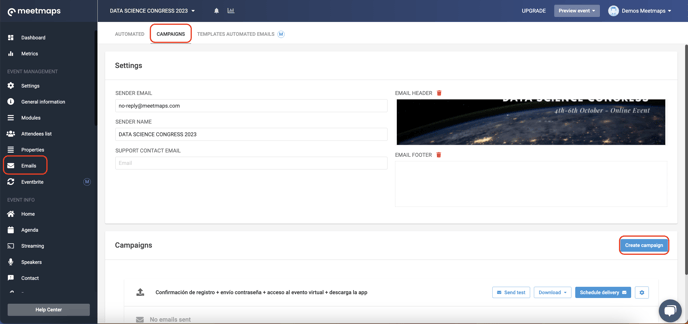
STEP BY STEP - Create a campaign with templates
In the Email section > Campaigns > Settings you have to add:
- Sender Email
- Sender Name
- Email Header
- Support Contact Email
Now, click on "Create Campaign" in the Campaign section
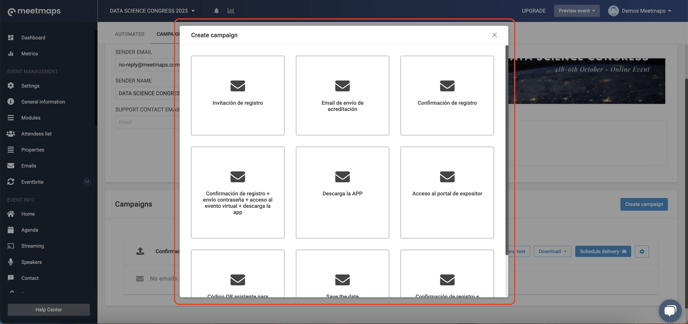
By doing so, the following pop-up will appear, with options to create the campaign from a template or from scratch. Select "Create from template", and choose the template according to the message you wish to configure 👇:
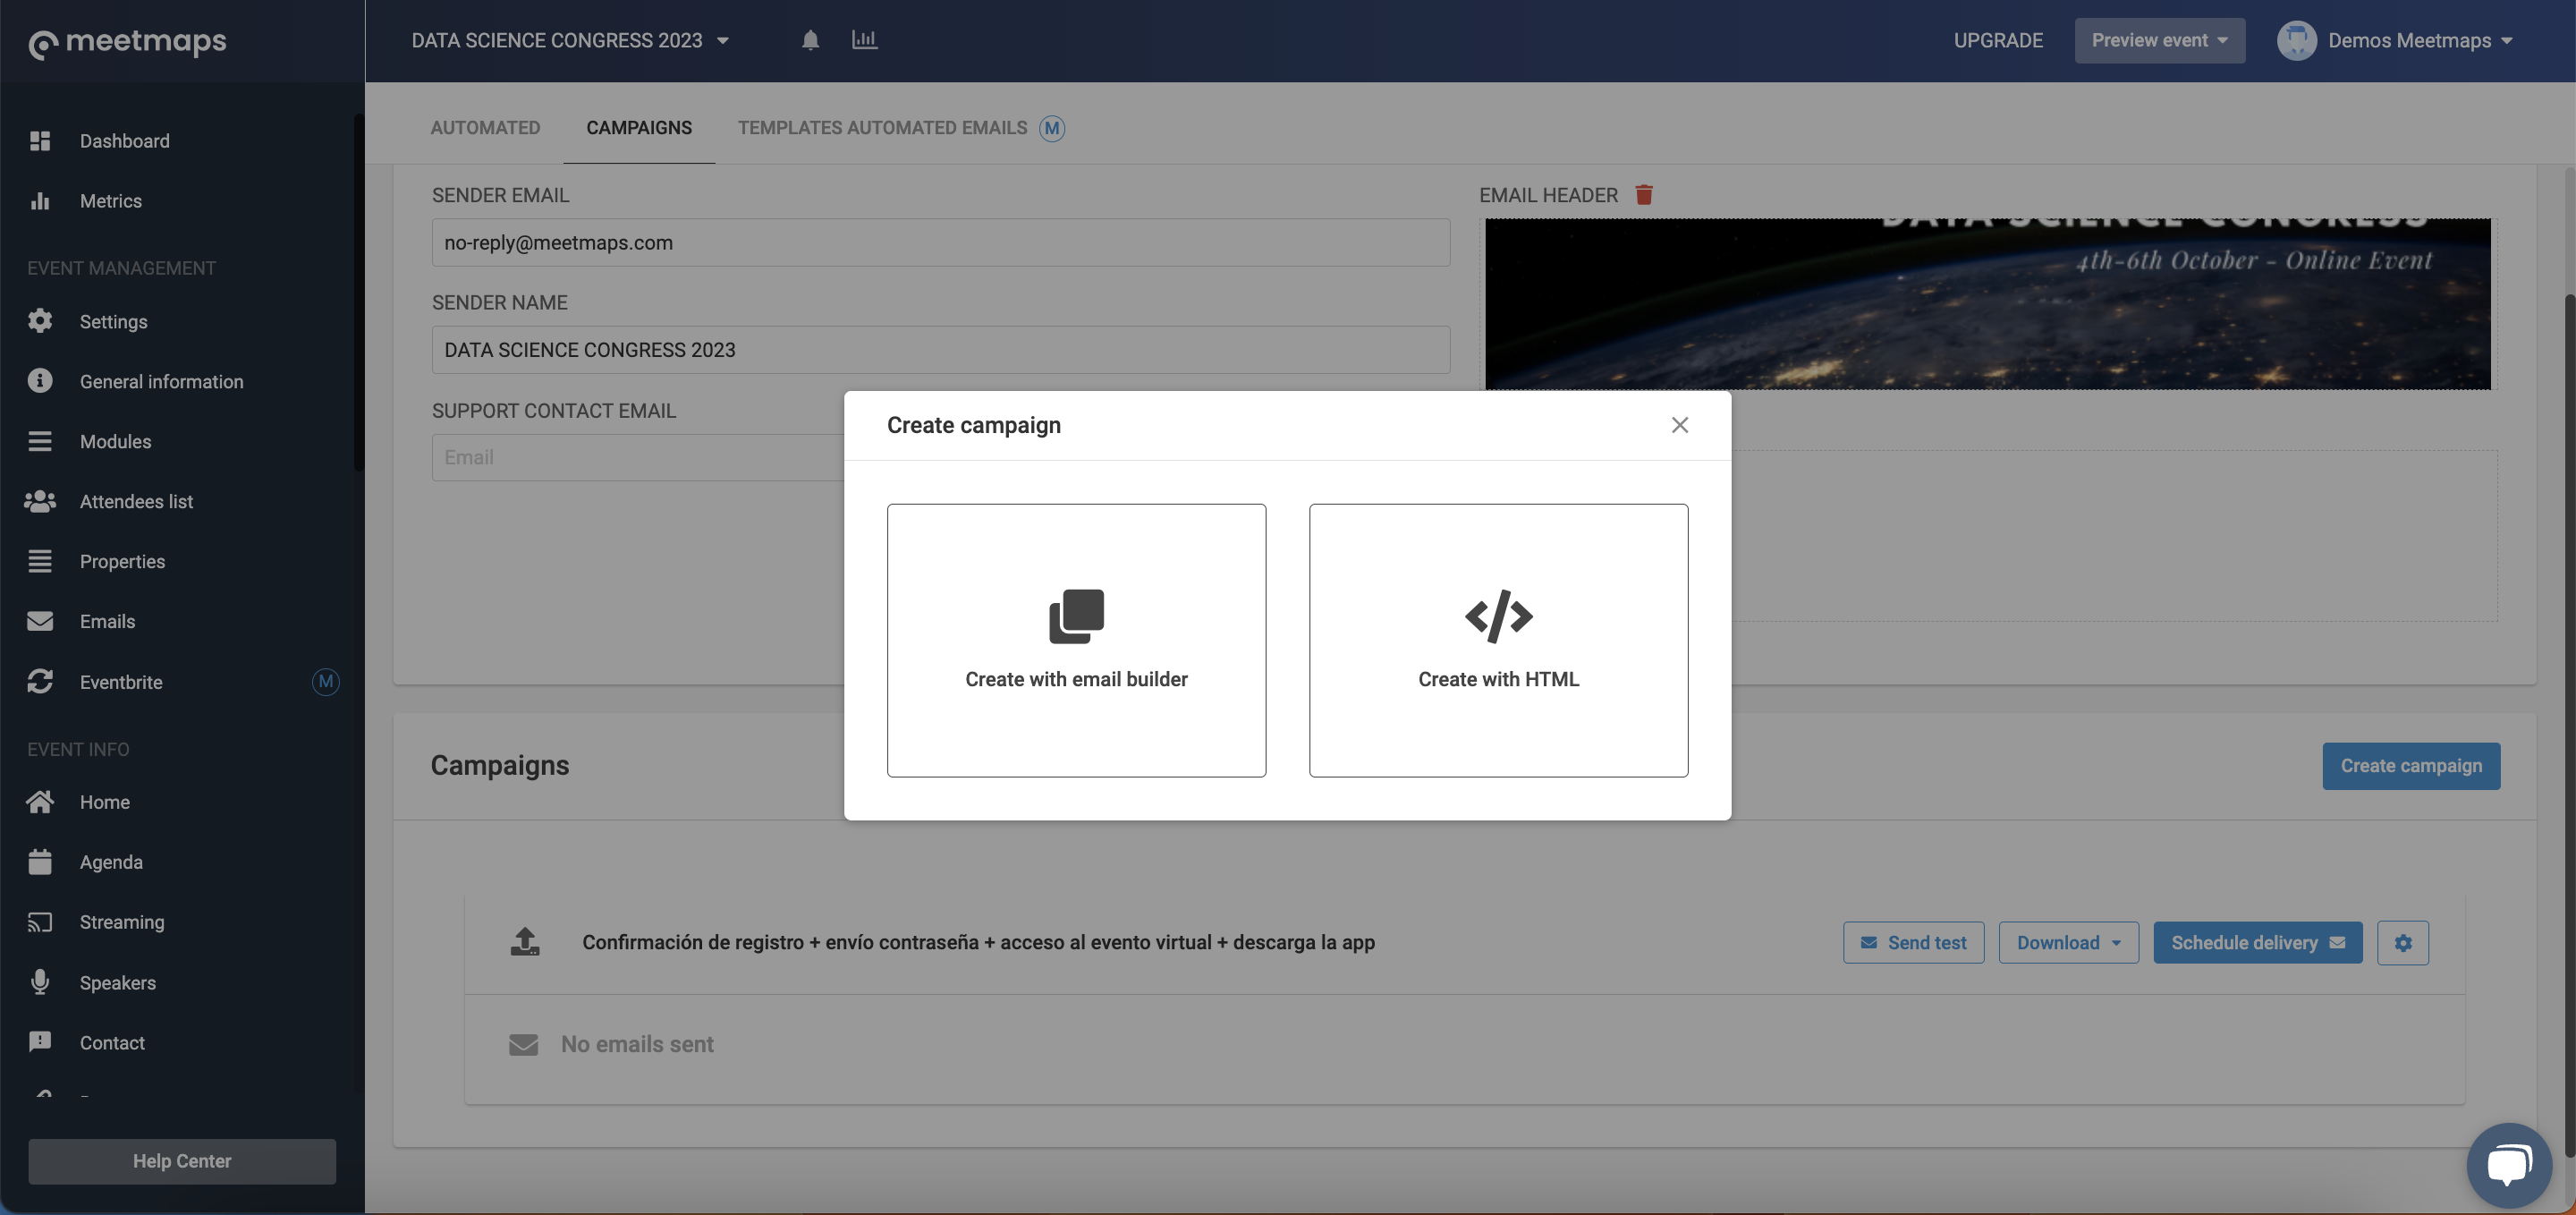
➡️ You can also create an email from scratch by uploading your own HTML and thus have an email designed to your liking.
REMEMBER 📢: If you have an account in Mailchimp or other email marketing systems, they allow you to generate the HTML, which you can then paste into Meetmaps.
Once you choose the template, you will need to determine if you will send it by importing a database or selecting a filter. But... what's the difference 😅?

You can import a database directly into Campaigns without the need to load or register attendees previously in the Attendee List.
This option would be ideal, for example, if you want to send an invitation campaign to register through the registration form to a database.
IMPORTANT ❗: Keep in mind that when importing, attendees will not be registered in the platform and, therefore, will not detect personalized variables, such as the personal access code or accreditation.
2. SELECT FILTER
With this option, you can send content to your attendees in a segmented way, either by state or by roles.
- Status: choose to send a campaign email only to users who, in the attendee list, appear with the status of "invited", "registered", or "User activated" 👉 What does each status mean?
- By roles: you can also make a specific role shipment by choosing the available option from the drop-down menu. These roles will have been previously created in the Properties section and assigned to the attendees in the existing database in the Attendee List. If you want to know how to create a property, click 👉 here.
IMPORTANT ❗: Once you choose how you want to send the campaign you won´t be able to modify the option. If you change your mind about it, you would have to create a new campaign and chose the other option.
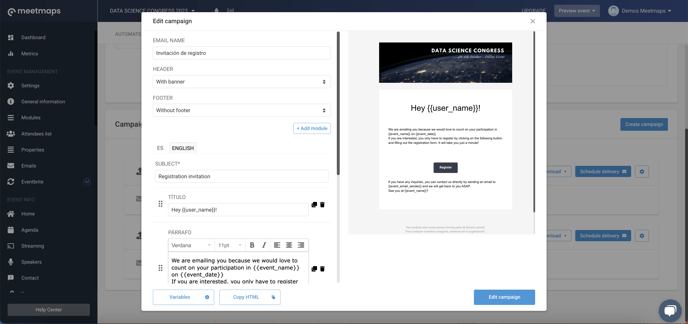
Now, let's create the campaign content 💪!
You will find a default text that you can edit on the left, and on the right you will see the changes you make in real-time 😎!
Remember to save the campaign once it's created.
Once you have created the email, you can send yourself a test to verify that the content is as you desire by clicking on the "Send test" button, selecting the language, and entering your email address below.
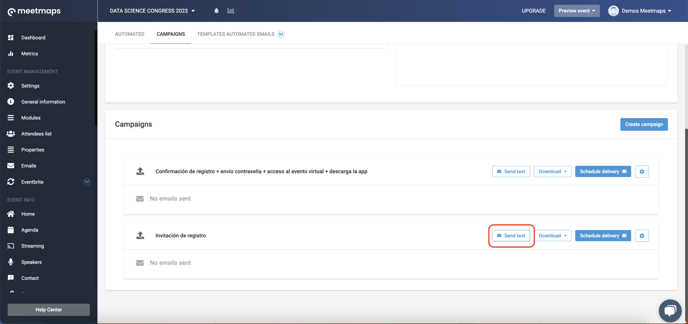
How to send the campaign once it's created?
By clicking on the "Schedule Delivery" button, you can either send it immediately or schedule its delivery for a specific date and time.
If you choose the Schedule Delivery option, in addition to indicating the date and time, you must select the language in which you want to send the campaign.
IMPORTANT❗ If you schedule the sending of the mail with the filter selection option, it will capture the attendees who have registered until that moment. If more people register from the moment you schedule the email to the moment it is finally sent, they will not receive the communication.
The next step depends on the campaign delivery option you have chosen, you should:
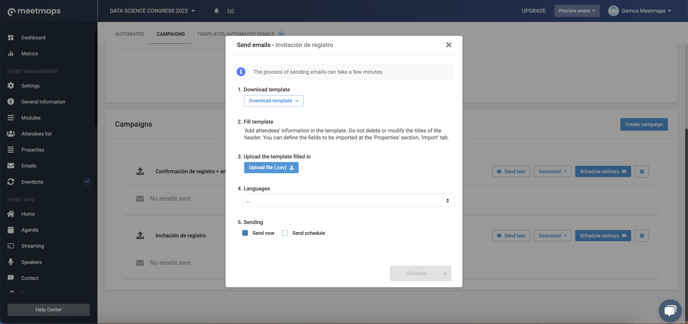
1. IMPORT DATABASE:
To make the import, you must click on the "Schedule Delivery" button and download the import template from step 1. Once you have it filled out, save the file in .csv format and upload it in step 3, by clicking on the "Upload file (.csv)" button.
Next, select the language in which you want to send and define how you will send it: immediately or schedule a specific day and time.
Finally, click on the "Continue" button to finish the configuration.
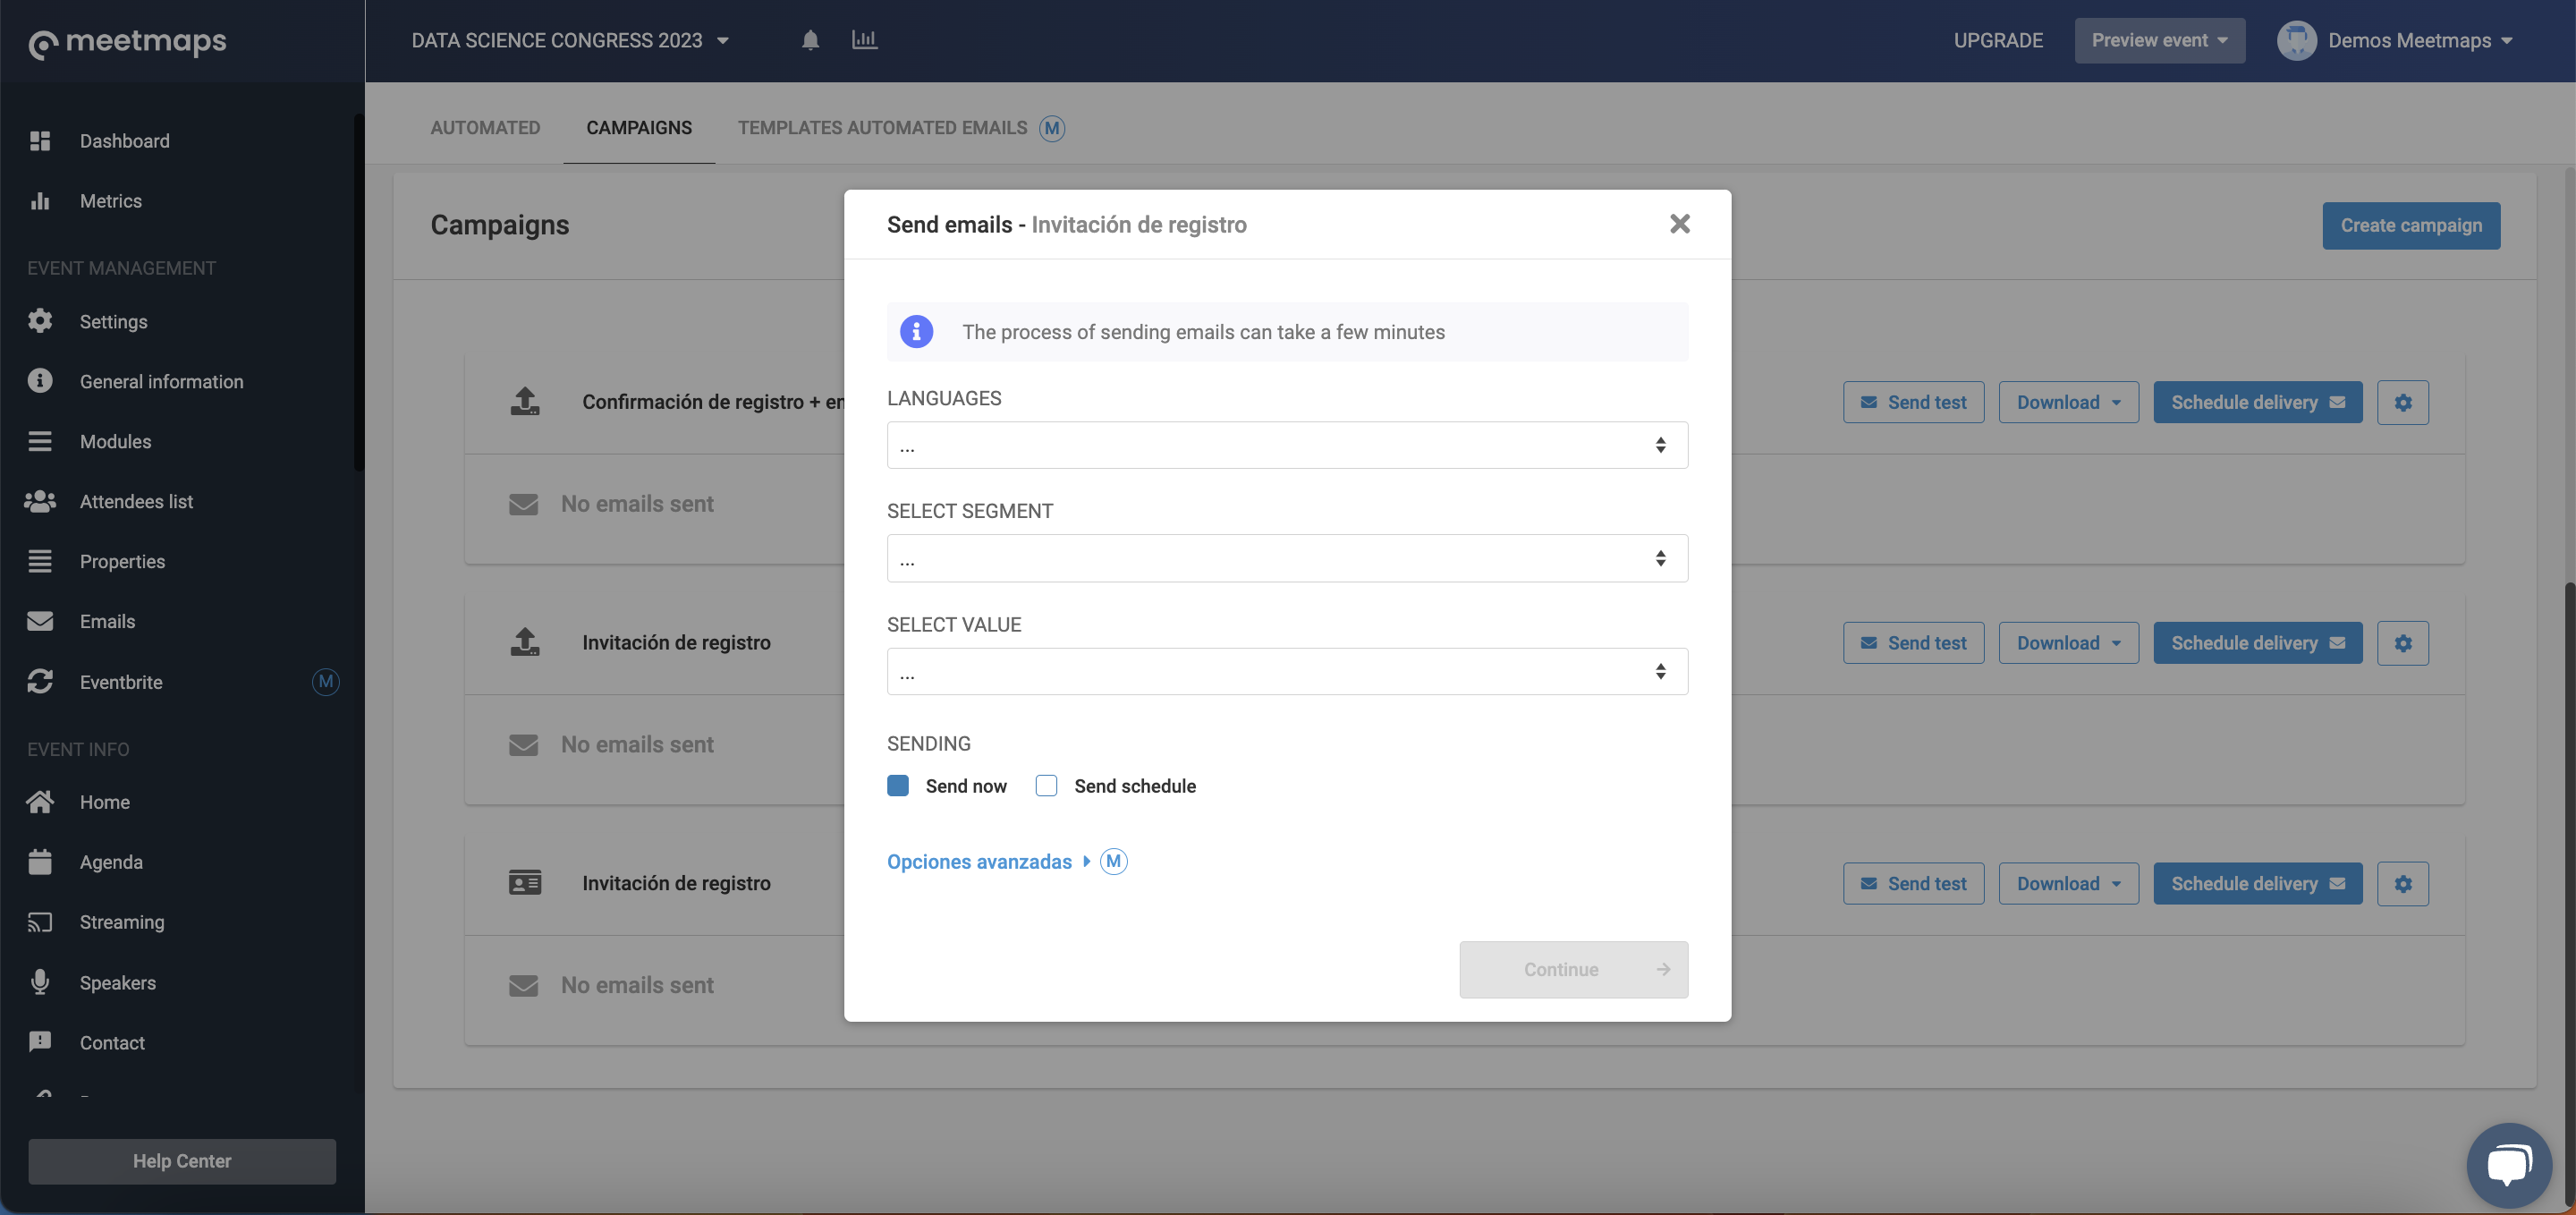
2. SELECT FILTER
You must select the filter - segment and the value, and click on the "Continue" button to send it.
TIP 💡: Before sending out a campaign, we recommend sending a test to yourself to verify that everything is displayed correctly and you don't need to make any further adjustments. If you want to know how to send a test for a campaign, click 👉 here.
Did you know that you can also create automated email with Email Builder? Take a look at this article and learn how to do it 👉How to create step by step an automated email with templates?