-1.png?height=120&name=BLAU__EMBLEMA%20PRINCIPAL%20SENSE%20ESLOGAN%20(1)-1.png)
Add buttons using HTML in the streaming scenarios of your Web (not App)
If you have an event that will be streamed in multiple languages (meaning you will create a streaming signal for each language), we provide a solution for attendees to easily select the language in which they want to watch the streaming.
The solution is to configure HTML buttons that redirect to the streaming signal of the desired language. Don't worry if you don't have much knowledge of HTML; we will share a very easy-to-understand guide and the HTML code you can use.
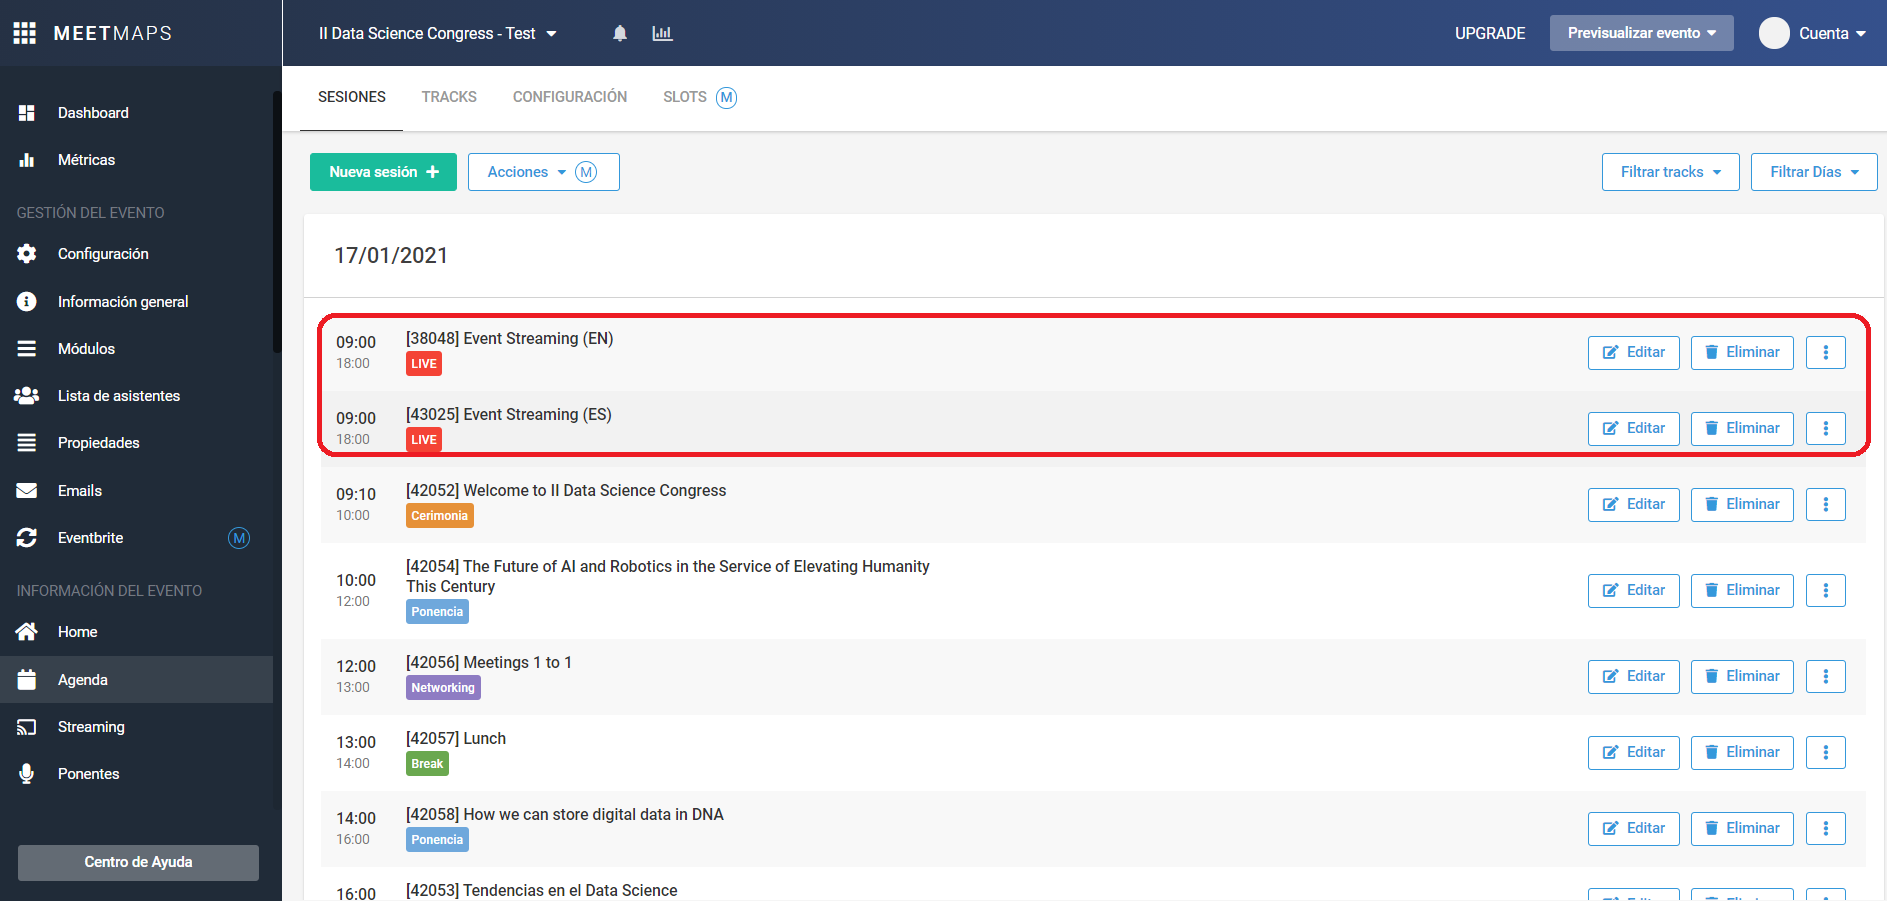
Before starting with the configurations, it's important that you have set up a streaming session in the agenda for each language you will be broadcasting. For example: "Event Streaming [ES]" and "Event Streaming [EN]."
Follow these steps:
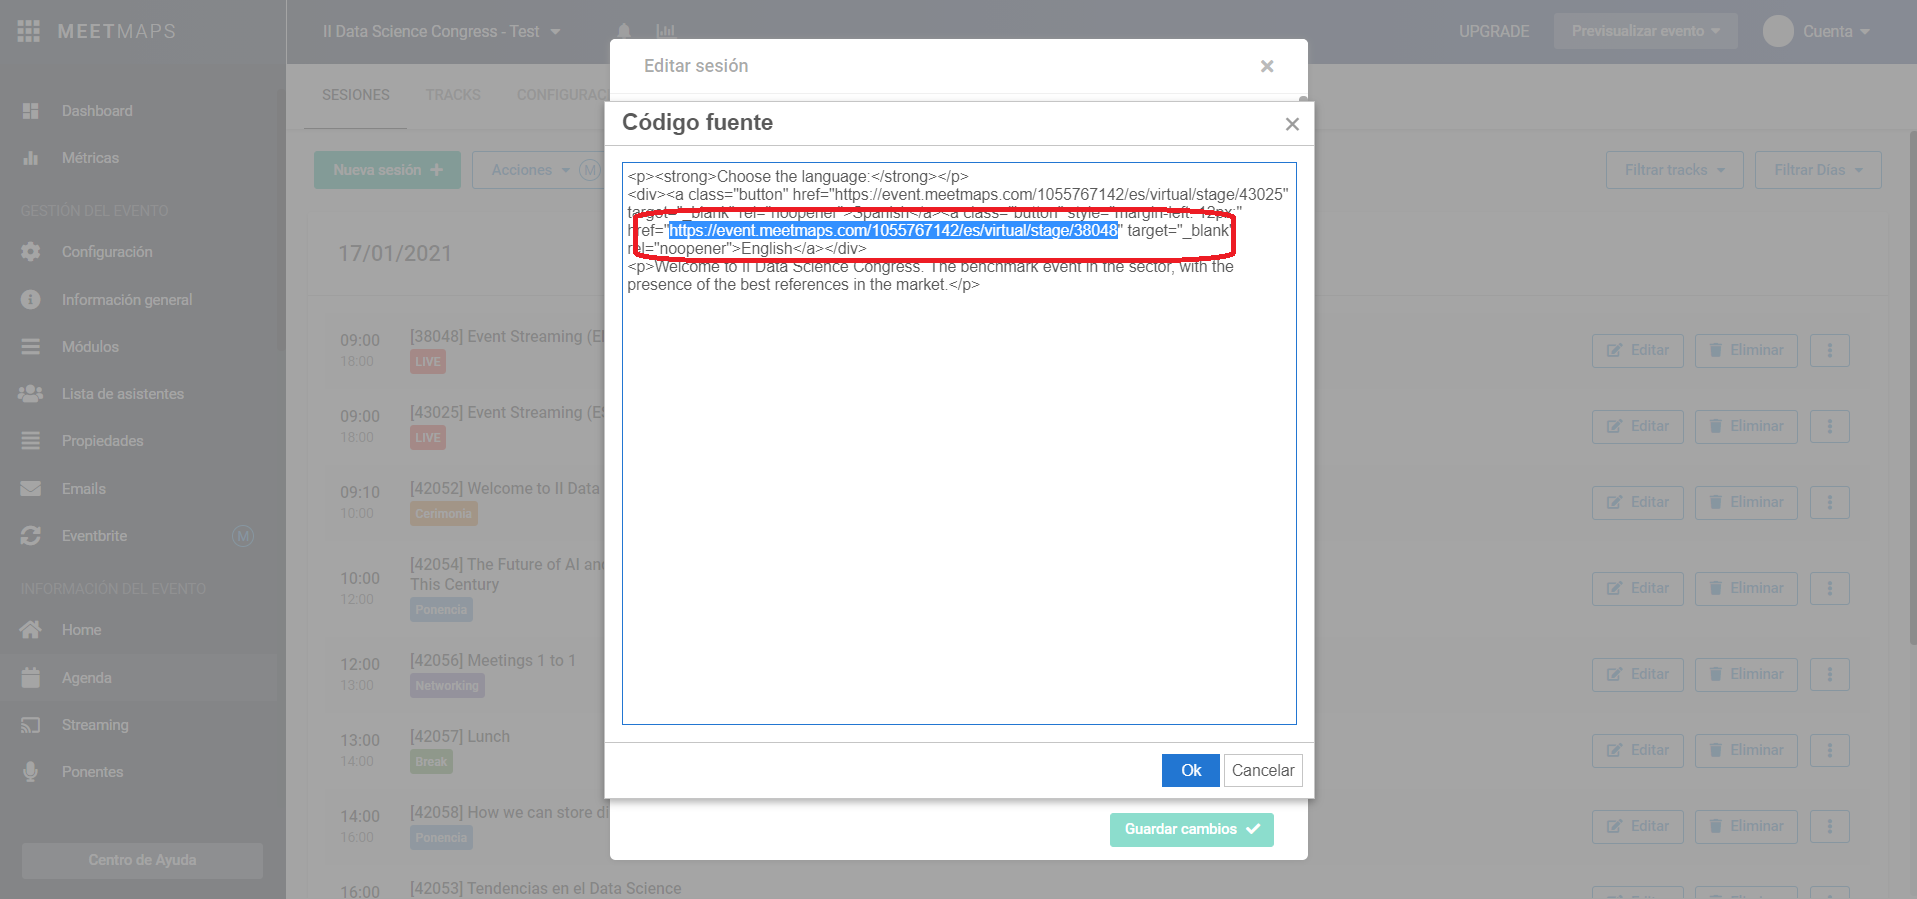
- In the Agenda section, select the session that contains the streaming where you want to insert the multilingual buttons.
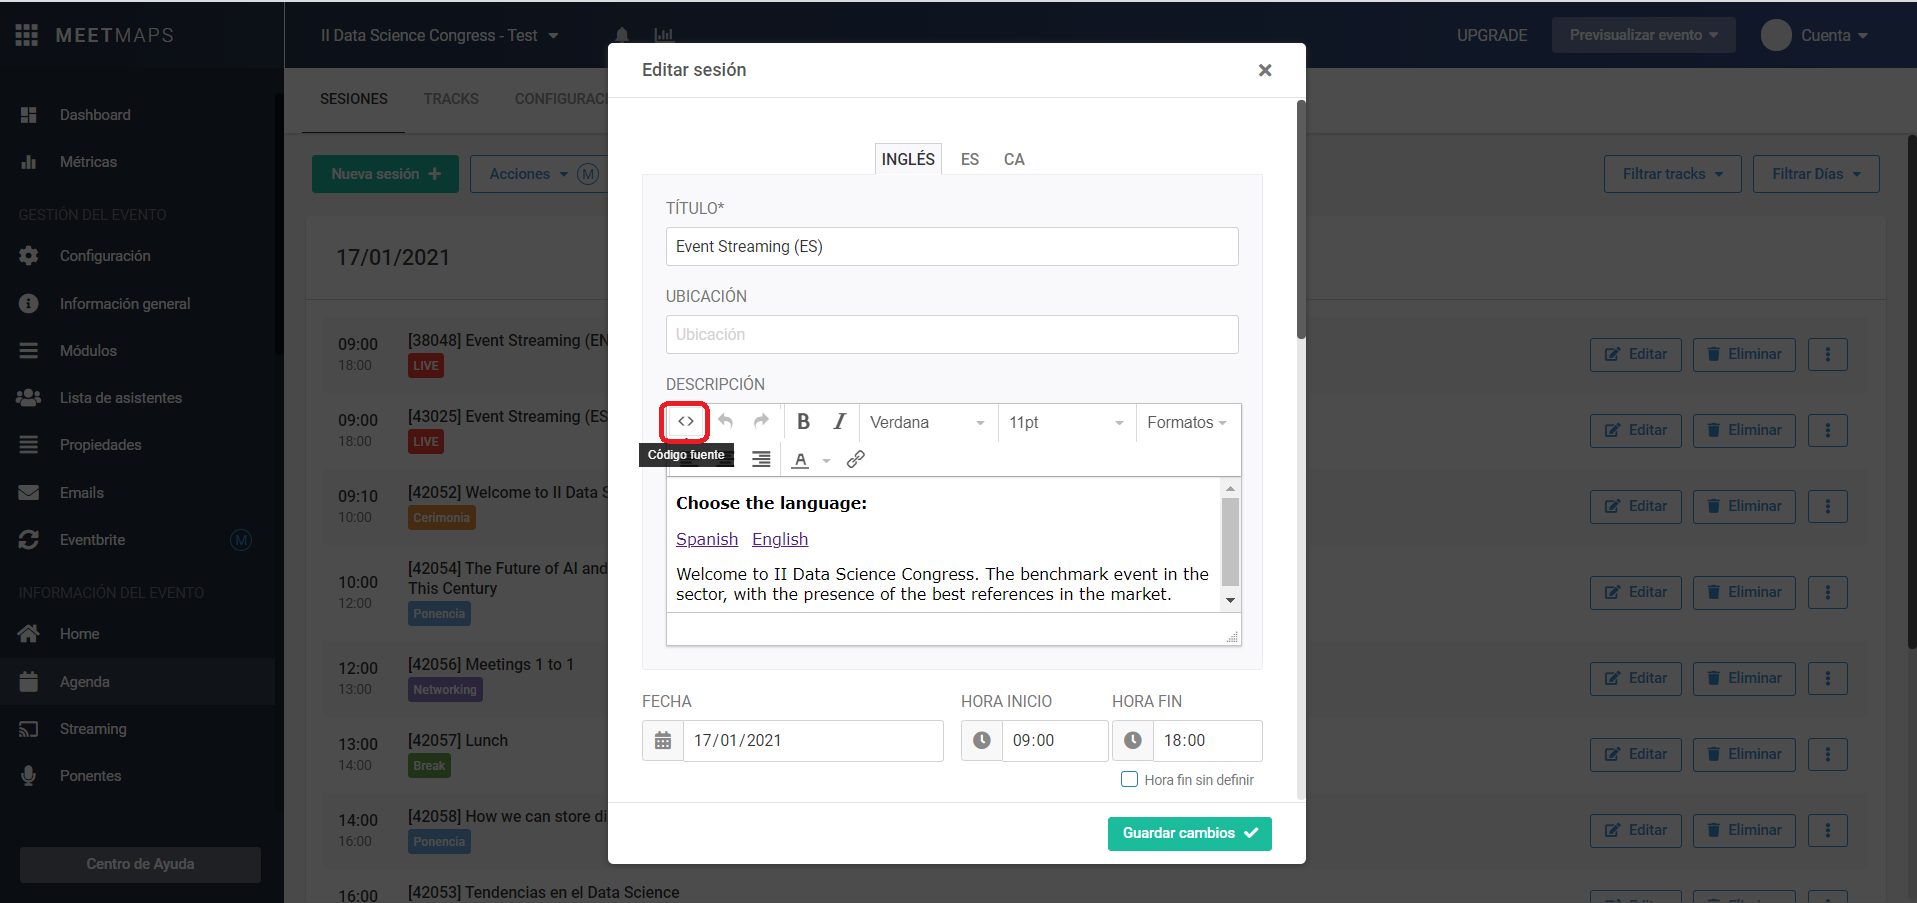
- Click on the "Edit" button, and in the session's Description, click on the "Source Code" button.
NOTA 🗒️: You should use the URL where each language's streaming will be hosted. For example, if you have a stage where the streaming is in English, you should go to the English stage and select the URL.
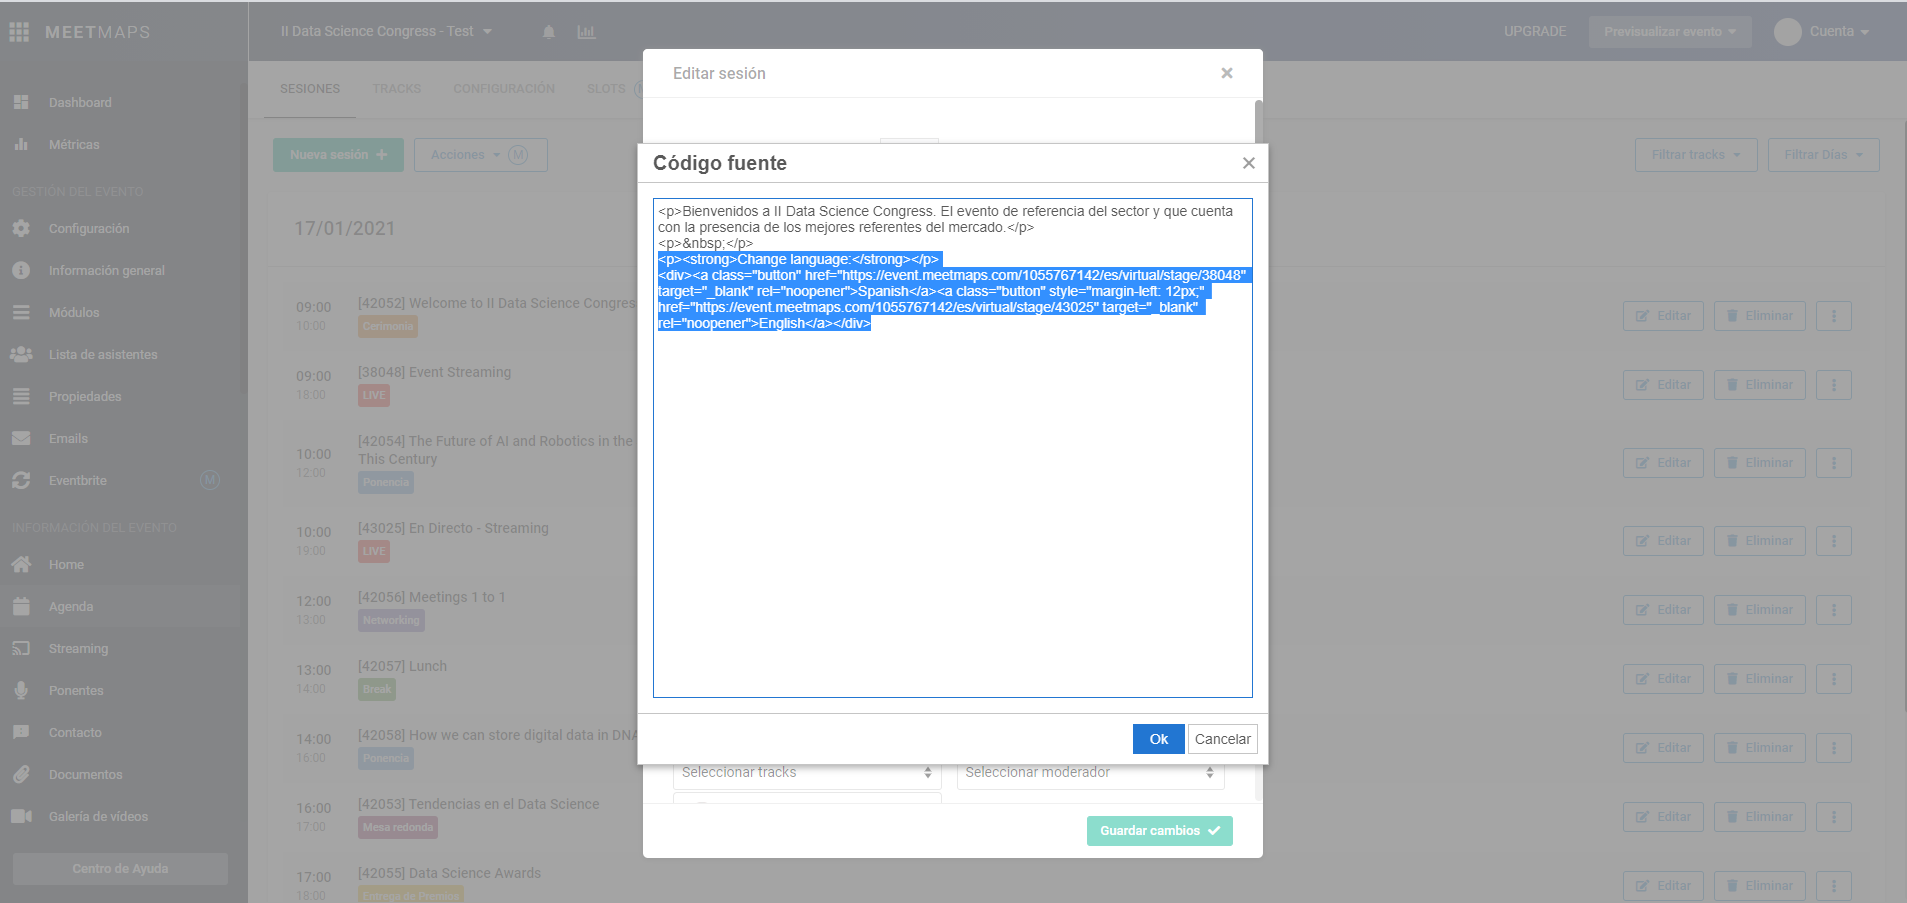
This will be the URL you configure in the HTML for the English part:
HTML Code Version 1:
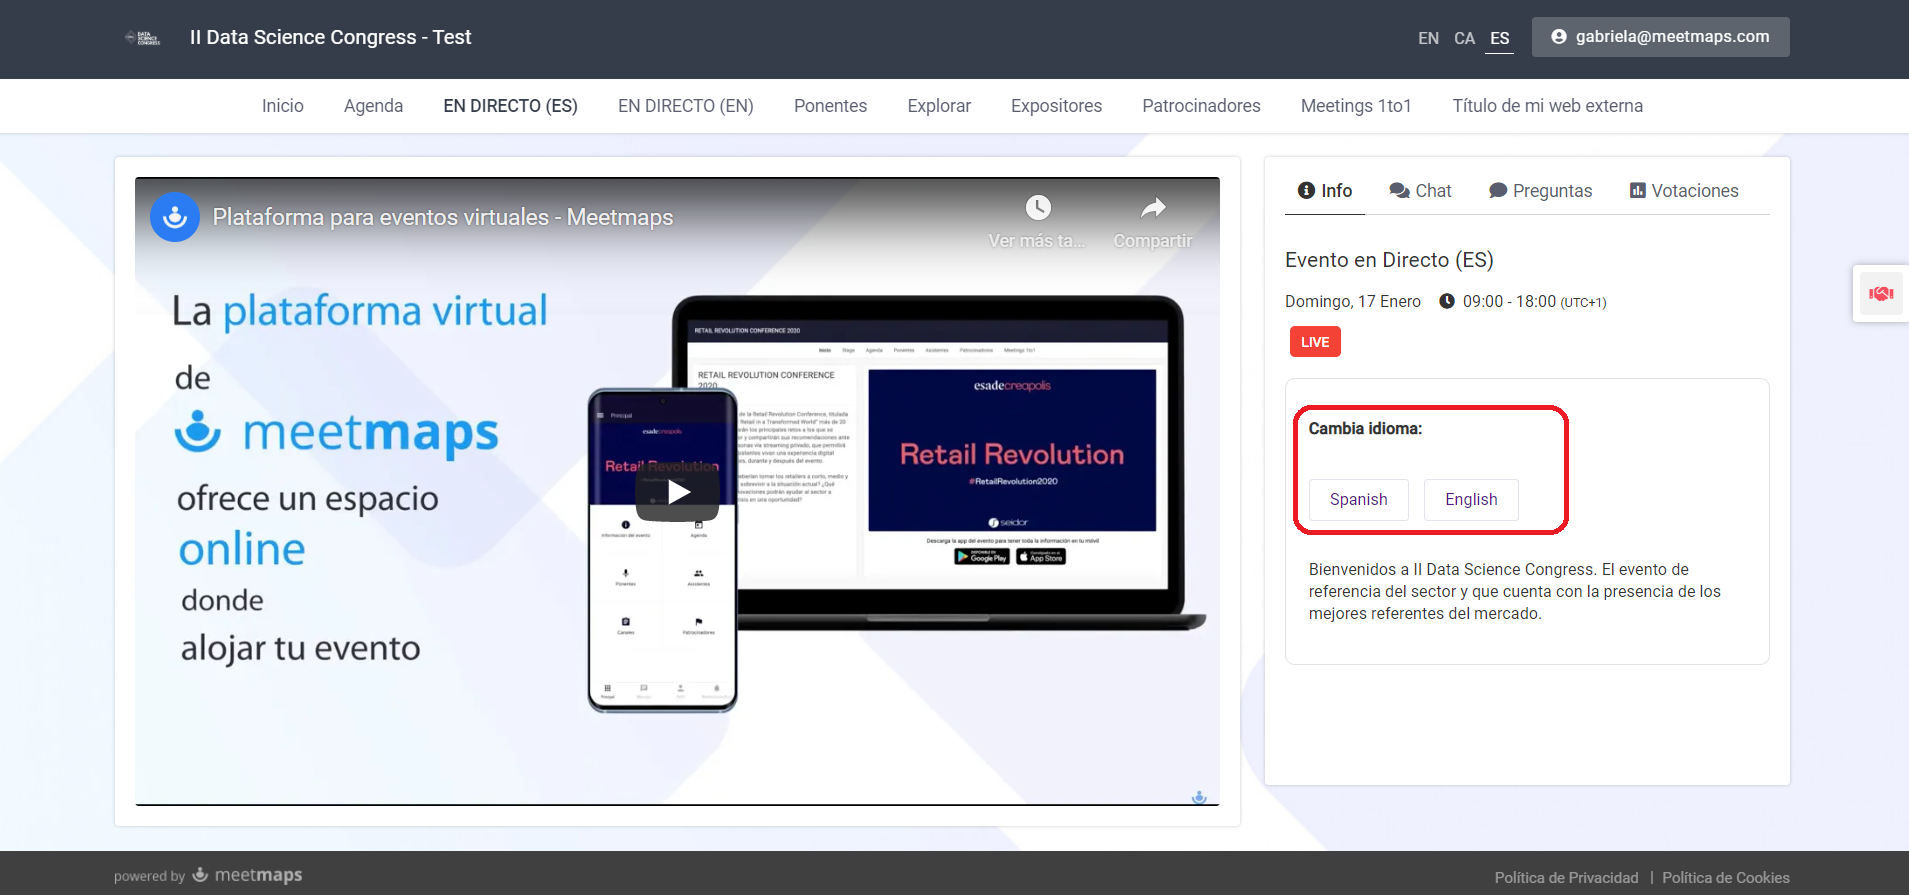
<p><strong>Change language</strong></p>
<div><a class="button" href="https://event.meetmaps.com/1055767142/es/virtual/stage/43025" target="_blank" rel="noopener">Spanish</a><a class="button" style="margin-left: 12px;" href="https://event.meetmaps.com/1055767142/es/virtual/stage/38048" target="_blank" rel="noopener">English</a></div>
➖➖➖➖➖➖➖➖➖➖➖➖➖➖➖➖➖➖➖➖➖➖➖➖➖➖➖➖➖➖➖
The bolded text is what the attendee will see. "Spanish" and "English" will be the text on each button. The underlined text represents the URLs you need to replace, as explained above.
NOTE 🗒️: Remember to replicate the configuration for each language in the session.
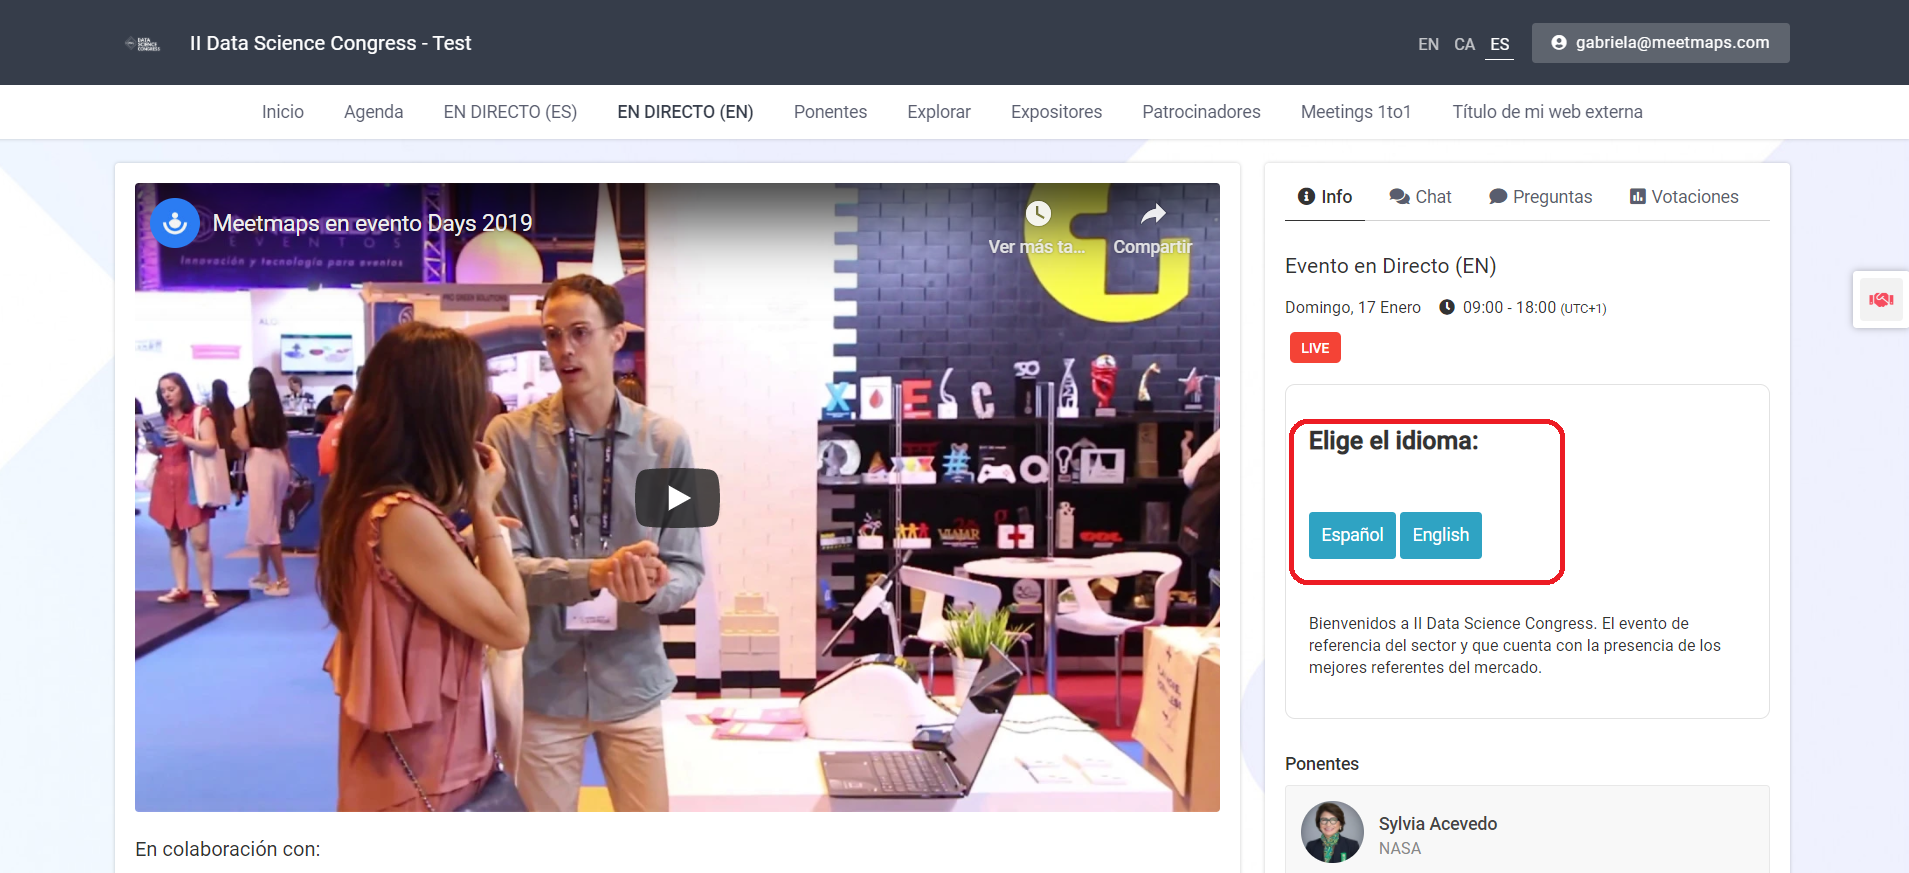
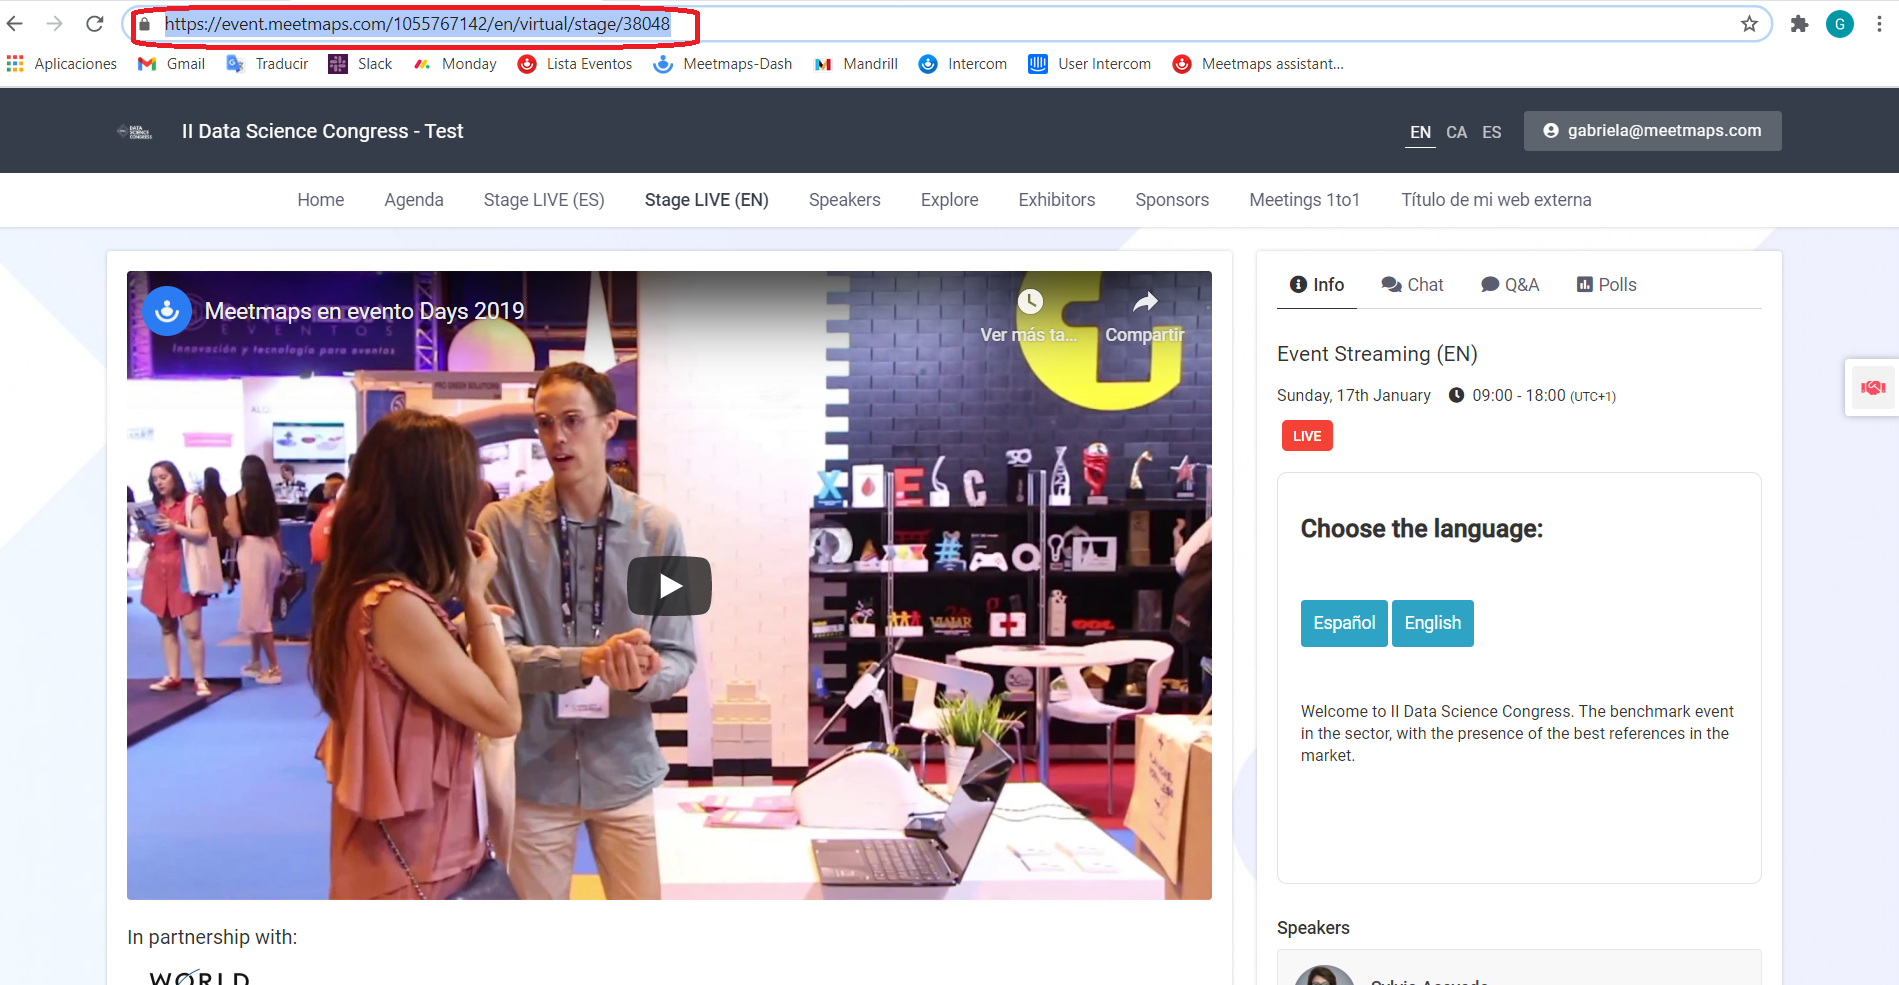
In the Web, the buttons will be displayed as follows:
HTML Code Version 2:
<div class="stage-title"><span style="font-size: 20px; color: #333333; font-family: arial, helvetica, sans-serif;"><strong>Choose the language:</strong></span></div><p><a style="display: inline-block; background-color: #2FA3C3; color: #FFFFFF; font-size: 14px; border: 10px solid#2FA3C3; border-radius: 3px; text-decoration: none;"
href="https://event.meetmaps.com/1055767142/es/virtual/stage/43025">Español</a> <a style="display: inline-block; background-color: #2fa3c3; color: #ffffff; font-size: 14px; border: 10px solid#2FA3C3; border-radius: 3px; text-decoration: none;" href="https://event.meetmaps.com/1055767142/es/virtual/stage/38048">English</a></p>
➖➖➖➖➖➖➖➖➖➖➖➖➖➖➖➖➖➖➖➖➖➖➖➖➖➖➖➖➖➖➖
In this second version, design elements are added to the buttons. You can use the main color of your event to unify the style. You can change the color in the bolded text that starts with # since it represents the HEX code.
And this second version will be displayed as follows: